
2006 gen3 conversion
i've just come up with another idea with the stock silencer, i can flip the CAN around backwards, it wouldnt require any cutting and would give me a little extra length. The rear mount will line up, the front sits a tad lower but a bango exhaust clamp will work there
That way the silencer will be longer, very similar dimensions to my PC silencer....
I've got to have a beer and think about it. i'm done for the day

That way the silencer will be longer, very similar dimensions to my PC silencer....
I've got to have a beer and think about it. i'm done for the day
13 isnt unlucky i just keep falling off
NOTE these are 125 radiators.
If you use 250 radiators they are different and require alot of modification with the outlet removed then plugged and relocated to the bottom of the radiator tank
right side radiator, i'll need to trim the hose from the 125 and bend the waterpump outlet inwards a couple of degrees.


the crossover pipe will be pushed up and in slightly. The hose will sit between the cylinder head and frame downtube. "after i remove the tab in the middle"

radiators are done, it's seriously a 5 minute job. just a couple little bends that co-operate very easy. Just stick a socket inside and bend by hand.... Bit hard to tell from the picture but there is clearance "NOT MUCH" as you can imagine but there is clearance. The protective rubber on the hose makes it look closer than it actually is.
If you use 250 radiators they are different and require alot of modification with the outlet removed then plugged and relocated to the bottom of the radiator tank
right side radiator, i'll need to trim the hose from the 125 and bend the waterpump outlet inwards a couple of degrees.
the crossover pipe will be pushed up and in slightly. The hose will sit between the cylinder head and frame downtube. "after i remove the tab in the middle"
radiators are done, it's seriously a 5 minute job. just a couple little bends that co-operate very easy. Just stick a socket inside and bend by hand.... Bit hard to tell from the picture but there is clearance "NOT MUCH" as you can imagine but there is clearance. The protective rubber on the hose makes it look closer than it actually is.
13 isnt unlucky i just keep falling off
havnt really done much, have a wicked hangover... And way too many beers yesterday. Felt like the right thing to do at the time.
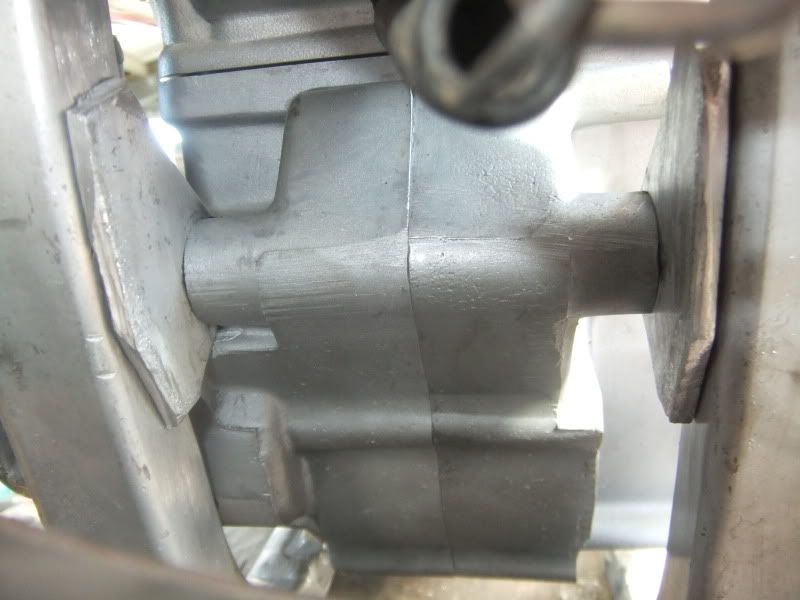
here's how i clearanced the frame, i did one side at a time...

i cut the timber so it sit even both sides.
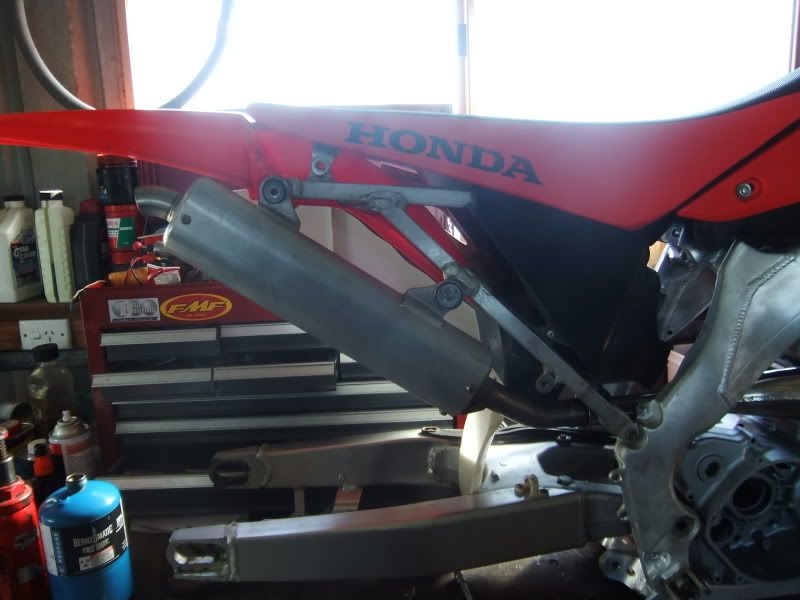
here's the Stock pipe, i'm thinking my PC pipe may be bent, just doesnt look right. The stock pipe has heaps of room for radiators

here's what i did with the coil, here's little bracket for the coil, i tapped two 6mm 1.0 thread pitch holes...
the earth wire is on the other side so these bolts dont need to be overly tight

i'm going to mount the ECM on the top bracket of the spar
here's how i clearanced the frame, i did one side at a time...
i cut the timber so it sit even both sides.
here's the Stock pipe, i'm thinking my PC pipe may be bent, just doesnt look right. The stock pipe has heaps of room for radiators
here's what i did with the coil, here's little bracket for the coil, i tapped two 6mm 1.0 thread pitch holes...
the earth wire is on the other side so these bolts dont need to be overly tight
i'm going to mount the ECM on the top bracket of the spar
13 isnt unlucky i just keep falling off

-
2strokeforever

- Posts: 1524
- Joined: November 13th, 2009, 1:04 pm
- Last active:
- Location: Vernon B.C Canada
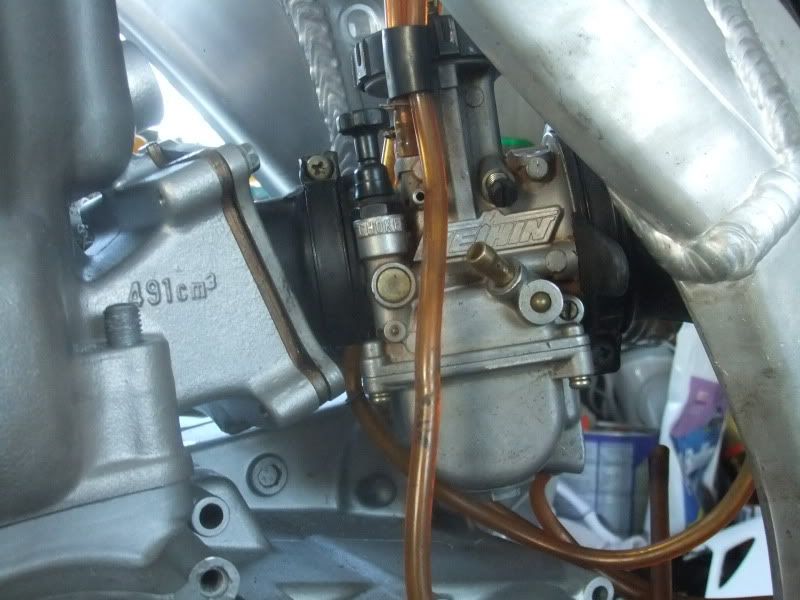
the most stressful part i've encounted thus far in the conversion. Damn carb/ boot alignment... It's actually not far out.... but it's giving me the shits big time.. it's a little cold this morning so i think i'll wait later in the day when it's a bit warmer and hopefully the rubber may relax a little... i need 5 sets of hands and hold my tounge precisely 13 degrees offset to a gentle westerly sea breeze
Been cursing like a sailor and even invented some new swear words this morning.

Been cursing like a sailor and even invented some new swear words this morning.
13 isnt unlucky i just keep falling off
ok i've just had a plan.. leave the top subframe bolt in. Remove the lower 2 subframe bolts and chain roller. pull the subframe back and tuck it on the inside.. This gives me a better angle..
Then do up the carb boot clamps tight. pull the subframe back a little and back to it's orginal spot.. re install the chain roller and lower subframe bolts.

Then do up the carb boot clamps tight. pull the subframe back a little and back to it's orginal spot.. re install the chain roller and lower subframe bolts.
13 isnt unlucky i just keep falling off

The really easy way to attach the boot, is to just pull the airbox out of the subframe and it will go on to the carb with zero fight. Then just slip the subframe into place, it takes one minute, and is only 4 bolts...
Is that a 125 airboot? The carb mouth may be smaller than the 250 boot.
I ran into that putting a 2002 cr125 airbox onto a 2003 cr250. Took some warming with a heat gun and unique swear words.
Seriously though my gen3 250'conversion the airboot lines up and install like it was meant to by Honda
Is that a 125 airboot? The carb mouth may be smaller than the 250 boot.
I ran into that putting a 2002 cr125 airbox onto a 2003 cr250. Took some warming with a heat gun and unique swear words.
Seriously though my gen3 250'conversion the airboot lines up and install like it was meant to by Honda


I've got scrap in 6, 6.5, 9.5mm in 6061, and 8mm in 5083.
If you need some, to make nicer / better front plates than those, just let me know (I've got buggerall 6mm , but a section thats 50mm wide for 150mm, with a step down to 44mm - it looks like the max width you need is somewhere near those 2 measurements - I've better levels of 'scrap' 6.5mm).
Bloody hell I'm low on materials - I've got to pay more attention to things.
If you need some, to make nicer / better front plates than those, just let me know (I've got buggerall 6mm
Bloody hell I'm low on materials - I've got to pay more attention to things.
A lot of what is done at factory level is for expediency, and cost.Gmbond wrote:I'd also try to use a front mount more like the original style where the load is spread to two sides of the tube rather than just a flat plate along the side.
One of those things I figure its like that from the factory, so it's probably for a reason.
He can't emulate the 250 front mount, as he's mounting the engine with the right tilt for decent CS / SA centre height, with the 'stretched', std frame cradle. Though, if you used a T plate, you could remove a section near the nut / bolt head area, if you felt you had to have something across the rear face of the tube, though I'd not weld across the frame tube. Anythings possible, even with little more than a vice, hacksaw, and some files, together with a skilled welder. He'll have only a few inches of weld on this conversion.
Make the plate longer, with good (perhaps spaced) welds on the forward tube corner to the edge of the plate, with spaced welds at the rear edge of the tube to the plate, none at the nut area (looks like he may have had to take a side off the nut flange, so the nut will be 'captive' - good set up), with perhaps a rosette weld through the plate, onto the inside face of the tube. No welds across the front and rear faces of the tube, and you've got a hell of a lot better mount than OEM. You could also make it a 'removable plate' mount, with longer weld on plates, then 2 bolts, 8mm, holding the engine plates to the mount.
There's a lot of ways of doing things, many that will be better than std, but a whole heap that can be worse. Just think clearly about what you're doing, before you do it, and you won't go wrong.
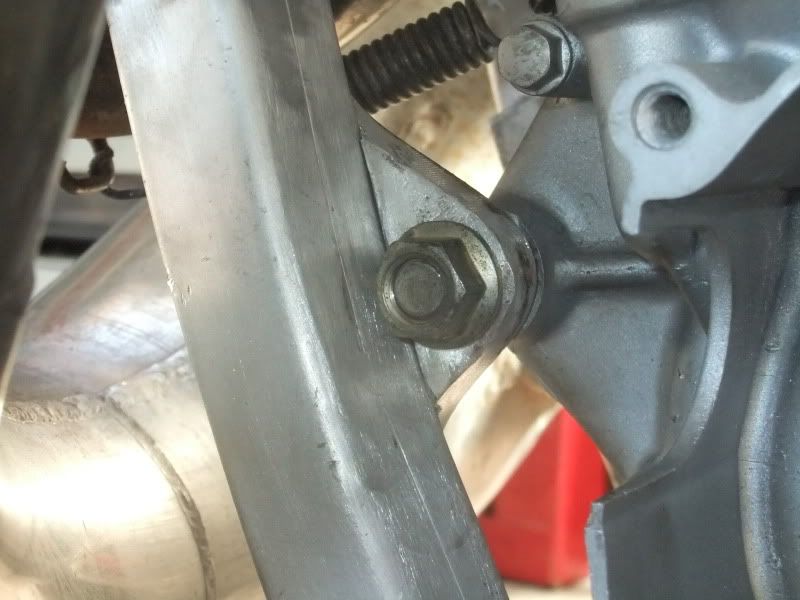
the mounts are indexed, may be a little hard to see from the pictures but exact same thickness as standard mount. The inside face has the exact weld surface area as standard mount. The rear face however will have less due to the fact of how close the bolt is to the rail.
Now saying that the ignition side would be much easier to extend the back face BUT the waterpump side has much less usuable surface area.
It can be done however, it would requir a little more involved work making one.
Another area of thought, i've come up with a way to make a completely WELDLESS AF conversion... Saying that i need better access to some quality tooling to do it properly becuase if i make the smallest of error i will completely stuff the rails and have to start all over again.
It still may be on the cards though but not making any commitments at this stage
13 isnt unlucky i just keep falling off

I've got a question. Sorry if it sounds silly. Do i have all my bolts done up nice and tight for the welding process?
I'll be using the empty cases as the jig, or do i just get it tacked first and then pull the engine cases out to finish welding ?
Last thing i want is to have it all stuffed up by a silly mistake.
PS, i'm not doing it. local sheet metal business that works with aluminium will be doing the welding for me.
13 isnt unlucky i just keep falling off

Where are these clamps from? I recall reading about them a while back. Still need to add it to my Gen2.coley13 wrote:rear pipe mount, cost me $3... I thought bugger welding it. I've used a 32mm super clamp with the bango clamp bolt going straight through it....
The reason i did this is i can use this pipe on both my 500's if i want to.
The CR500 is an acquired taste. If you don't like it, acquire some taste...

-
freeride588

- Posts: 418
- Joined: November 20th, 2010, 3:51 pm
- Last active:
- Location: San Diego