Page 1 of 4
98' Gen. One AFC Build It's Getting There!!! DONE!!!!!!!!!!
Posted: August 2nd, 2010, 11:02 pm
by Rue
I’ve wanted an aluminum framed 500 ever since my neighbor Shane had one about ten years ago, but never thought I would ever get one due to the high $$$ tag. About a year and a half ago my BFF Anthony puts a great idea in my head, that we should build our own AF CR500. Once that happened I had the AF BUG all over again!! I started surfing the web and found Shanman’s Instrctions and it lead me to here to the banned site and CR500riders.com. I became a member immediately. I looked through all the builds in the AF sections. I did my home work for a while and decide that the Gen. One would be the right build for me. If it weren’t for Shanman’s instructions and Drawings this build would not be possible. I fit the bill of being a Normal guy with just the right tools to get the job done. I knew going into this project that I was going to have to be patient due the fundage!! So I was on craigslist every damn day until I found my donors. Thanks to all the great Hoons for helping me out with parts and my build.
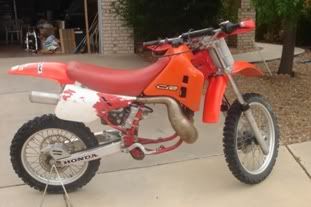
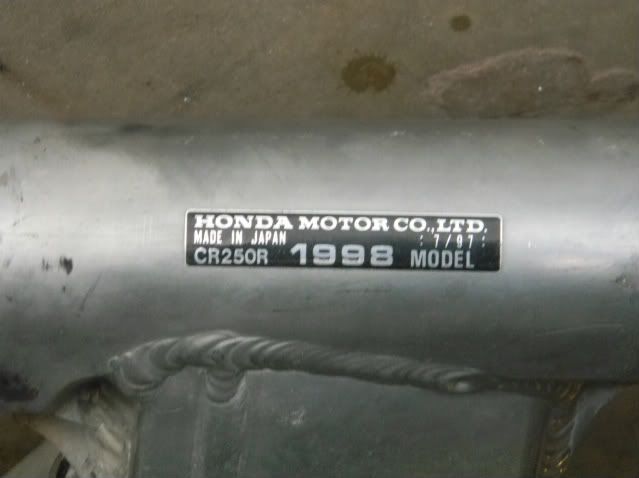
So in March of 09 I went on a road trip with my BFF and headed down to Phoenix to pick up a complete but not running 1998 CR250 he took $800.00 bucks he was asking $1000. I didn’t think that was a bad deal, I'm sure you guys will let me know how I did. In May of 2009 I took another road trip to Phoenix this time I brought my mom’s with me so we could visit some family that lives in the area and to pick up the donor bike, a 1988 CR500R for $500. It had no coolant and was ran dry for who knows how long, didn’t know that till I got her home. It’s a good thing I didn’t run her to hard on the test drive!!! My smile was ear to ear.
I had to put the build on hold for a while because my wife told me I was going to be a Daddy!! So I needed to save my dinero for my lil baby girl. My daughter is doing well and will be 6 months on August 12th.
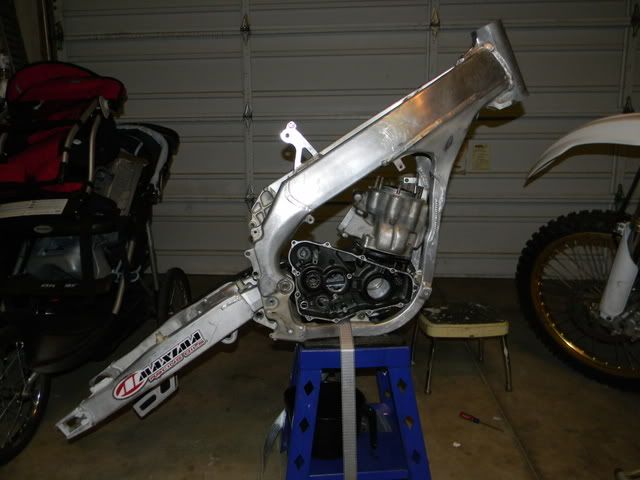
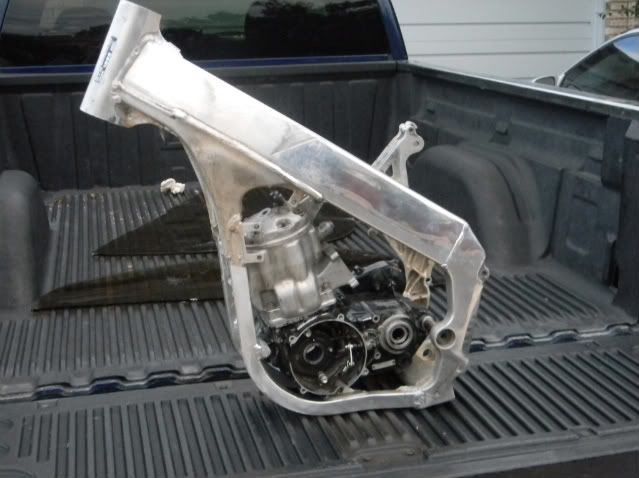
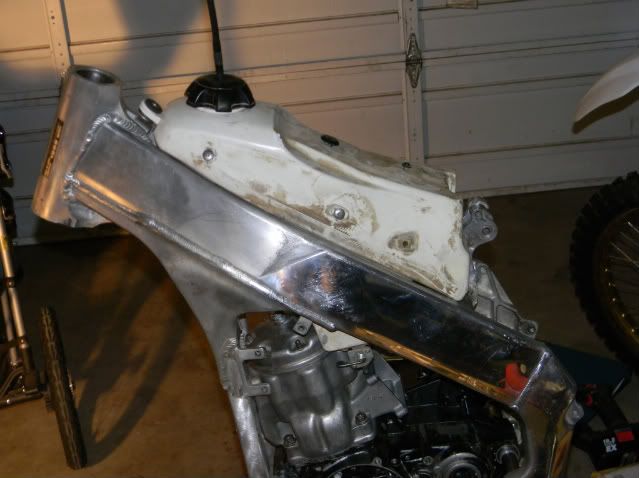
Ive been busy these last couple of weeks putting together all the parts that I have gathered from several Hoons and following Shanman’s instructions. I'll post some pictures of the parts I've gathered and the progress I have made.
Posted: August 2nd, 2010, 11:19 pm
by AlisoBob
SWEET!!!!!!
Posted: August 2nd, 2010, 11:24 pm
by Rue
Hoons that have made my build possible!!!!:
ShanMan – Instructions & Drawings
PRICELESS INFO
http://bannedcr500riders.com/board/viewtopic.php?t=410
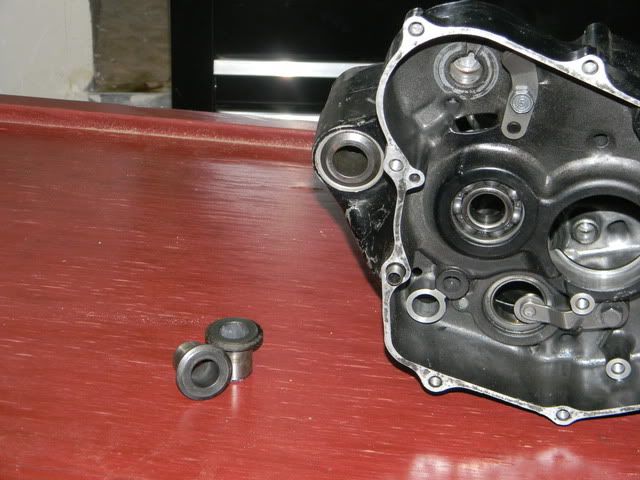
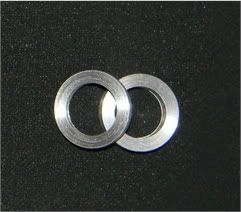
logos5705- Machined swingarm spacers
$30.00!! (Per Shanman’s Drawings)
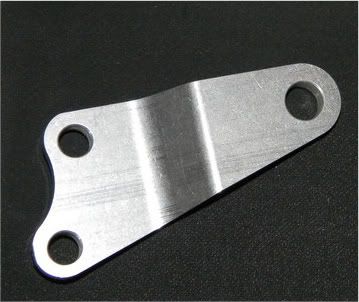
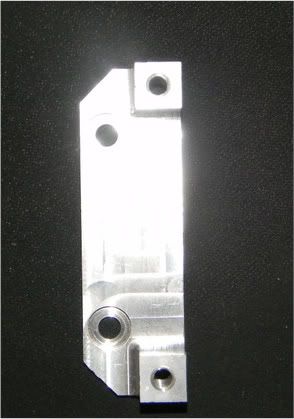
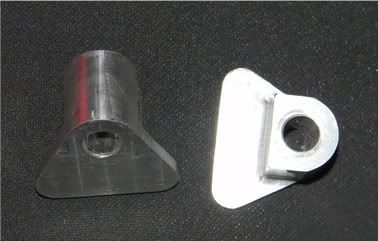
hoofarted – provided me with Shanman’s Head Stay & coil Adapter
$60.00!!
AlisoBob
SOLID Bro
mcrawford39
97af
Roostius Maximus
Danny Graves
AP
Greg @ High Velocity Cycles- Local Shop and a buddy of mine has built several AFC’s and has given me many pointers, helped me with my build and has helped me with my other Bikes. Thanks bro!!

Keith @ Factory Edge- Local Shop Has been a great help with my build and hooking me up with some good contacts.
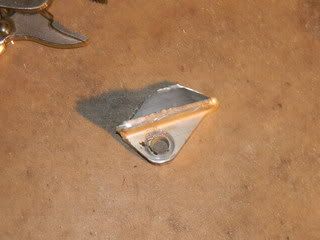
Don – Local TIG Welder Front Engine mounts welded
$50!!
Steve- Local Machinist Milled my Engine mounts (Per Shanman’s Drawings)
$75!!
Posted: August 2nd, 2010, 11:26 pm
by Rue
Thanks Bob!!
Posted: August 3rd, 2010, 1:11 am
by asteroid500
GO THE G1,
by the way...whats a BFF...a boy friend prehaps? & how many "MOMS" do you have....

Get some picks up mate.....$ wise im in the same boat...i work 2 jobs,1 as a metal fabricatoe & 2 as a chef in the old mans resterant, 6am till 11pm, 5 days a week....cooking is my play $, & ive been building my G1 for over 18mths.

Posted: August 3rd, 2010, 8:39 am
by hoofarted
Congrats Raul! Glad to see its coming together finally! Hope all is well with the family! Post some pix up of your progress....
Asteroid,
BFF is an acronym for Best Friend:
http://www.urbandictionary.com/define.php?term=bff
Posted: August 3rd, 2010, 8:45 am
by Rue
asteroid500 wrote:GO THE G1,
by the way...whats a BFF...a boy friend prehaps? & how many "MOMS" do you have....
No he’s not my boyfriend asteroid500. I am happily married and have a beautiful baby girl. He is my friend, buddy, amigo, mate! I was being funny making a joke, BFF is a acronym for Best Friend Forever, kids use it a lot while texting so they don’t have to spell it out. It’s just like IMO= In My Opinion ect. ect. ect. I only have one mom that was me using the slang again.
asteroid500 wrote:Get some picks up mate.....$ wise im in the same boat...i work 2 jobs,1 as a metal fabricatoe & 2 as a chef in the old mans resterant, 6am till 11pm, 5 days a week....cooking is my play $, & ive been building my G1 for over 18mths.
I fill you there mate...I might need to find a Part time job to fund my Projects!! I am a manager Trainer for Foot Locker and It’s busy at work right now all the kids are getting ready to go back to school. Busy= $Bonus$ Time = a little $$ will go to the Gen. one build!!

Posted: August 3rd, 2010, 10:47 am
by Rue
Posted: August 3rd, 2010, 10:53 am
by south central hoon
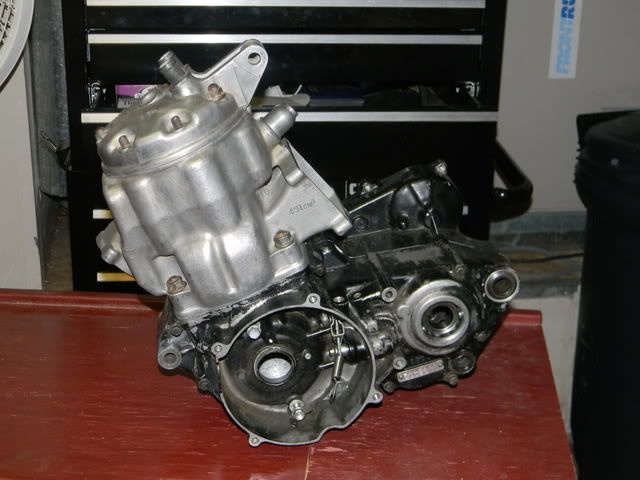
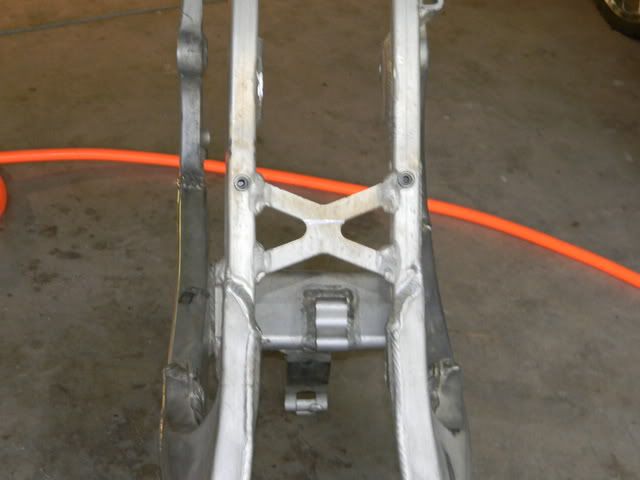
you won't be able to get the jug in there with the top half of the X still in it. Or anyway, i couldn't. I had to take the whole thing out.

Posted: August 3rd, 2010, 10:58 am
by Rue
south central hoon wrote:you won't be able to get the jug in there with the top half of the X still in it. Or anyway, i couldn't. I had to take the whole thing out.
Yeah I will have to remove the entire engine to service the top end , I am going to leave it like that for now. I can always cut it off later. Thanks for the advice south central hoon. If you can think of anything else let me know I'd appreciate any help I can get.
Posted: August 3rd, 2010, 11:13 am
by ShanMan
excellent progress brother! Keep chuggin' along and you will be roostin' soon! BTW: for gen. one bikes...beyond the conversion: the best money you will soend is to get your suspension DIALED professionally. It forgives some of the rigidity that some complain from on the gen. one bikes. It's essential.
Great work!
Posted: August 3rd, 2010, 12:15 pm
by AlisoBob
Rue wrote:
1.Machined swingarm spacers $30.00!!
2.Shanman’s Head Stay & coil Adapter $60.00!!
The A/F world constantly evolves... FYI.
1. I think guys are now using the correct OEM Honda bushings as they are cheaper to buy than having the Shanman spacers made.
2. Some guys are just using the OEM 250 coil instead of the 500 coil in the machined adapter. I reccomend double headstay plates, but the jury is still out on that one.
Your build looks sweet!!!!

Posted: August 3rd, 2010, 5:17 pm
by Rue
Thanks Bob for what I paid for the spacers, head stay and coil adapter I thought those guys gave me one hell of a Hoon deal. I know that it is quality hardwear and for those prices I couldn't pass um up.
Bob wrote:
1. I think guys are now using the correct OEM Honda bushings as they are cheaper to buy than having the Shanman spacers made.
Bob You wouldn't happen to know the OEM part numbers for the correct bushings or know a Hoon that would? Those bushings are a pain in the ass, I like astroids solution to the spacer but it would cost to mush to import them.
Posted: August 3rd, 2010, 7:03 pm
by AlisoBob
I think you need a 54mm and a 59mm.
Something like that.
Whats the combined legnth of the 125 bushing + spacer?
Posted: August 3rd, 2010, 10:48 pm
by Rue
AlisoBob wrote:I think you need a 54mm and a 59mm.
Something like that.
Whats the combined legnth of the 125 bushing + spacer?
The combined legnth of the 250 bushings + spacer are:
Countershaft side- 55.98mm
Clutch side-54.00mm
The stock 98' CR250 both bushings are 49mm
I don't think a 56mm would work, right??? Is a 56mm even made in that length

Maybe from another manufacture??
Bob Do you think a machinist could mill down the 59mm to 56mm, I’ve heard that they are a hardened steel??
I was looking through the thread: Gen 3 OEM Swingarm Spacers and Washers.
CR500R7 wrote:OK this might save some confusion when stuffing a CR500 into these frames.
The Std CRF250 04-09 uses a 49mm on the left and a 59mm on the right, with the CR500 engine get a 54mm for the left side and you are done.
The Std CRF450 02-04 uses a 49mm on the left and a 54mm on the right, with the CR500 engine swap right to left and get a 59mm for the right side and you are done.
The Std CRF450 05-09 uses a 46mm on the left and a 54mm on the right, with the CR500 engine swap right to left and get a 59mm for the right side and you are done.
The Std CR125 02-07 uses a 54mm on the left and a 59mm on the right, with the CR500 engine you are good to go as is.
The Std CR250 02-07 uses a 49mm on the left and a 54mm on the right, with the CR500 engine swap right to left and get a 59mm for the right side and you are done.
Part# for the 54mm bush is 52142-KZ4-J40, left side of swingarm.
Part# for the 59mm bush is 52141-KZ4-J40, right side of swingarm.
If any of this is incorrect, please let me know so I can change it before any mistakes are made.
Posted: August 3rd, 2010, 11:24 pm
by Rue
Posted: August 4th, 2010, 12:11 am
by AlisoBob
Part# for the 54mm bush is 52142-KZ4-J40, left side of swingarm.
Part# for the 59mm bush is 52141-KZ4-J40, right side of swingarm.
Just grind down the 59mm to 56mm by youself, and your all set
THe 59mm just may squeeze in there as-is. The case bushings are beveled just for this reason... to coax it all together.
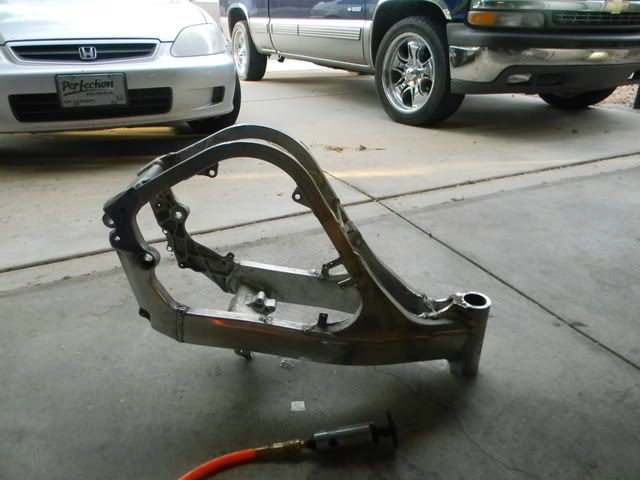
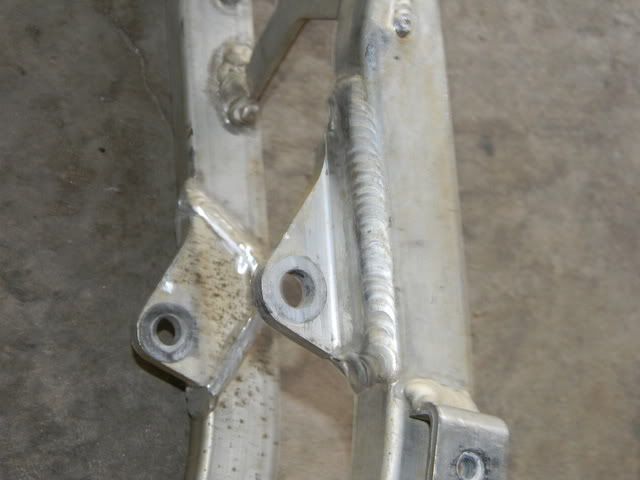
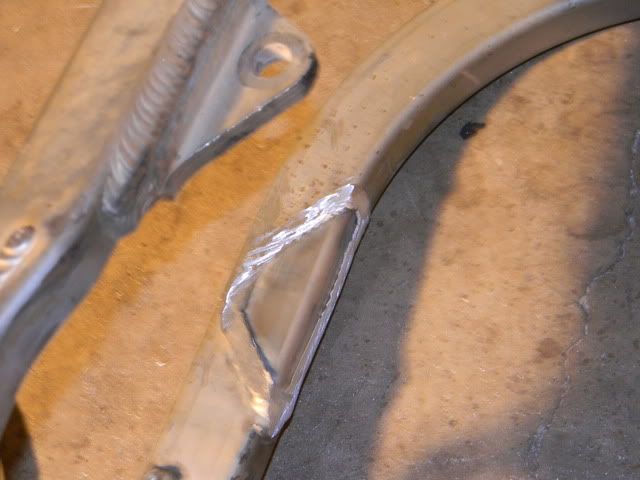
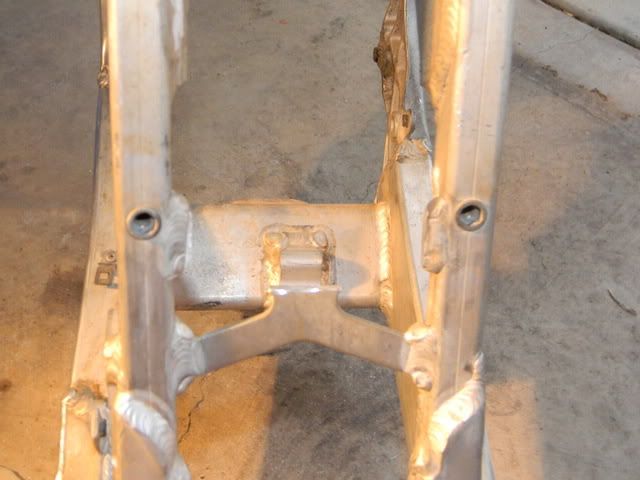
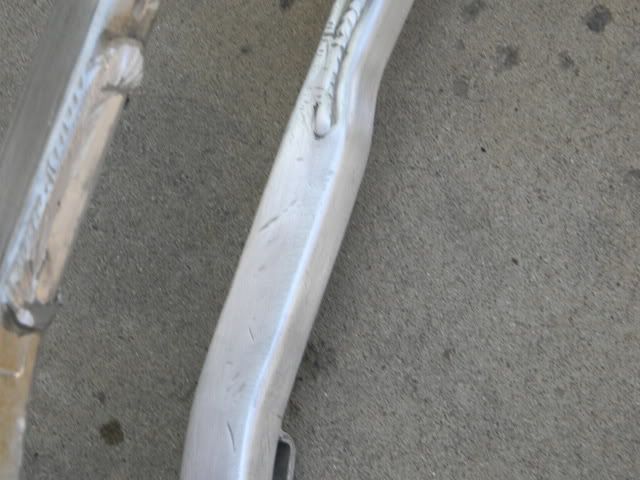
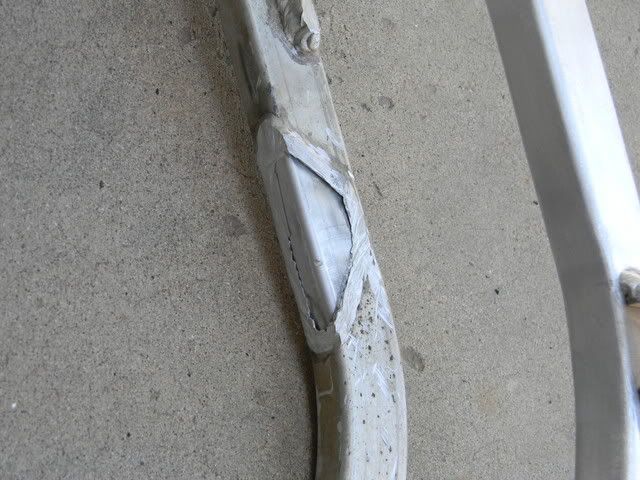
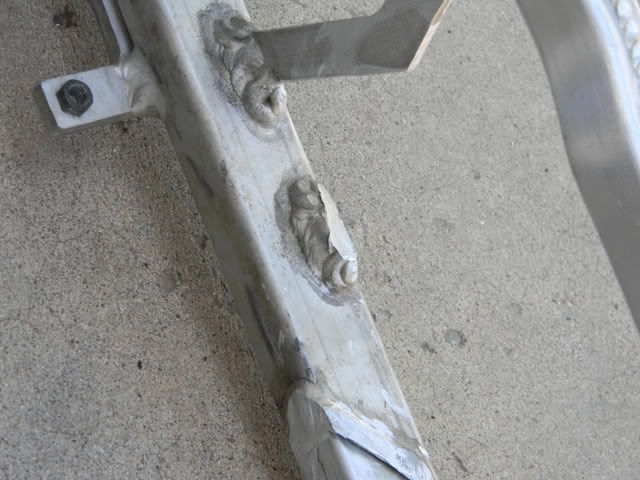
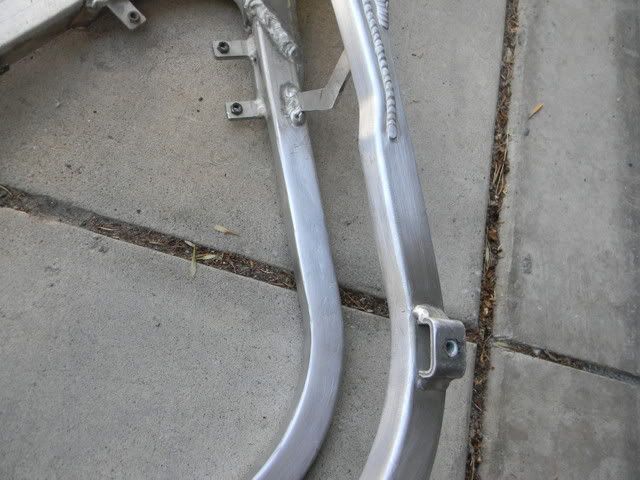
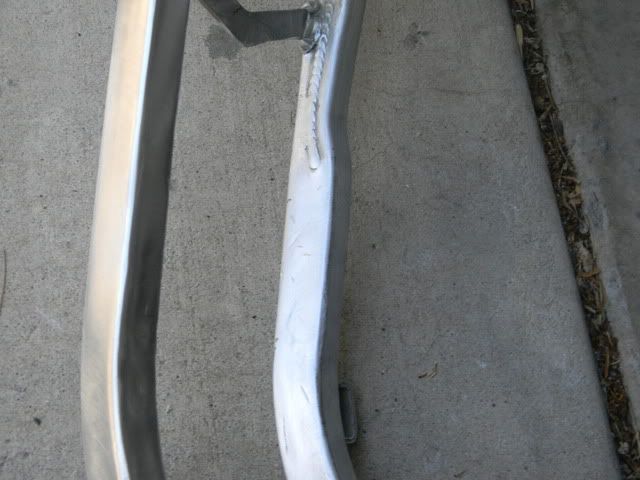
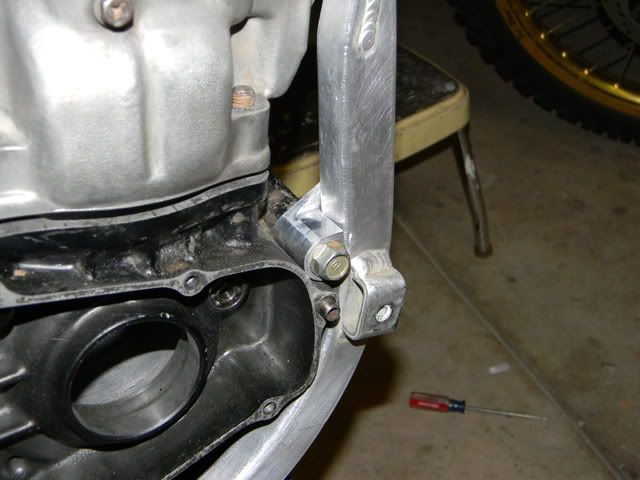
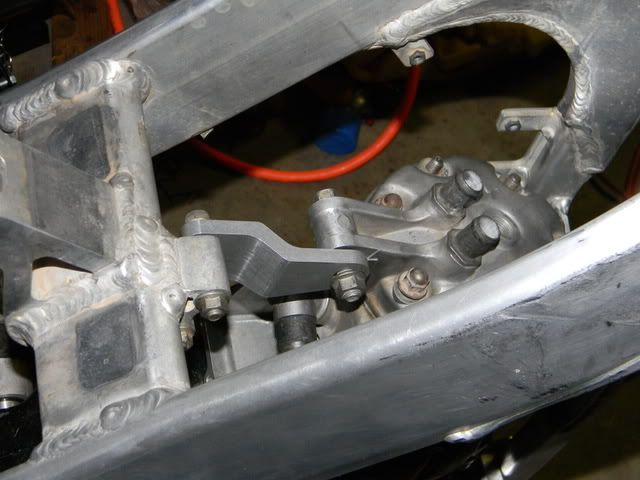
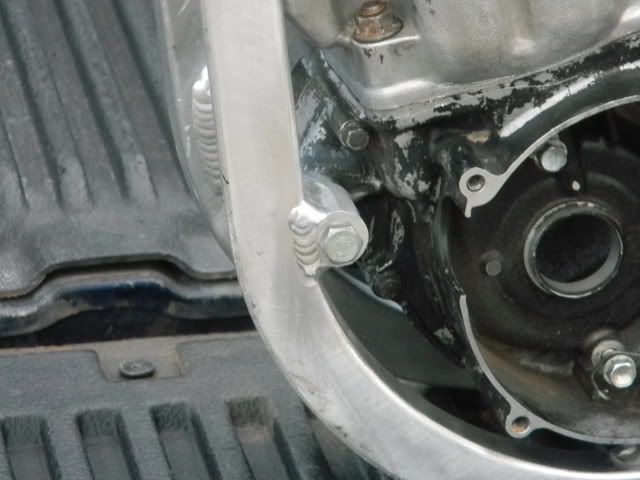
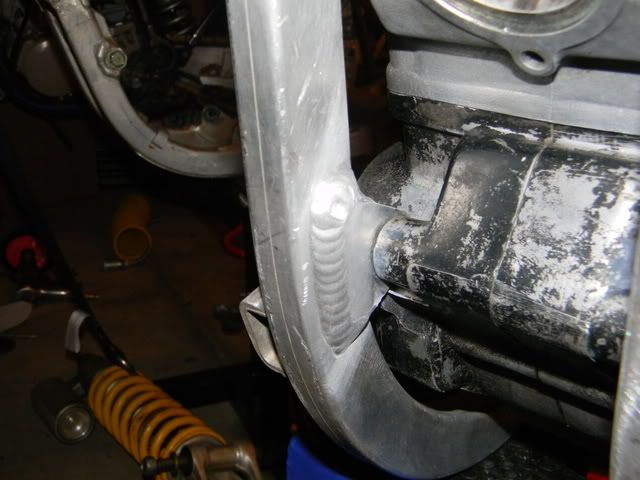
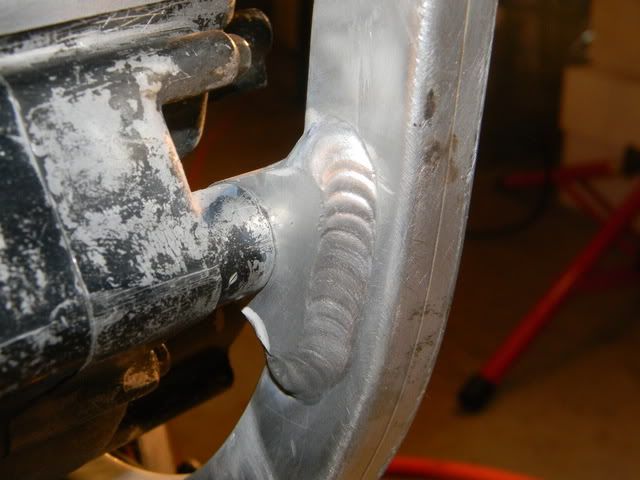
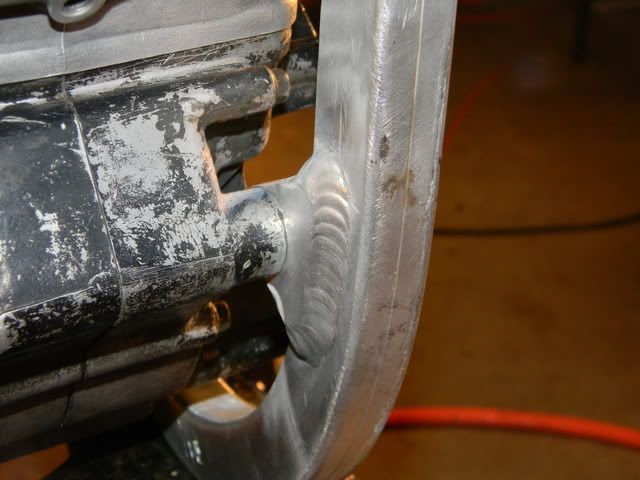
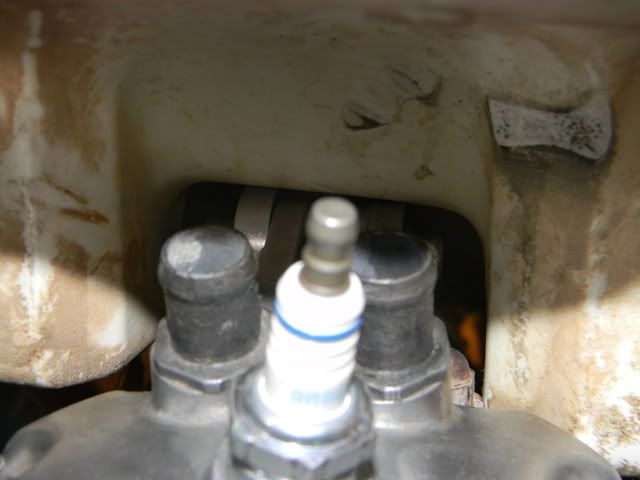
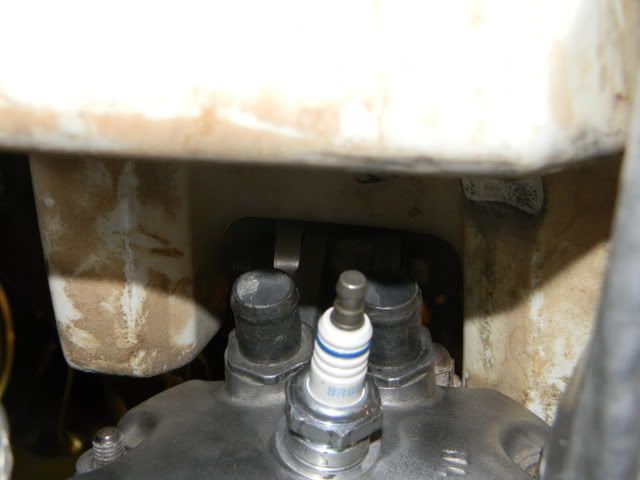
Welds look sweet.
Old goats know their way around a Tig torch....

Posted: August 4th, 2010, 12:28 am
by AlisoBob
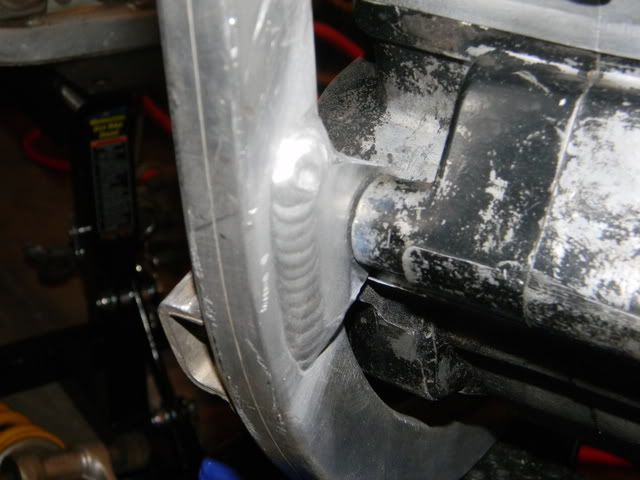
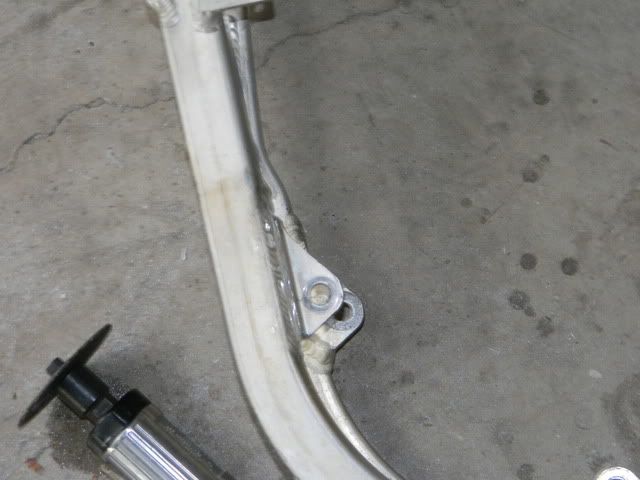
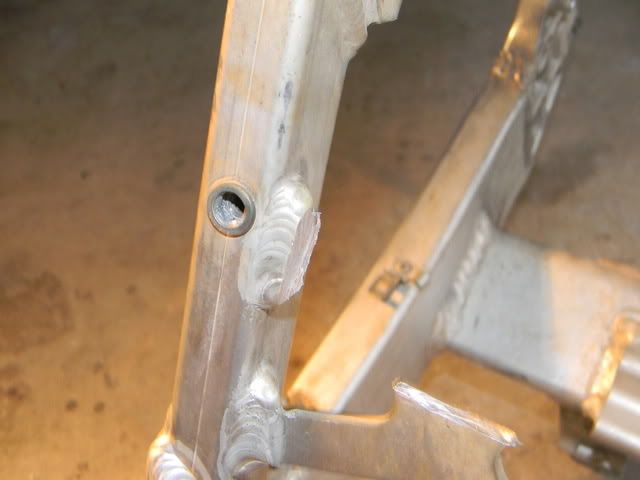
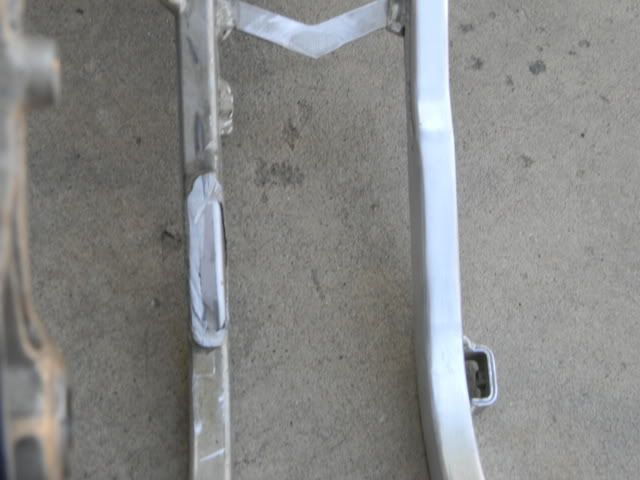
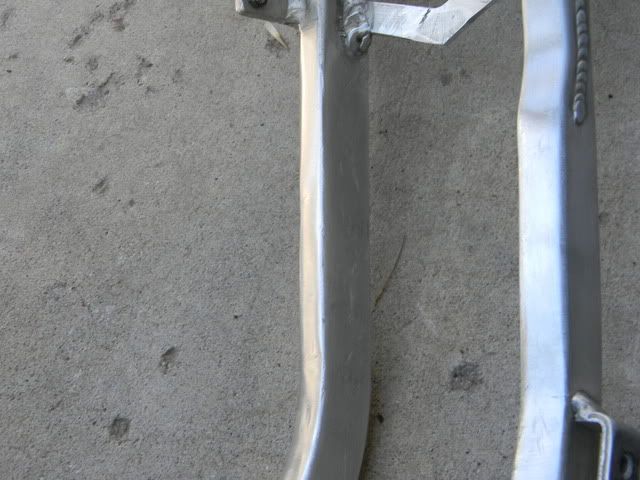
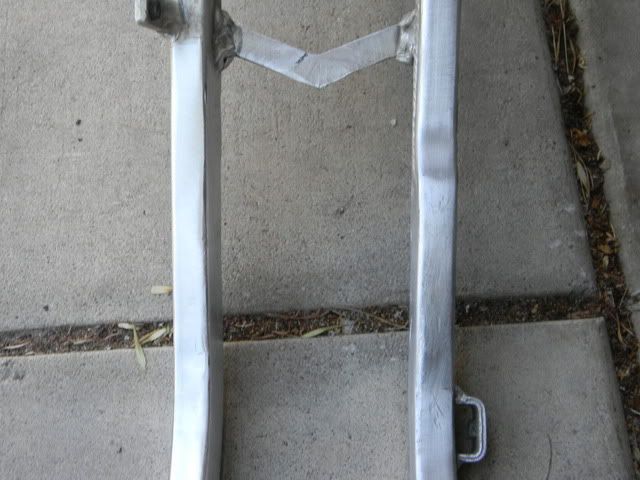
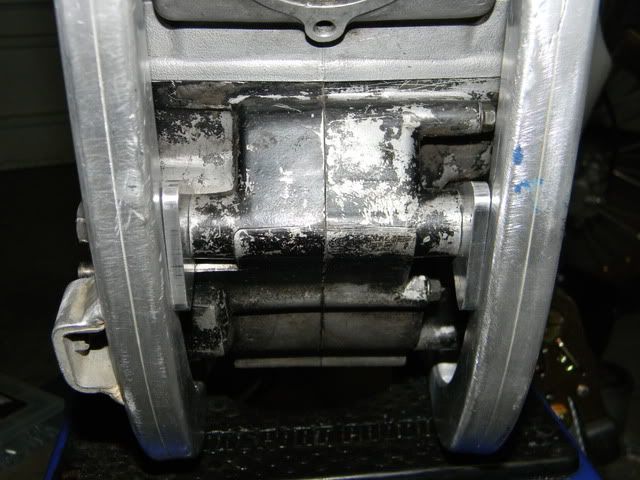
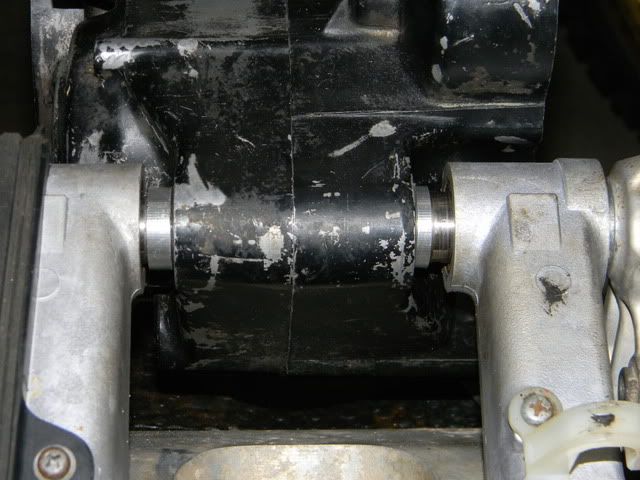
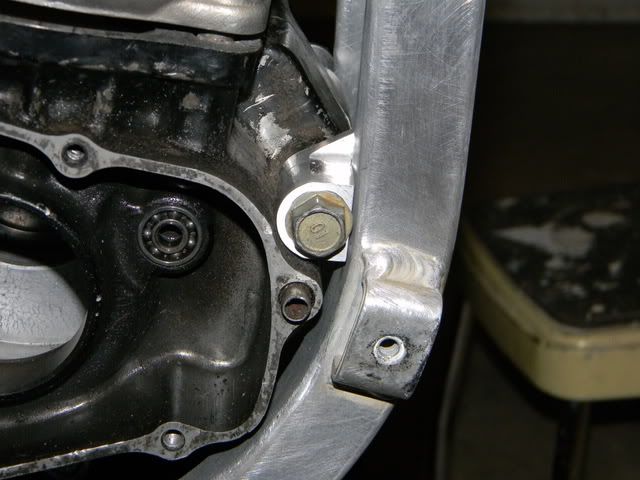
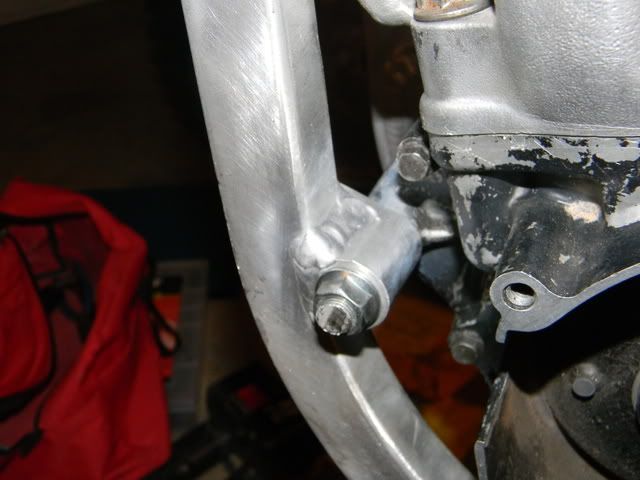
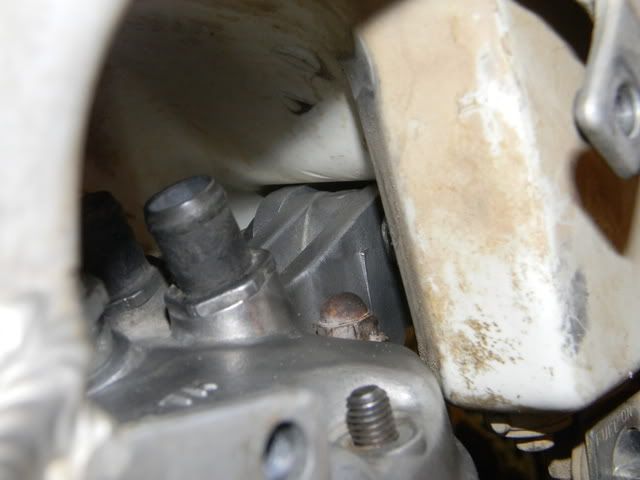
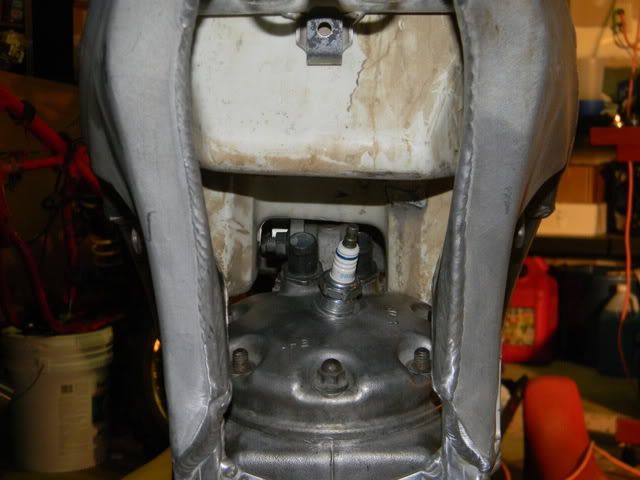
Is this really a gap, or just a photo shadow??
If it is a gap, DO NOT TIGHTEN THE BOLT TO CLOSE IT!! Get a thin "AN" type washer to stick in there.
If there is a washer on one side, and not the other... so be it.
Pinching the frame to close the gap raises the natural frequency of it, like tightening a guitar string.
The higher the frequency, the more the bike will buzz.
Everyone says my bike has very low vibes.. even lower than a steelie. Its not the engine... its the install. I shoved washers in every gap before I tightened anything down.
Its very "dead" as far as vibes go, and I attribute it to this assembly method and double headstays.
Posted: August 4th, 2010, 12:42 am
by Rue
AlisoBob wrote:Is this really a gap, or just a photo shadow??
If it is a gap, DO NOT TIGHTEN THE BOLT TO CLOSE IT!! Get a thin "AN" type washer to stick in there.
If there is a washer on one side, and not the other... so be it.
Pinching the frame to close the gap raises the natural frequency of it, like tightening a guitar string.
The higher the frequency, the more the bike will buzz.
Everyone says my bike has very low vibes.. even lower than a steelie. Its not the engine... its the install. I shoved washers in every gap before I tightened anything down.
Its very "dead" as far as vibes go, and I attribute it to this assembly method and double headstays.
No it's not a shadow there is a slight gap. I might be able to get two thin washers on each side. Bob I do remember you saying not to tighten it up, I think you said they were also called half washers and could find them at any "true" hardwear store.
Posted: August 4th, 2010, 3:09 am
by gregrobo
looks sweet old school build having contact with a good skilled welder always helps
Posted: August 4th, 2010, 8:05 am
by high velocity
Sweet build! looking foward to riding with you soon!
Posted: August 4th, 2010, 8:11 am
by Rue
high velocity wrote:Sweet build! looking foward to riding with you soon!
Thanks Greg, How is Anthonys 500 build coming along?? He's giving the Nova some lovin'. We are going golfing later this evening we'll see if I can get him to fire up the 490 and go for a ride soon.
Gas Tank!! Heat Treating 101...
Posted: August 5th, 2010, 11:36 pm
by Rue
Posted: August 6th, 2010, 12:28 am
by asteroid500
Tank mods on G1 are so easy....
http://www.bannedcr500riders.com/board/ ... highlight=
Also compliments on an excellent pictorial..........take note guys...this how it's done.

Posted: August 6th, 2010, 10:32 pm
by Rue
asteroid500 wrote:Also compliments on an excellent pictorial..........take note guys...this how it's done.
Thanks asteroid for the compliment!!!