AlisoBob's Gen 4 A/F Conversion
Ok bitches... I'm pooped... not from the conversion, but getting this thing torn apart!!!!
Joe and I spent 4 hours taking it apart... ( Wiring, allot of hoses, fittings... all kinds of shit.... ) and about 45 minutes of Sawzall work to actually fit the motor.
I'll get the "Y" refitted and the cradle reattached pretty quickly. The other logistics look pretty simple, with the exception of the fuel tank being able to hold a decent fuel load. I'm still considering building either an Alloy one, or composite.. we'll see how it works out.
2 A/F's roughed in in one day.....
1- 2002 CR250R
1- 2004 CRF250X
Too Cool!
Time to clean up, and kick it. I'll post up some more photos tomorrow...
Last edited by AlisoBob on July 5th, 2011, 9:59 am, edited 5 times in total.
Hey I have an !!! Since you have a Gen 3 and a Gen 4 side by side take some pics of the differences between the two and post them up. I mean you are already doing a side by side build up so just emphasize the things that had to be done differently and do a side by side comparison of the two builds.
88CR500
ROOST ON PEOPLE!!!
ROOST ON PEOPLE!!!
Well , heres where it started... " I'll just take a few minutes to strip the bike and then we'll begin the conversion"..... WRONG!
The only thing worse than paying the repair bills on a 4 stroke is working on one. I work pretty quickly and it took forever to take this pig apart... 1.25 hours just to get the subframe off as an example. The carb was another 45 minutes or so...... If I had to perform the maintenance on my own 4 banger, I wouldnt ride it either..... WAY too much hassle.
About 8 seconds after the motor was out, Sawzall was put in action.... 1,2,3 Done!
2 minutes after that, the dummy motor was in place... SWEET! These are Gen 1 mounts. They fit the Gen 3 perfect, and look serviceable in the Gen 4 as well. Contact either Danny Graves, or Shanman for price and availaibility. These mounts RULE!!!!!
The motor is hard over to the right, and the chain alignment is pretty good, but I got a gap on the left side. I have lots of bushings and washers to play with. I'll get it right, with OEM stuff like the Gen 3 bike.
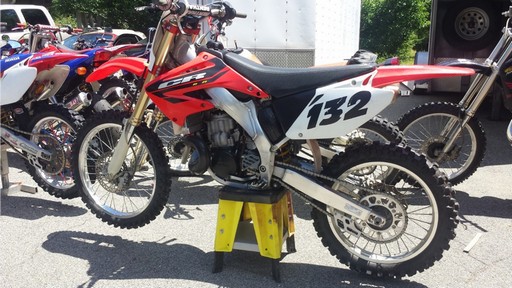
Overhead shot.
This is a shot of the interior on the "Y". Its an investment casting, with pockets machined to accept the down tube and cradle pieces. Once I get the cut off stubs out, its pretty straightforeword to cut the down tube higher, slap this puppy back on in its higher location to clear the pipe and buzz it back together.
It was honest -to -god 4 hours to take it apart, and 45 minutes to do the rough conversion.
I'll post up the reassembly of the "Y" once its done.
If ANYBOBY is the slightest bit concerned about trying this for themselves... CONTACT ME! If you can change your own oil, and have access to a Sawzall, you can do this!!!!
I'll walk you through it.....
Last edited by AlisoBob on September 30th, 2007, 4:16 pm, edited 5 times in total.
- britincali
- Posts: 8207
- Joined: May 31st, 2007, 7:10 pm
- Location: Barstow, CA
Why you gotta call my awsome motor a dummy? Shes gonna get her feelings hurt
"I'm glad you can use it, enjoy it forever.... buy me a beer at the next ride and were even....." Edited by the bobber......
Im sending you a bill for $150 now
You like that edit button so much we should rename you VH
"I'm glad you can use it, enjoy it forever.... buy me a beer at the next ride and were even....." Edited by the bobber......
Im sending you a bill for $150 now
You like that edit button so much we should rename you VH
Coolness list by 90cr500guy
Bob's = 50/50
Cepek = cool
Solidbro = cool
Brit = loser
Stoffer = 1 up from Brit
MFDB = cool
Danny = ok
Bob's = 50/50
Cepek = cool
Solidbro = cool
Brit = loser
Stoffer = 1 up from Brit
MFDB = cool
Danny = ok
- britincali
- Posts: 8207
- Joined: May 31st, 2007, 7:10 pm
- Location: Barstow, CA
This is why I like the Gen 4 so much...
You have to move the "Y", but its so simple.
1. Cut off the Y
2. Remove old downtube and cradle pieces from the pockets
3. Cut downtube higher up to raise Y
4. Reassemble and weld.
Here is the "Y" with the downtube piece removed. The machined pocket that accepts the downtube is clearly visible.
Another view showing its ample opening for the exhaust flange.
Easy enough?
- Rosco-Peeko
- Posts: 823
- Joined: June 1st, 2007, 2:47 pm
- iggys-amsoil
- Posts: 3602
- Joined: June 1st, 2007, 6:09 pm
- Location: Just North of March Airfield CA
Motors in!!!
Well... sort of..
The "Y" has been relocated. Its about 3.5" higher than it was. It indexes about 1/2" over the down tube. Look at the slice laying on the floor. These Gen 4 downtubes are stout!! There is plenty of room ahead of the jug for the radiator cross flow hoses to go. I cut off the un-needed tabs and sharp welds. I still need to make the lower mount tabs, and find the correct bushings and spacers to center the motor on the swingarm, but its almost done and is going to look very factory!!!!!
The motor is actually shorter than the CRF250 motor, and access to the carb from the right side is unreal! These 4 banger A/F frames were made to convert!!!
Lots of room around the "Y" to get the manifold, pipe, and springs in there.
This is just Home Depot 1" tuning to mock everything up, but Shanmans mounts line up well. I have now used these mounts on Gen 1, 3, and 4 frames. They are fantastic! This tubing is square edged,not the rounded corner tubing that Honda uses. The mounts will fit even better with the correct tubing. The 1" sutff will also index into the "Y" and the existing cradle pieces.
Another 3 hours into the build log.
Last edited by AlisoBob on October 9th, 2007, 9:17 pm, edited 2 times in total.
- britincali
- Posts: 8207
- Joined: May 31st, 2007, 7:10 pm
- Location: Barstow, CA
- iggys-amsoil
- Posts: 3602
- Joined: June 1st, 2007, 6:09 pm
- Location: Just North of March Airfield CA
Get the spacers for a 03 CR125. Per AJ. Thats what I did.
Trinity Racing mild porting FMF
62 pilot, EGH needle, 172 main
03 Gen III CR250 frame
2013 Dodger Charger 5.7 Hemi
http://www.prisonplanet.com
Your Amsoil Customer # 350882
62 pilot, EGH needle, 172 main
03 Gen III CR250 frame
2013 Dodger Charger 5.7 Hemi
http://www.prisonplanet.com
Your Amsoil Customer # 350882