Page 1 of 1
Gen one spacers
Posted: January 7th, 2010, 8:53 pm
by Rue
I'm in need of some Gen 1 swingarm spacers, I can't find a local machine shop willing to help me out!!!
Posted: January 7th, 2010, 9:27 pm
by asteroid500
What these,
Posted: January 10th, 2010, 6:07 pm
by gregrobo
they arnt needed use the standard ones and space them out
Posted: January 11th, 2010, 6:26 pm
by 97af

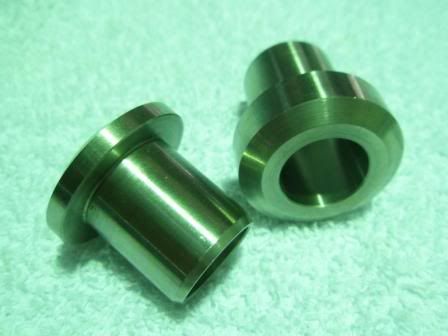
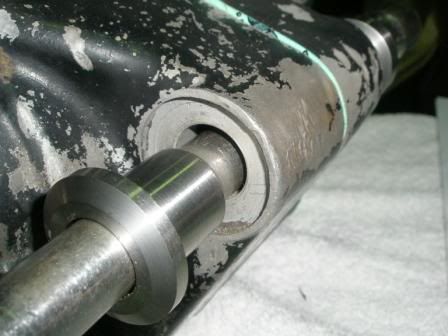
These are pretty easy to whip up yourself.
These shots were taken when I did my 97.
Posted: January 11th, 2010, 7:07 pm
by gregrobo
why not make them go betweem the engine bushand the engine then its all oem and you dont have crappy washers to line up
Posted: January 11th, 2010, 10:28 pm
by asteroid500
Greg you'd have to split the case's to press out the factory collets.
i made mine because 2 of the 3 motors had none and the holes were huge compared to the AF swingarm bolt.
During my many dummy fits for measurements to do my conversion i was sick to death with trying to line up those bloody slip in spacers, i'd swear and curse the dam things to the point i decided to add the material to the collet that was presant in the CR250-motor.
end result much easier to work on and a very neat looking job.
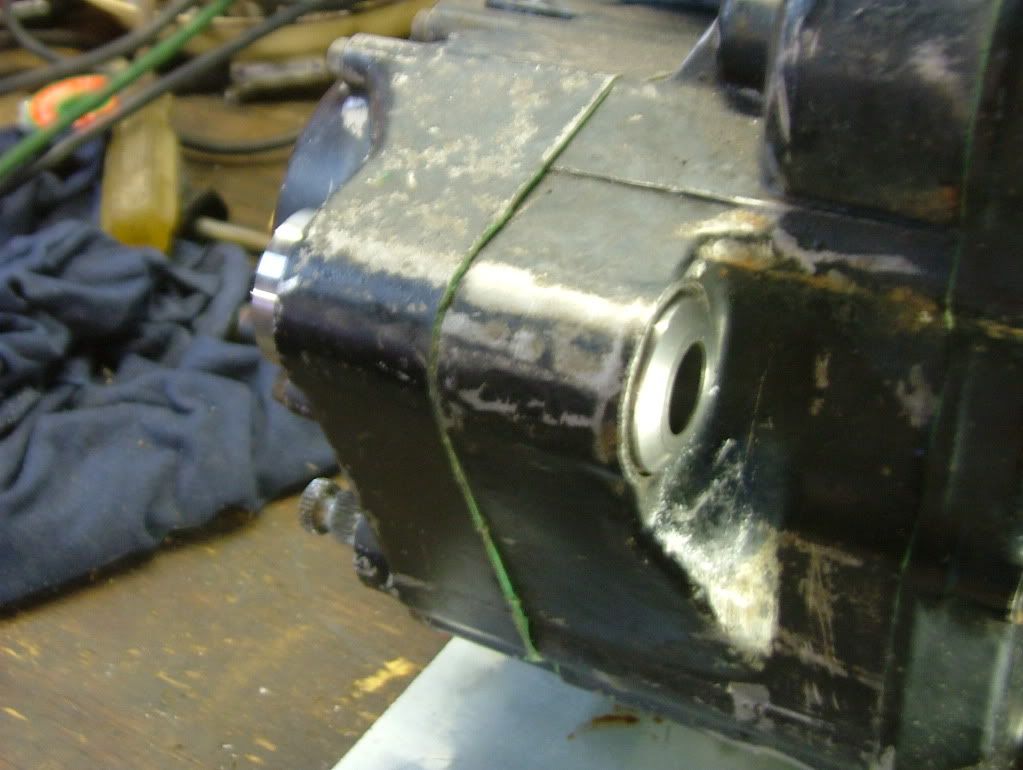
See the case hole difference to the swing arm bolt
Posted: January 12th, 2010, 1:10 am
by gregrobo
you do not have to split the cases to get them out nor do you have to freeze them to get them back in a gentle tap with a appropriate size pin punch removes them easily
Posted: January 12th, 2010, 3:02 pm
by gregrobo
but you are right in the case of the older engines being to small a inside diameter
Posted: January 12th, 2010, 6:18 pm
by asteroid500
Greg,
the Cr250 motor from my donor was dead so i try'd to knock'm out on the bench...fat fuck'n chance, we ended up cuting into the case's to relive the pressure on them.
i guess a well maintained bike my be a different story but mine wasn't, it had seen a few beach runs in its day and none the better for it.
As far as cooling parts to be pressed in goes...true you my not want to but ive always done this,
with ball joints and the like, cooling the job makes the metal contract and heating the work area expands metal.
you know this and as i cant afford to be splitting cases i chose to heat and cool my job...it went in like a good...well you get the picture

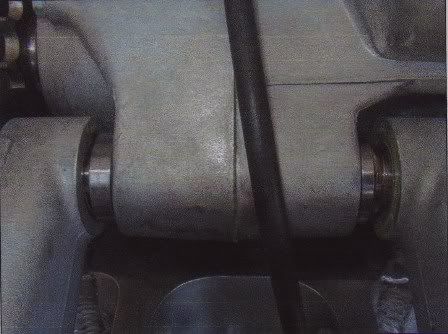
I've got motors with only the open alloy hole in the crank case bolt hole like in the pick thats why i had to make the spacers that pressed into the cases

Posted: January 15th, 2010, 4:42 pm
by Rue
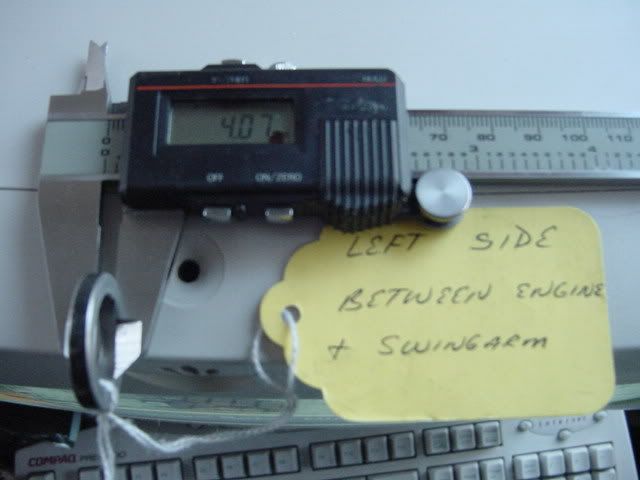
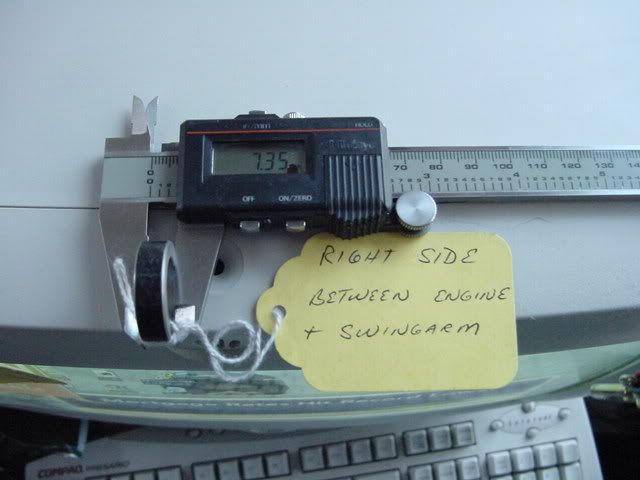
Thanks for the Pics 97af, I see that you run the 4mm on the left and the 7mm on the right, I am using ShanMan's Instructions on the Gen 1 Build and he runs it the other way around??? Any issues with chain alignment??
Posted: January 15th, 2010, 4:55 pm
by 97af
Rue wrote:Thanks for the Pics 97af, I see that you run the 4mm on the left and the 7mm on the right, I am using ShanMan's Instructions on the Gen 1 Build and he runs it the other way around??? Any issues with chain alignment??
Cool...Glad they can help. You sure Shan runs them opposite? He got the measurements and the pics from me before he did his first...Way back in 03 or 04. Man, I cant believe its been that long.
Chain alignment is spot on.
Posted: January 16th, 2010, 8:42 pm
by Rue
97af wrote:Rue wrote:Thanks for the Pics 97af, I see that you run the 4mm on the left and the 7mm on the right, I am using ShanMan's Instructions on the Gen 1 Build and he runs it the other way around??? Any issues with chain alignment??
Cool...Glad they can help. You sure Shan runs them opposite? He got the measurements and the pics from me before he did his first...Way back in 03 or 04. Man, I cant believe its been that long.
Chain alignment is spot on.
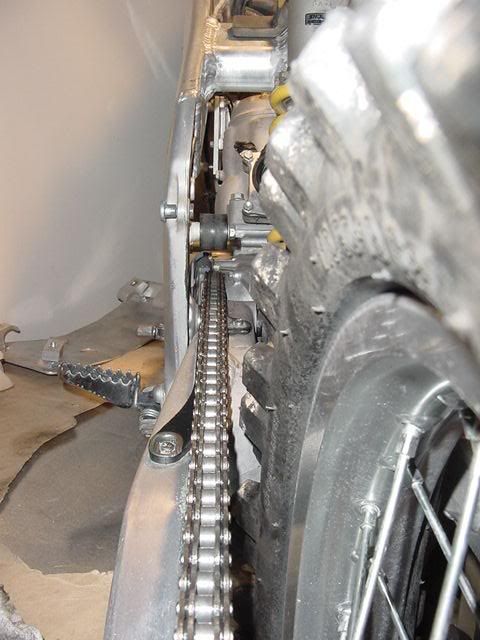
Step 8 in ShanMan's Instructions: "Reassemble the chassis by first installing the swingarm. This is where you will need to install the swingarm spacers. As you see in photo three, you will need to install the thicker (7mm wide) spacer on the left side of the swingarm, and the thinner (4mm) spacer on the right side of the swingarm."
Photo Three:
Posted: January 16th, 2010, 9:06 pm
by 97af
Rue wrote:
Step 8 in ShanMan's Instructions: "Reassemble the chassis by first installing the swingarm. This is where you will need to install the swingarm spacers. As you see in photo three, you will need to install the thicker (7mm wide) spacer on the left side of the swingarm, and the thinner (4mm) spacer on the right side of the swingarm."
Photo Three:
Rue,
You can try it Shans way but its not right. My guidance came from Mickey Kessler, the original builder of the AF. Like I said try it, but try it both ways. I'll betcha my way lines up better.