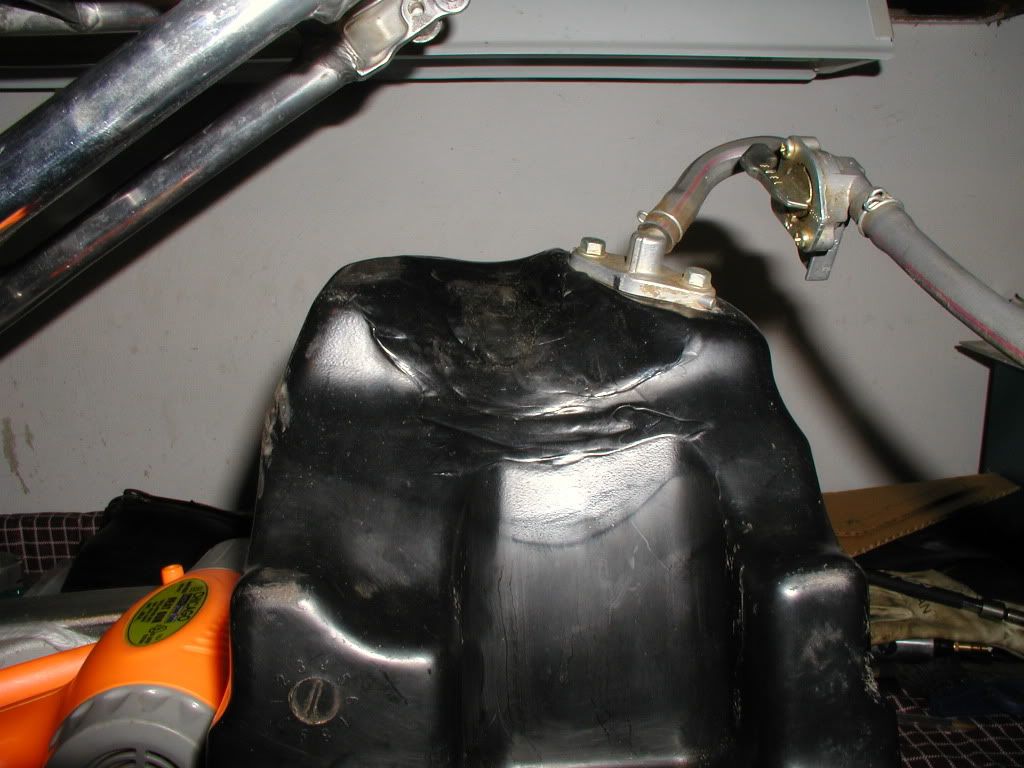
That lump is what causes all the problems, it interferes with the spark plug, and the coolant hoses.
To correct this, you need to reform this lump into a depression. I'll describe the best method I've found to do this...
What dosent work? Heating up the area you intend to push on.... Its gets too soft, too sticky, and you'll end up pushing right through...
What does work? Heating up all around the area you wish to reshape, letting the heat migrate, and pushing on the center, which is still relativly cool....

The white ring is the area you want to heat up..... and by heat.... I mean HOT!!!! Hot like you can smell it... It takes a while, I use two heat guns ( Which is why there are no "action shots" on me doing this task) Pay close attention the the areas at 9 o'clock, and 3 o'clock. Your asking the material in these areas to move considerably. What your trying to acheive is making this convex shape, concave. These two areas are your biggest concern.
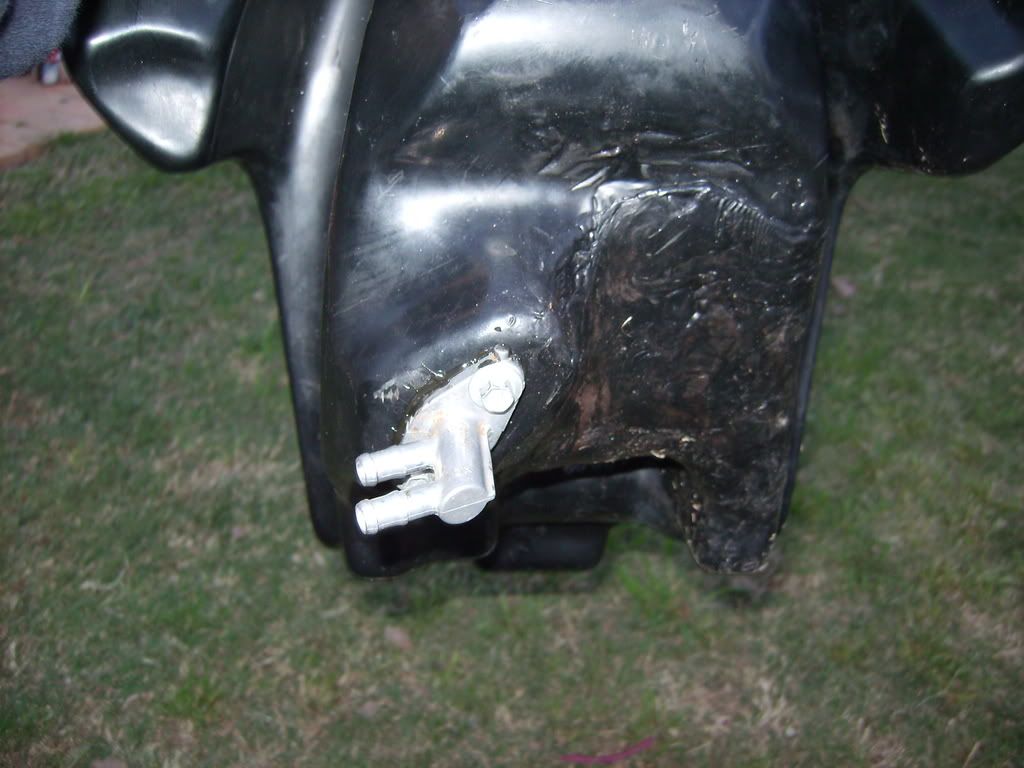
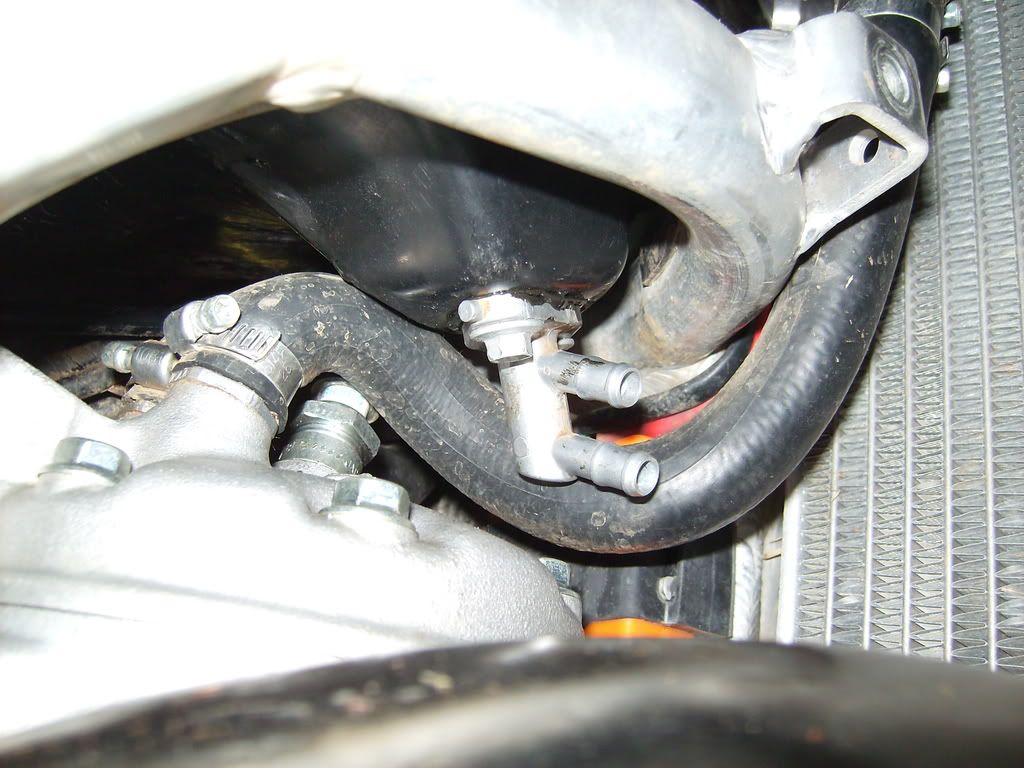
The area you will push on is just to the left of the left side bolt that holds the outlet in place. You will need the outlet attached, as if you try to form the tank with it missing, you will never get it back in.
So, the outlet is in, you have allot of heat available, and you have the balls to potentionally ruin your new $200 fuel tank... lets begin!!
I do it with the tank on the floor, nestled between some 4x4's to keep it rocking around.... this is for the first portion on the heating.
Start heating it up... it takes awhile.... keep the heat moving, and focus on the 3 and 9 o'clock positions... did I mention to get it really HOT ?
Keep going, and ocasionally give it a test push. I use a wooden hammer handle. If you have to use much pressure, its nowhere near hot enough.
At some point, its going to get pliable. Push with the hammer handle, and the area should feel like its going to spring in, and form a depression. If the depression is forming unevenly, apply more heat the the side that is giving the reesistance. If the heat is HOT enought, and well balanced.... it should not require much effort at all.
KEEP HEATING THE 3 AND 9 O'CLOCK POSITIONS!!!!
When you think the time is right, give it a push.... I move the 4x4's out of the way, and "grasp" the fuel tank with my shoes while I push. It should flatten out, then spring inwards. DONT FORCE IT!! Add more heat if needed.
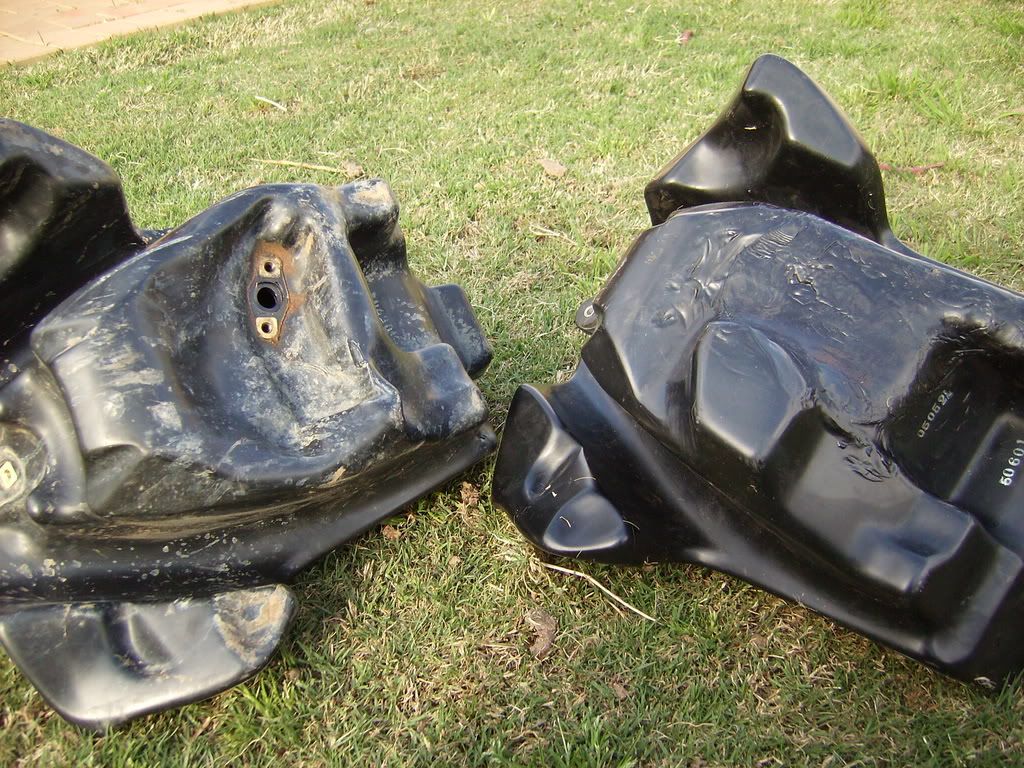
If its hot enough, it will pop right it...... It will look something like this....

Once the depression is formed, hold it in place with the hammer handle, and dump cold water on it to cool it and make the plastic take a set.
Anyone spot the fuck up in the photo??? Yup, not enough heat at 9 o'clock...
No biggie, and its not worth trying to correct. The area that needed moving has enough room. Its all risk with no reward to try to reheat the tank for this small conmetic issue.
Here's the side view....

Fits perfect..... no big deal..... remember.... Heat is your best friend to do this correctly!!!!


 "the game of life of is not so much in holding a good hand as playing a poor hand well"