Page 1 of 2
Posted: July 27th, 2009, 6:34 pm
by HrcRacing
Lookin' good.

So, what are you doing with the '01 roller?
Posted: July 27th, 2009, 9:13 pm
by CR500R7
Started off with all the right pieces for a conversion.
I not sure about your method

You are not finished yet so Im not going to put shit on you, It may turn out to be the best i have seen.
At least your having a go.

Posted: July 28th, 2009, 6:14 am
by Roostius_Maximus
that'll be a nice bike
Posted: July 28th, 2009, 6:25 am
by AlisoBob
Whats your plan to raise the "Y" up?
Posted: July 28th, 2009, 8:00 am
by hoofarted
AlisoBob wrote:Whats your plan to raise the "Y" up?
X2. You still need to make that cut and move it up a ways to clear the exhaust...
hmm
Posted: July 28th, 2009, 8:44 am
by chachi243
you dont have to do relocate the Y, you can leave it, i have done it on my first build which was also an 02 CR250R, BUT i couldnt run top springs on the pipe unless i added big mounts to the cradle or something, and it seemed like a ton of extra work hogging out the bottom of the Y over and over and re welding it each time to get it right.... i remember adding little tunnels just to get to the top 2 bolts of the exhaust manifold..... and then you have to remember to tilt the bottom end while you put the spigot manifold thingy on the cylinder before you swivel it in place and i remember getting that motor in and out was a real PIA....... either way, it IS doable..... congrats on the project, keep goin' and you definitely came to the right spot for advice, tips, and support to make your dream bike a reality......
http://cr500riders.com/cgi/yabb/YaBB.pl?num=1123653338
i like this forum a bit more, its less conservative...... and not as many new jackoffs telling you how to do shit they can only dream of.....
Posted: July 28th, 2009, 10:21 am
by Mik329
You really didn't need to cut anything and you can get away with just taking a bit out of the bottom of the Y to have the pipe clear. Look at my Gen 3 thread for details. Good luck on the build.
Posted: July 28th, 2009, 10:24 am
by dannygraves
congrats on starting with some fine bikes!
You have all the resources and hundreds of conversions to look at, why would you do it that way? the front mounts will be tougher (will have to be gen-1 style) and that Y is gonna be the biggest PITA. no way to bolt on the exhaust manifold and no room for springs. I moved my Y as high as it would go and still had to grind out some clearence for the manifold bolts!
do yourself a favor and check out some other builds before making something you'll regret. the jug will never come off in the bike w/ that setup. Mine just did
I recommend to find algavas build, I think he only posted on the other site, but I used the same method and couldn't be happier.
Posted: July 28th, 2009, 10:28 am
by hoofarted
dannygraves wrote:congrats on starting with some fine bikes!
You have all the resources and hundreds of conversions to look at, why would you do it that way? the front mounts will be tougher (will have to be gen-1 style) and that Y is gonna be the biggest PITA. no way to bolt on the exhaust manifold and no room for springs. I moved my Y as high as it would go and still had to grind out some clearence for the manifold bolts!
do yourself a favor and check out some other builds before making something you'll regret. the jug will never come off in the bike w/ that setup. Mine just did
I recommend to find algavas build, I think he only posted on the other site, but I used the same method and couldn't be happier.
Agreed!
Posted: July 28th, 2009, 12:49 pm
by HXCENDURO
HrcRacing wrote:Lookin' good.
So, what are you doing with the '01 roller?
PART IT OUT

Posted: July 28th, 2009, 12:58 pm
by HXCENDURO
AlisoBob wrote:Whats your plan to raise the "Y" up?
TO TAKE SOME FROM THE BOTTOM AND ADD TO THE TOP UNDER THE RADIATORS, IF IT LOOKS LIKE IT'S NOT GOING TO WORK THEN I AM JUST GOING TO DO THE TEAM TROUBLE WORKS CNC Y PIECE

Posted: July 28th, 2009, 1:09 pm
by ridin4fun
x3. I also copied Algavas' build with helpful tips from Danny and others. Coolest bike I've ever owned by far. And, by the way, it's also a 2002. With Algavas' instructions, Shanman's front mounts and the talent of my welder/fabricator, my bike turned out great. And, like Danny says, my cylinder BARELY fits in and out even with the Y raised all the way to the radiators. Happy building.
Posted: July 28th, 2009, 1:16 pm
by AlisoBob
HXCENDURO wrote:IF IT LOOKS LIKE IT'S NOT GOING TO WORK THEN I AM JUST GOING TO DO THE TEAM TROUBLE WORKS CNC Y PIECE
Typing in all caps isnt working....
Posted: July 28th, 2009, 1:24 pm
by HXCENDURO
AlisoBob wrote:HXCENDURO wrote:IF IT LOOKS LIKE IT'S NOT GOING TO WORK THEN I AM JUST GOING TO DO THE TEAM TROUBLE WORKS CNC Y PIECE
Typing in all caps isnt working....
sorry, at work.. computer set at caps.. (now off)
on the down sloap of things
Posted: August 2nd, 2009, 8:45 pm
by HXCENDURO
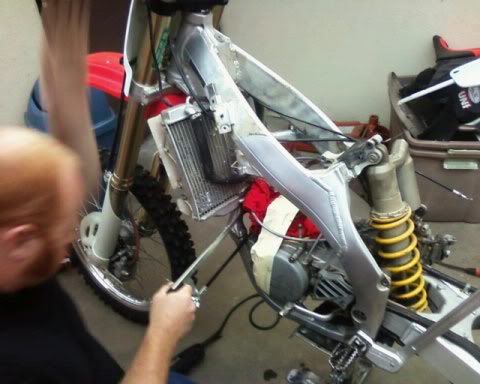
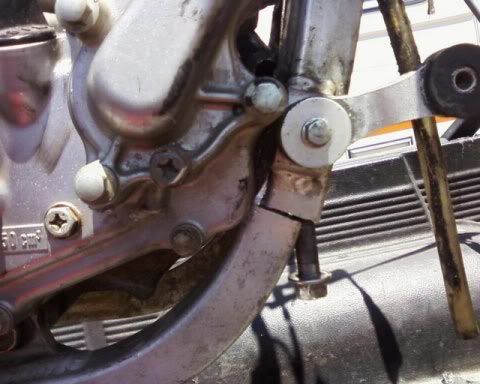
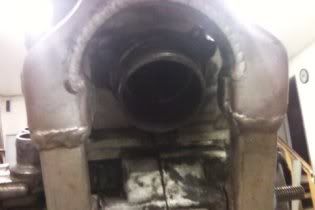
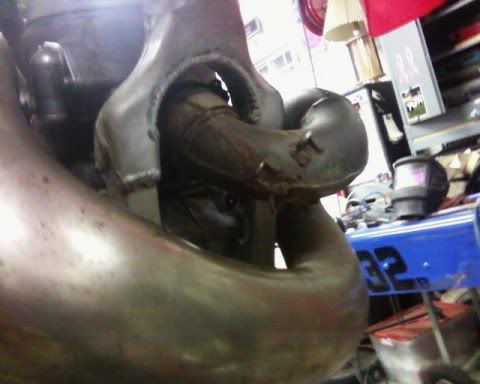
ok guys well here i am on sunday night the 2nd of august, having spent most the day on the fabrication, here is where i currently am.
starting with that notch that i made in the frame to clearance the water pump, i cut a pie piece to fit my notch and accomodate the new water pump area. enjoy the photo's
then

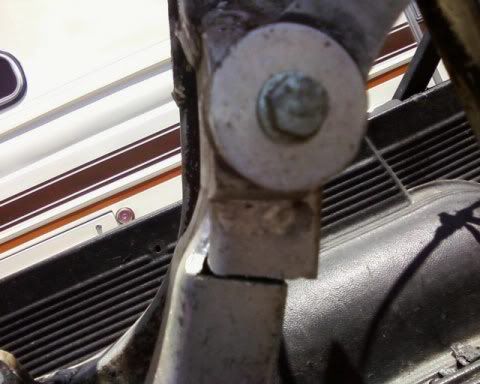
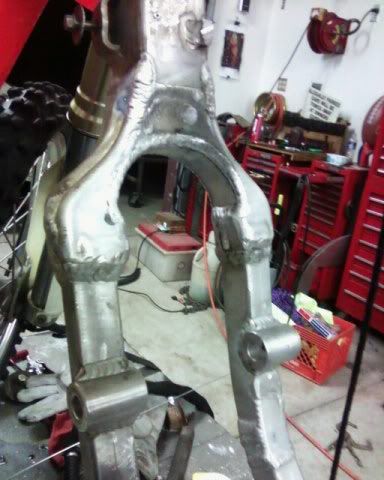
i opted for the barrel style mounts just because they are so stout!
then i cut my y peice


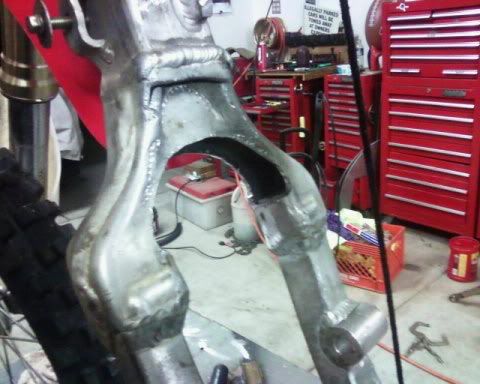
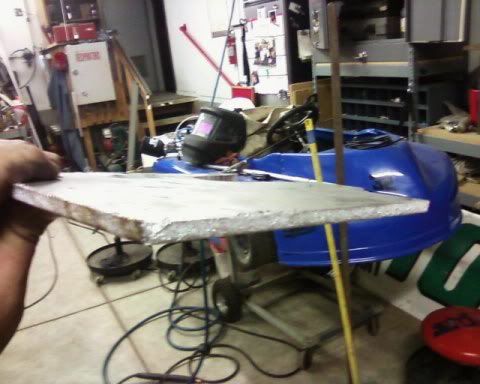
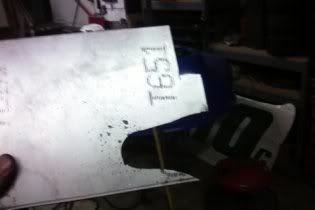
my new inseam of solid T6

fitted


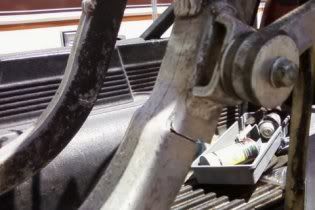
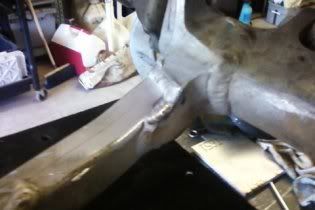
checking my clearance
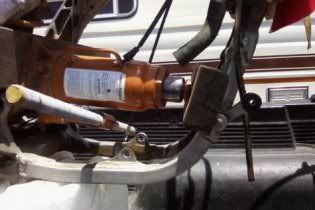
front side clearance. (NOTICE) The exhaust flange clearance, soon will be more "sano"
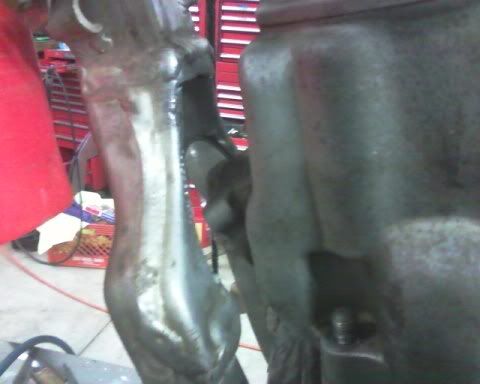
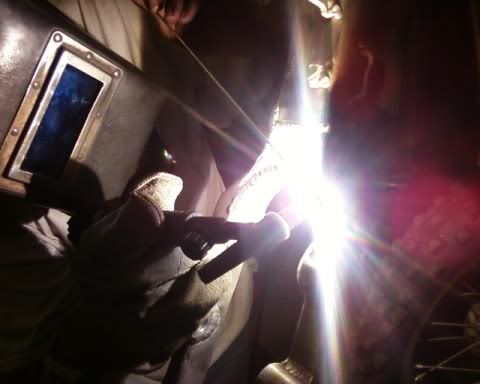
TIME TO WELD IT UP!!!!
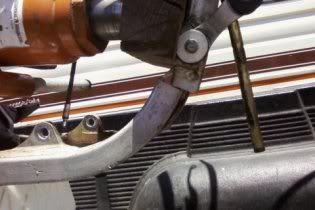
clearance clarance
clearance for rear of engine case then re-weled the seam
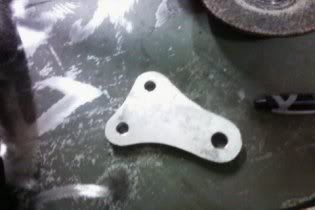
((((time to make head stay mounts out of 1/4" T6!!!!!))))
(((( so after a all nighter this is where im stuck until the radiators are
done.. stay tuned. should have more photo's up soon!!!!
Posted: August 3rd, 2009, 4:21 am
by CR500R7
I wasn't sure how this would turn out when I first saw your method.
To see the pics now, I must say this looks like it is going to turn out really good.
Posted: August 3rd, 2009, 8:08 am
by hoofarted
Looks good! You using a single-side stay? Curios - how'd u bend it? Oh - did you try to fit the exhaust springs on the manifold yet? If they rub, you may have to swap them with extended versions.
Re: on the down sloap of things
Posted: August 3rd, 2009, 8:40 am
by AlisoBob
HXCENDURO wrote:
clearance clarance
Whats my vector, Victor?
Re: on the down sloap of things
Posted: August 3rd, 2009, 11:14 am
by hoofarted
AlisoBob wrote:HXCENDURO wrote:
clearance clarance
Whats my vector, Victor?
Roger Victor Rectal Licker

Posted: August 3rd, 2009, 5:03 pm
by HXCENDURO
WHAT'S YOURE BEARING BARRY?

OK THAT'S ENOUGH.. I GET THE RADIATORS TOMORROW... WHOOT WHOOT, ALMOST RIDE TIME
Posted: August 3rd, 2009, 5:07 pm
by HXCENDURO
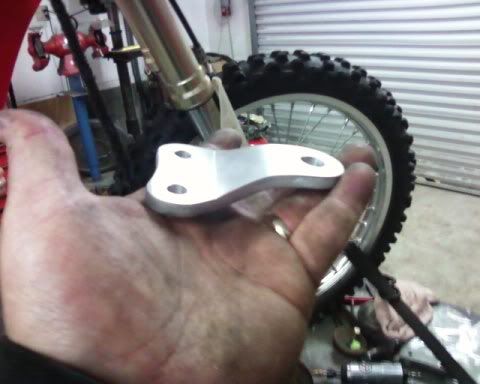
hoofarted wrote:Looks good! You using a single-side stay? Curios - how'd u bend it? Oh - did you try to fit the exhaust springs on the manifold yet? If they rub, you may have to swap them with extended versions.
yes. iam using that single headstay mount and it was bent with a custom die in a cold mandrel press.. the stock pipe springs clear perfectly i wont need the extented ones. we took many many measurements to make sure the springs clear without making the frame look murdered.. will take more pics soon
Posted: August 3rd, 2009, 5:41 pm
by AlisoBob
HXCENDURO wrote:
yes. iam using that single headstay mount and it was bent with a custom die in a cold mandrel press..
I would use two.....

Posted: August 4th, 2009, 8:48 pm
by HXCENDURO
AlisoBob wrote:HXCENDURO wrote:
yes. iam using that single headstay mount and it was bent with a custom die in a cold mandrel press..
I would use two.....
will it make a big difference in vibration?... i can easly make another.
Posted: August 4th, 2009, 9:00 pm
by AlisoBob
Honda uses two...... nuff' said.
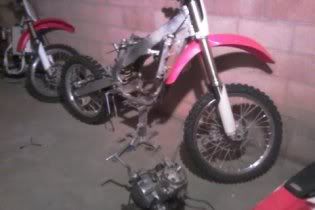
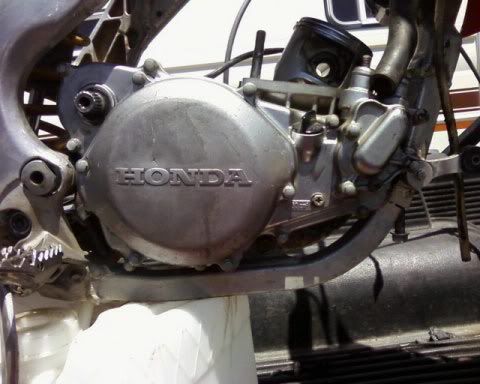
 <--- NICE CANDIDATE GOOD LINKAGE AND BERRINGS, THEN I GOT ME A 2001 CR500
  <-- ANOTHER NICE CANDIDATE, WITH A CLEAN LOW HOUR ENGINE. SO NOW I START MY HACK.. ENJOY THE PHOTO'S AND LET ME KNOW YOURE IDEA'S AND THOUGHTS!!! CHEER'S