Page 1 of 1
A Gen 3 Conversion
Posted: June 28th, 2009, 9:38 pm
by cr_denny
Well, many moons in the making and a number of times trying to melt down my credit cards, I’ve finally got my conversion done.
What I had to start: a 2003 CR250R complete bike and my 1991 CR500R complete bike. For the record, I still have that 2003 CR250 motor/carb/electronics for sale, as well a 1991 CR500 swing-arm, front forks, and rear brake assembly.
Many thanks are in order for all members that contribute here. I’ve stolen ideas shamelessly from many, got some great suggestions from the guy that I used to do the fab work, and came up with a few of my own. I took her out yesterday for the first trip to the desert and other than some tweaks I still need to make suspension-wise, I’m happier than the proverbial pig in shit. This bike, this idea of this bad ass motor in a modern frame, cannot really be matched for how I want to ride a dirt-bike. Thanks to Service Honda, and everyone of you who has taken that refinement to satisfy your own tastes to the next level. Thanks to Mike Fachar for his time on the phone.
All the fab work (machining/welding) was done by a really cool guy I found on craigslist in Phoenix. He’s interested in doing more frame mods so if anyone is interested let me know. The machine work was great and the welding looks good and has great penetration. I did opt out of any heat-treat. I may regret that later, but time will tell there I guess.
I’d be glad to answer any questions that I can about this build. I’ll throw some pics on here to satisfy anyone’s curiosity.
Here’s the mods in a nutshell.
1) Cut out the “Y” and cradle
2) Had billet “Y” machined with integral upper engine mounts and new lower mounts machined and welded to the cradle pieces
3) One piece, two-sided headstay fabbed
4) Pro Circuit Silencer tubing “reworked” to mount correctly to the un-modified FMF Gnarly Pipe. Both of these parts were straight off of the 1991 CR500
5) Custom radiators built by Neil at Fluidyne Powersports (spendy, but top notch job to my specs and a really nice guy to deal with)
Everything else went pretty smoothly. So take a look at the pics and if you have any questions, let me know.
Hopefully, I loaded these pictures correctly.


Custom radiator guards out of perforated SS

New girlfriend

Posted: June 28th, 2009, 9:47 pm
by CR500R7
Aarh......no, I don't think so.
Could be wrong!

Posted: June 29th, 2009, 6:19 am
by Roostius_Maximus
looks good
Re: A Gen 3 Conversion
Posted: June 29th, 2009, 6:31 am
by AlisoBob
cr_denny wrote:
4) Pro Circuit Silencer tubing “reworked” to mount correctly to the un-modified FMF Gnarly Pipe.

Nice build.
Posted: June 29th, 2009, 7:57 am
by Exnav
Posted: June 29th, 2009, 8:12 am
by hoofarted
Nice Build!

Your stay pic didnt come up:
http://s903.photobucket.com/albums/ac23 ... _Stay3.jpg
No tank interference with the bolt length on the head stay? how does she ride?
Keep an eye out for 93+ gears, you're gonna find yourself looking to click up into 6th!
Posted: June 29th, 2009, 9:52 am
by cr_denny
Another shot at the headstay pic.
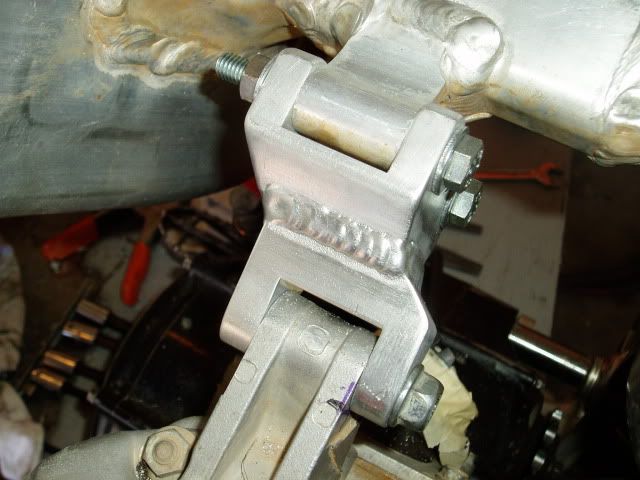
No interference issues at all with the stock tank. I'm going to want to try a larger IMS here shortly.
Other than not having the suspension quite right yet, it rides very nice. Ergonomically, I have it set up the way I want it. I've had a flywheel weight on this thing for like 12 years that worked out riding the tight woods in the Pacific NW, and figured I would take it off. But I couldn't find the flywheel nut quick enough, and I wanted to ride this thing too badly. I think it's going to work out very well for the desert and single track that I've been riding lately. I really couldn't be happier with this bike.
Posted: February 8th, 2011, 9:27 pm
by cr_denny
I had some updates I thought I'd pass along.
cryzsurfer got me inspired, at least enough to pursue having it built. Yours looks sweet by the way! What you built was really what I was originally after, but one time out of running out of gas with the stock capacity, and I had to make it bigger.
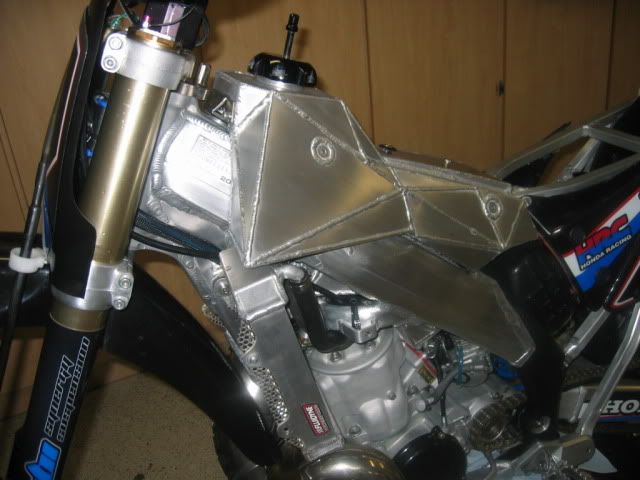
I don't have the equipment and couldn't weld aluminum to save my life, but I mocked up a sample out of some foam from the craft store and took it to the guy that welded my frame. He did a really nice job. We maximized the volume and I now have an aluminum tank that holds 2.95 gallons. Although it took him a while to get it done, I'm very happy. Most is .100" plate and it's a little heavy, but I don't notice it cruising down the trails. Here's some pics:
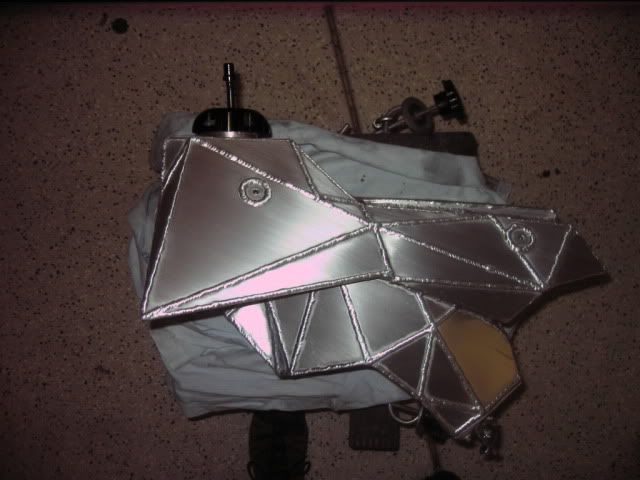
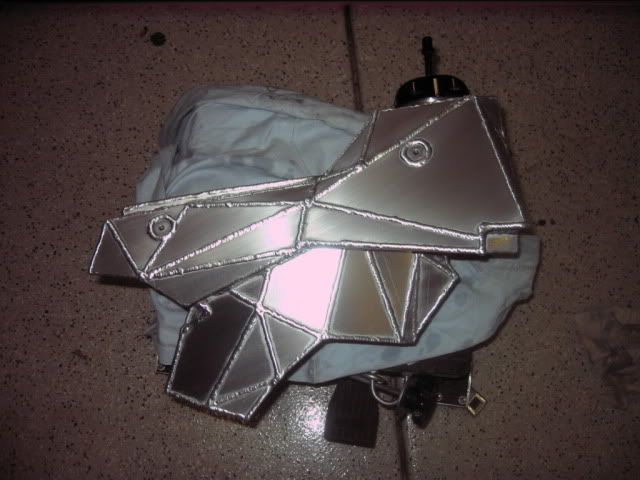
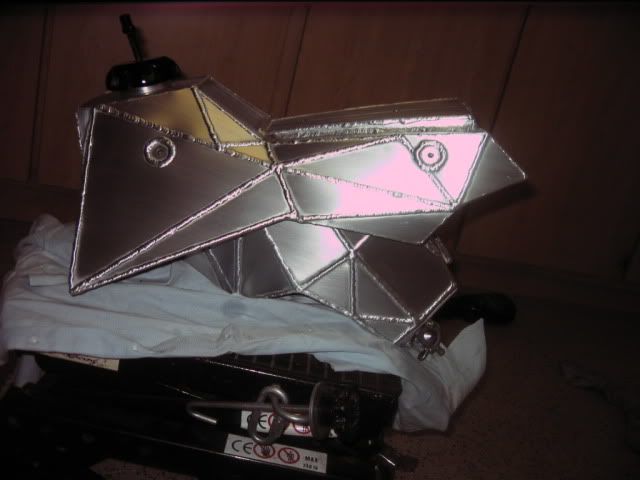
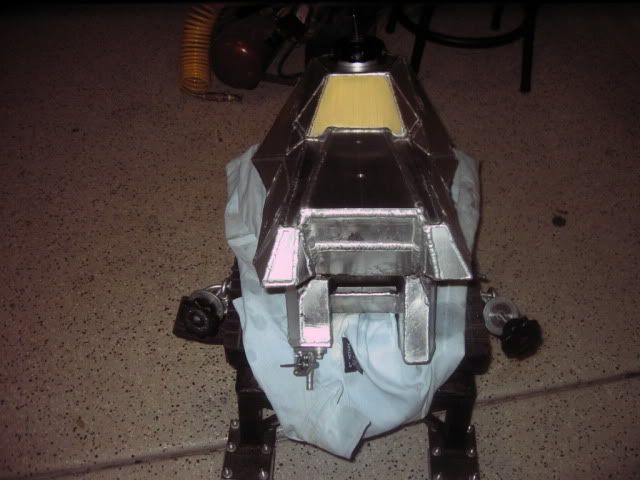
And here's the final product.
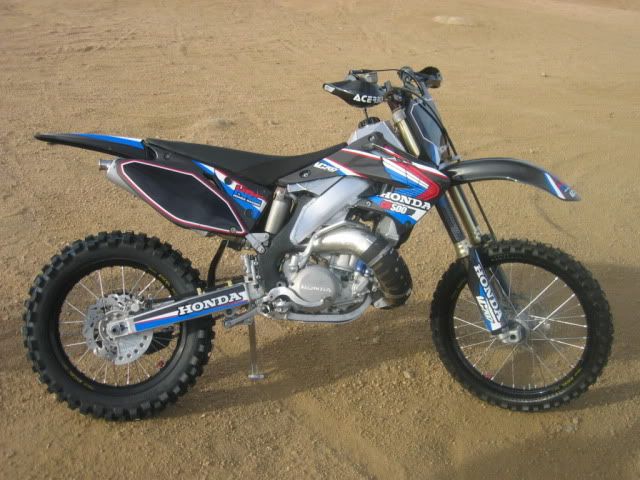
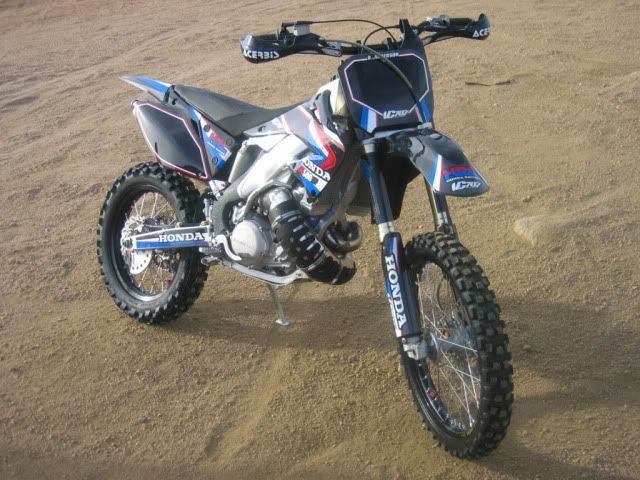
This is the bike I wanted to put together the first time around, but didn't have the coin. So after several months of riding it, I decided to pull the trigger on making it look like a newer bike over the holidays.
I worked with Noah over at Visual Concepts
http://www.vc707.com/motorcycles/ to put the graphics together. Real cool guy to deal with and did an excellent job on coming up with a design that caught my eye.
I suppose this is where the shit talkin' starts, but I had taken my engine to GSS before Bob's ordeal, but got it back after his departure from the site. I guess time will tell if I'll have any issues, but so far I'm happy with his work (Trail Port) and I'll get to beat it up pretty good in the AZ desert.
I learned a lot along the way. Through some helpful sticky's, I learned how to lace and true the wheels I built with the stock hubs and Exel rims. I'd already taken this bitch apart a million times, so not much to learn there. I met a cool young fabricator that will probably do my next conversion if I get divorced.
Hopefully I'll make it to Hoonfest this weekend if anyone wants to check it out. She's already got a few scratches, but I guess that's why I took the pictures a before I rode it. Thanks to all the hoons that keep pushing the envelope and innovating. Without these two sites, I doubt I would have ever embarked on this conversion and would be riding around on the old steel horse...but life could be worse I suppose.
Posted: February 8th, 2011, 11:28 pm
by Flatbiller
Looks bitchen!
Posted: February 9th, 2011, 4:35 am
by 2strokeforever
good job looks nice
Custom radiators built by Neil at Fluidyne Powersports (spendy, but top notch job to my specs and a really nice guy to deal with)
if you lay (or smash) it down lots its worth looking into radiator braces to protect them from getting peeled over
A Gen 3 Conversion
Posted: February 9th, 2011, 6:41 am
by cryzsurfer
Looks great. I wish I'd have done the recessed threaded bungs for the shrouds, but got too far along and didn't want to get a lot of shavings in it. The whole project looks great and tell your welder thumbs up.
Craigus
Posted: February 9th, 2011, 8:31 am
by dubious01
Awesome job!
Posted: February 9th, 2011, 11:49 am
by yota
tank is sweet, any idea of the cost in it? looks like a cup and a half or so of fuel will stay in ea of the wingtips but I guess it willl slosh out, call it a reserve. nice job man.
Posted: February 9th, 2011, 12:05 pm
by cr_denny
around $350 to build the tank. I knew the only way to maximize that size was to do something custom. I figured an IMS was around $250 new, and I'd probably be f'ing up the deformation of a plastic tank. I guess I was okay paying extra for the bling and knowing I could carry just as much gas as my buddies on 450's.
Cool thing now is, I can put a fork in this. I'm completely done with this bike. I have a spreadsheet somewhere with my overall costs to put it together between buying the chasis and selling parts. I need to update it and figure out what my total out of pocket has been.
Posted: February 9th, 2011, 1:46 pm
by yota
" I have a spreadsheet somewhere with my overall costs to put it together between buying the chasis and selling parts. I need to update it and figure out what my total out of pocket has been."
don't do it (:
If he wants to make another tank let me know. I'd be interested if it doesn't rub the frame and doesn't stick out too far.
Posted: February 9th, 2011, 1:49 pm
by Roostius_Maximus
ya, never add that shit up
Posted: February 9th, 2011, 2:48 pm
by Gravel Scratcher
x 2
Posted: February 9th, 2011, 5:12 pm
by 100hp honda
bike and tank are sweet
Posted: February 9th, 2011, 6:15 pm
by Roostius_Maximus
i want some of those airbox vents
Posted: February 9th, 2011, 6:24 pm
by Rue
100hp honda wrote:bike and tank are sweet
X2
Posted: February 9th, 2011, 6:33 pm
by cr_denny
I didn't even know they still had them available, but I've since seen them on Rocky Mountain. UNI makes them. I've had those things laying around for probably 12 years in an old gear bag and stumbled across them hiding in one of the pockets and figured WTF, I'll pop a few holes in the airbox.
I can check with the guy that built the tank and see if he's interested in undertaking another one. I had the filler neck turned by a different guy. That cost me like $60 bucks, but I think I figured that into my total $350. It took him a while to get the tank done and he built it in the frame, so my bike was at his house for awhile. It is ever so close on the inside of the spars, and when I had the sides of the frame done with the bed-liner stuff, I had them do the inside and top of the spars where the tank would ride. It's a really nice fit. As far as the wings that wrap around the frame like those big Acerbis/IMS tanks, there's a pretty decent gap between the tank and the outside of the spars.
Posted: February 9th, 2011, 6:54 pm
by Rue
Roostius_Maximus wrote:i want some of those airbox vents
Rocky Mountain here is the link:
http://www.rockymountainatvmc.com/produ ... ockId=1960
Fluidynes
Posted: February 9th, 2011, 7:02 pm
by AMA714
2strokeforever wrote:good job looks nice
Custom radiators built by Neil at Fluidyne Powersports (spendy, but top notch job to my specs and a really nice guy to deal with)
if you lay (or smash) it down lots its worth looking into radiator braces to protect them from getting peeled over
Nice thing about Fluidynes is they'll take a beating!! I used to warp my stock honda rads by squeezing with my knees so much... The Fluidyne rads I put on took a severe crash and hardly even bent the mounting tabs..
Posted: February 10th, 2011, 6:55 am
by Roostius_Maximus
i weld an 1/8"aluminum plate to the outer edge of the rad. shes hit the ground hard on the hills a few times