alright well i appreciate that, i dont have time to wait for honda swingarm parts, so i sanded the right a tick and added one spacer about .280" thick to the left side of the swingarm.... the only reason i want the motor centered is so the exhaust clearance looks symmetrical and proper with the centerline of the handmade Y section, which i weld out by itself before i weld the motor tabs....so it cant pull or whatever...
anyways i appreciate the advice and the idea of saving time is great but wheni have 8 hours in the Y by itself im not to worried about going the extra mile for a "signature" build....anyways a couple more pics, got the Y welded up today so tomorrow motor mounts and pipe, i already cut off the headstay so i could change the location and i only run one bolt hole pickup at the frame and one at the head with 1X1/4" flat strap..... this isnt triangulated but a little flex cant hurt these rigid bastards plus if that fails you'll have much more pressing issues obviously so thats just my style...
anyways, welded up, motor tabs and doubler plates tomorrow (love em or hate em , they've worked for me in all 6 other builds so im fine with it......handmade "works" Y and welded doublers , not "factory" lookin' on purpose although I AM NOT TRASHTALKING factory lookin' builds by any means!!!!!) anyways i also discovered (when i opened my eyes) that the radiators only have one top hose on the left side compared to the 450 and CR250R radiators so it looks like Teemtrubbles head mod is pretty mandatory if a builder is using 250F/X radiators unless you want to add a spigot to the top of the right one and melt your tank to hell!!! Save one for us Mike, although i think we'd prefer you do the installation and welding.....more on that later!
AlisoBob/DannyG!!!!!!
A. where/what do i have to weld to relocate this coil as it obviously wont fit inside the shroud~under the tank like in all my other 450/250R builds....
B. My bro has an fmf with a long ole Q silencer.... any tips or ideas worth mentioning before they get the saw???
please advise......10-4 thanks again hoons for the support and advice!
SeanMcDougall


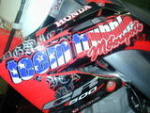
Radiator's not modded yet, but just a reference picture.