Hi guys. I guess some of you also joins the CR500riders forum, but i thought i put up a thread of my build here too. maybe someone is intrested and a bit curious of the Liger kits.
As said i started to think about building a new bike for iceracing here in Sweden, but as i build it on a registered frame i will maybe even make an Enduro registration on it and use it "for transportation to training and competition" too ;=).
In June i decided to take contact with Dave (RSSS396) here at the forum. He had a very good reputation from other guys both here and on 500riders. That is nothing i have regretted! Very good guy to deal with! It's not often you get in contact with someone that helpful and that put down so much time and effort to solve everything for a customer.
After some discussion we decided that the new version on 550cc would probably be the best choice as it will fit easier in the stock cases and also revs better with less vibrations.
This build will be made in a stock steel frame with some mods to make everything fit. The build has proceeded a bit now so i have done some case work, all parts from Dave has arrived, the frame is being modded.
I put up some later.
Johnny.
Swedish CR550 Liger build

-
johnnytheswede
- Posts: 158
- Joined: April 22nd, 2011, 3:40 pm
Hi Bob! Yes, it's a quite big project, but i thought i give it a go :=).I have great support from Dave who i bought the parts from, so it's very nice.
The frame mods that required the engine blocks to be fitted is just done,so now it's only some small stuff to fix with the frame. Engine will be built soon too.
The frame mods that required the engine blocks to be fitted is just done,so now it's only some small stuff to fix with the frame. Engine will be built soon too.


Last edited by johnnytheswede on May 29th, 2014, 9:48 am, edited 1 time in total.

-
johnnytheswede
- Posts: 158
- Joined: April 22nd, 2011, 3:40 pm
-
Roostius_Maximus

- Site Admin
- Posts: 4641
- Joined: November 16th, 2007, 3:24 pm
- Location: Mt Nebo, Manitoba, Canada
- Contact:
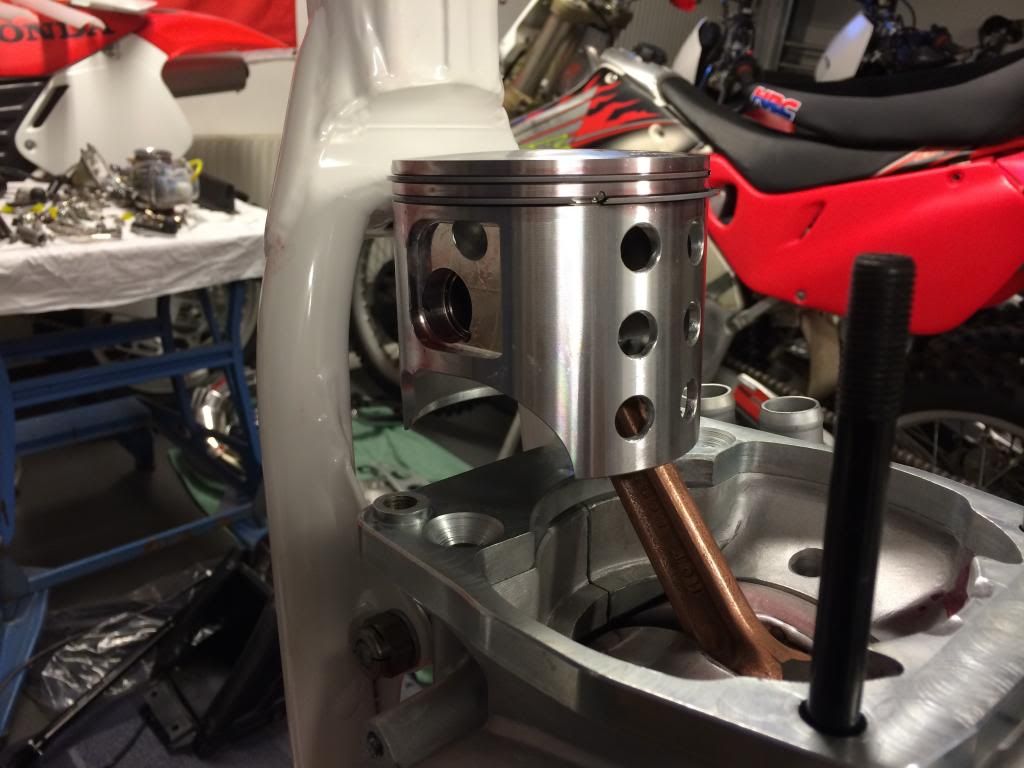
because this is built as an insert head they had previously done the decomp in the cylinder 
http://www.youtube.com/user/500bigbore
My CR500 Tech Reference... http://sdrv.ms/1a0CIiz
MRE Components... http://sdrv.ms/1bs2zhd

My CR500 Tech Reference... http://sdrv.ms/1a0CIiz
MRE Components... http://sdrv.ms/1bs2zhd
-
johnnytheswede
- Posts: 158
- Joined: April 22nd, 2011, 3:40 pm
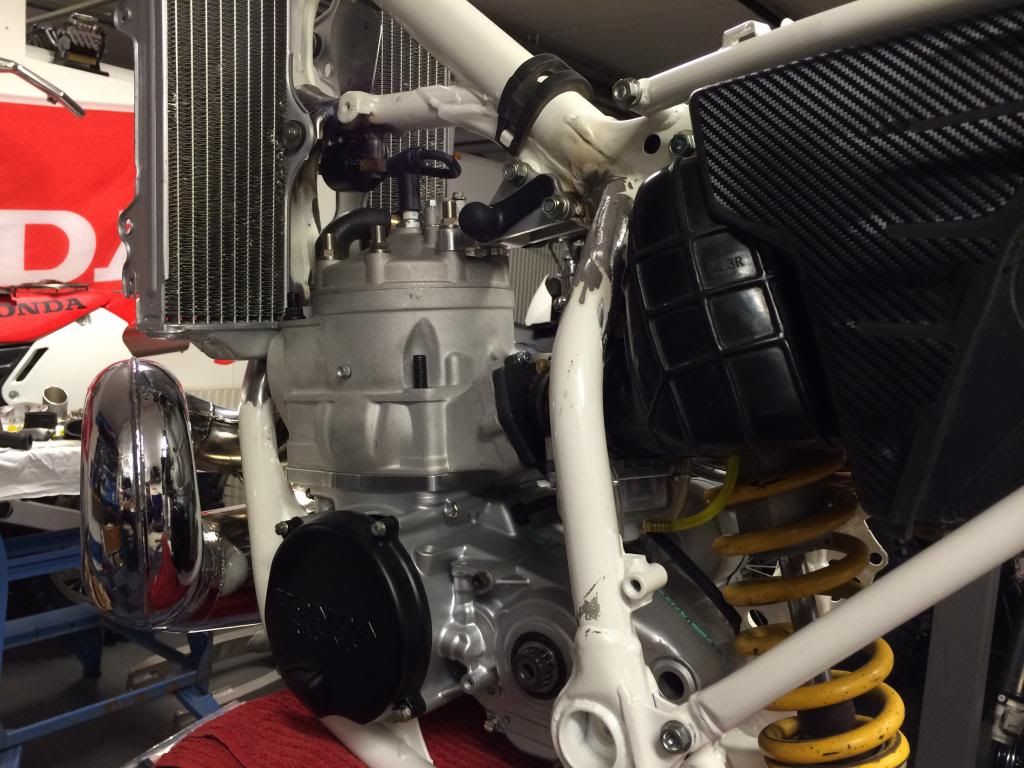
Yesterday we continued with the frame mods. We decided to raise the radiators about 7mm, and also move them forward about 10mm at the lower mounting point, which will be 5mm at the middle mounting point. This is done because we have made a cutout in the frame where the radiator hose goes beween the radiators above the exhaust port. The cylinder is bigger and the hose gets squeezed between the frame and above the exhaust port if this isn't done. Maybe i could have solved this with a more simple solution, but my friend is not the guy who likes to do things "ok". It should be looking stock and properly welded mounts. His 2008 Service Honda looks brand new..
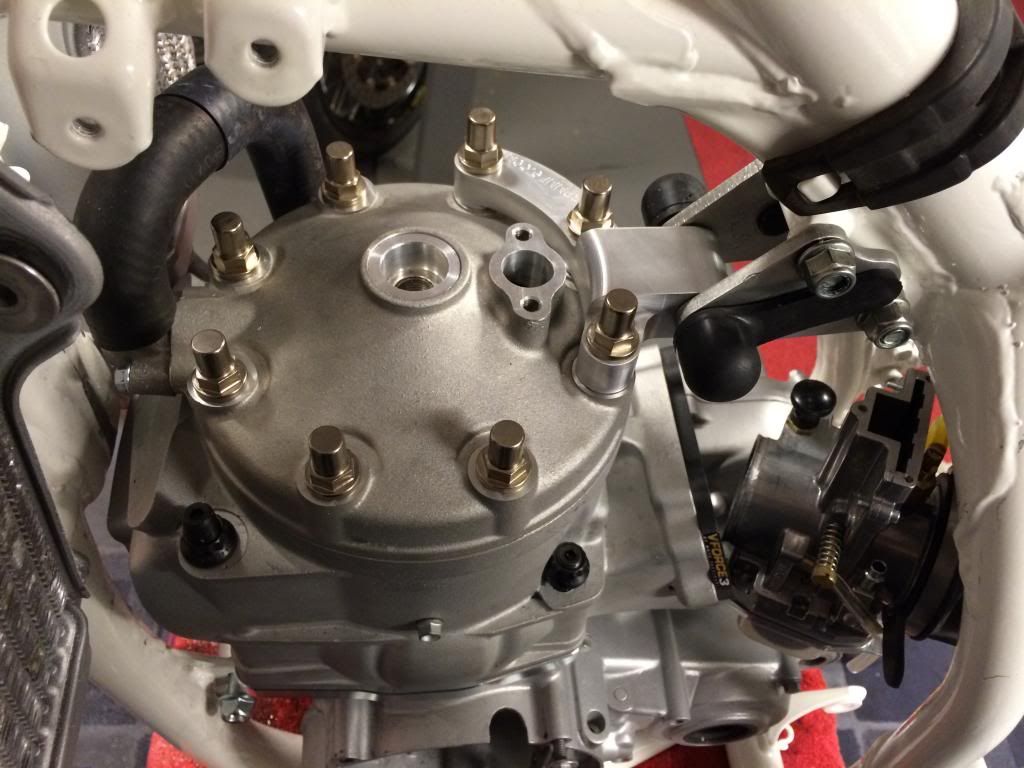
We also fabricated a mount for the CDI where the coil sits on a stock 500. We moved the coil down to the underside of the frame pipe that it sits above normally, above the cylinder head.
Johnny
We also fabricated a mount for the CDI where the coil sits on a stock 500. We moved the coil down to the underside of the frame pipe that it sits above normally, above the cylinder head.
Johnny
-
johnnytheswede
- Posts: 158
- Joined: April 22nd, 2011, 3:40 pm
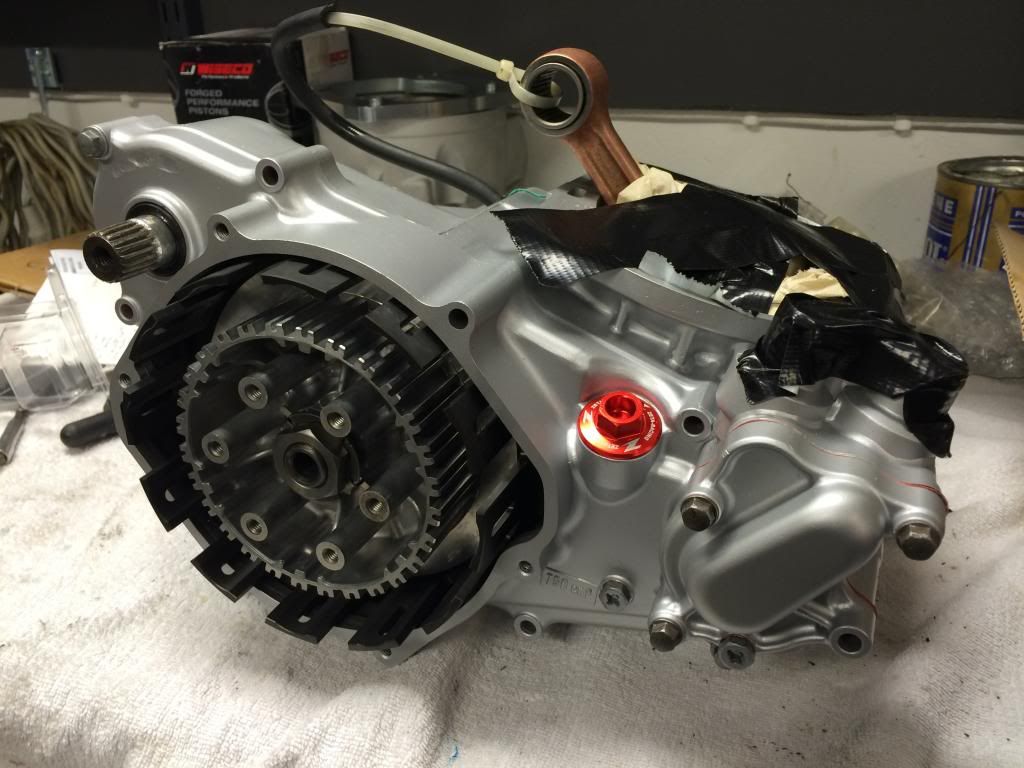
So, yesterday i got my engine back from my friend who has helped me rebuild it. Everything is new, except the gearbox that has been back cut on 1st, 2nd and 3rd gears. Tomorrow i will put the engine in the frame for the last measurings before i paint it. I hope i will be done with the frame now. It took more work than expected, as usual with projects like this. The bolts on the engine block will be fixed :=).

-
johnnytheswede
- Posts: 158
- Joined: April 22nd, 2011, 3:40 pm
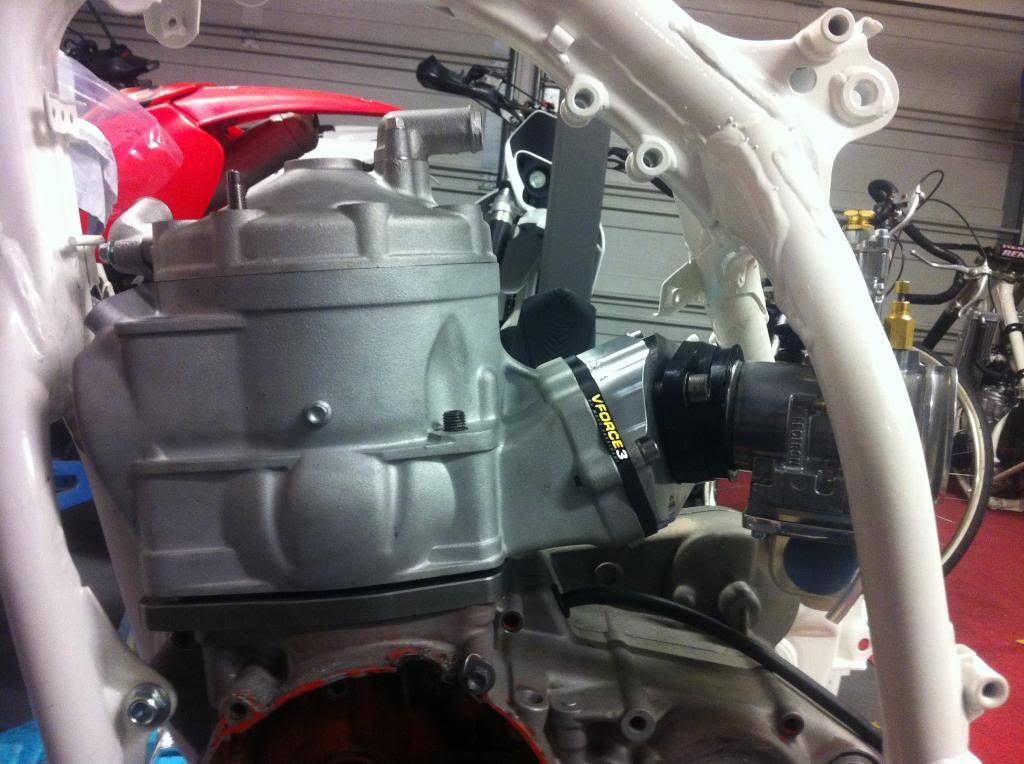
Today i have done the final fitment in the frame to check that everything fits after all the mods we have done. Finally it seems like everything fits! This hasn't been easy, to get a lectron 48 into the stock frame. Finally it works, even with the thicker V-force3 reedcage. I haven't decided which one to use yet. I will talk to Dave about what he thinks too.
This is how it looks when it's all in the frame. The stock tank fits fine when i have a shorter head pin bolt on the right side, but the alloy tank is not fitting well, so i think i have to leave those thought unfortunately. I don't want to cut in a VRP factory tank..
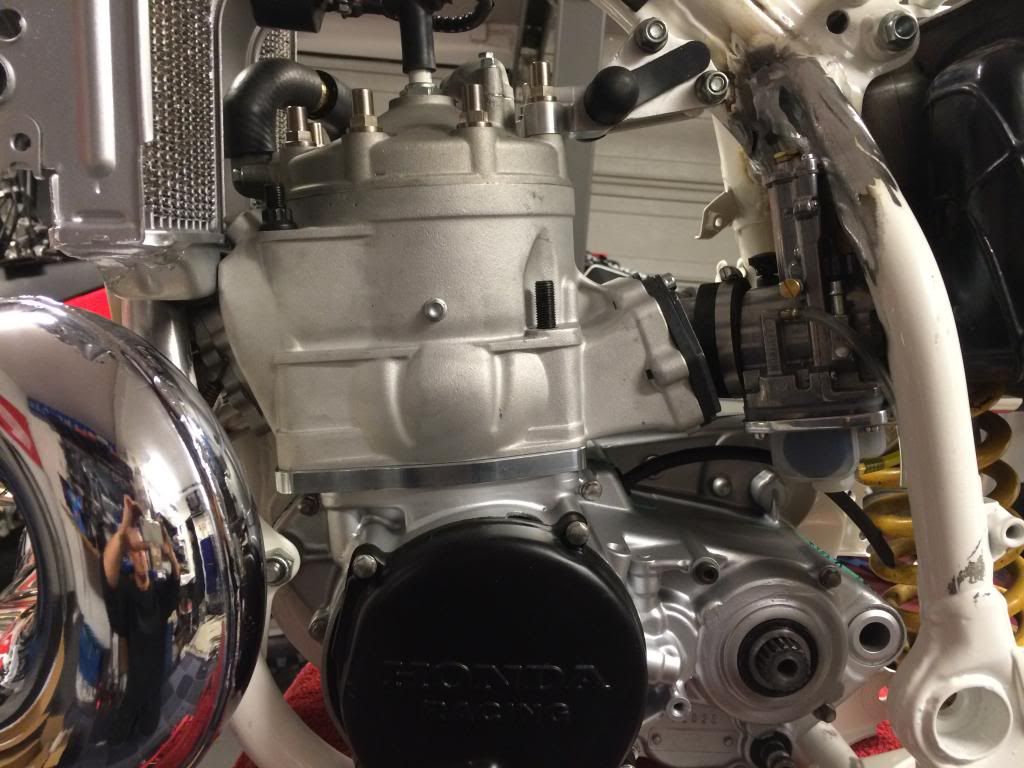
This is how it looks when it's all in the frame. The stock tank fits fine when i have a shorter head pin bolt on the right side, but the alloy tank is not fitting well, so i think i have to leave those thought unfortunately. I don't want to cut in a VRP factory tank..


-
johnnytheswede
- Posts: 158
- Joined: April 22nd, 2011, 3:40 pm
Working on it, Bob:=)! The frame will be painted next week. That is what limits me right now. After that everything will start to be put together. I have prepared all the parts as much as i can to be able to get it together as fast as i can:=). There is not only the build itself that has been worked on. The whole bike will be restored with many new parts, glassblasted, painted, anodized parts everywhere, own designed decalkit is made, tailormade seat cover, restored brakes and so on, so it takes time with everything! But i hope it will look and run good when i'm done. I have great support with a lot of stuff from Dave, so that is really great :=).
-
johnnytheswede
- Posts: 158
- Joined: April 22nd, 2011, 3:40 pm
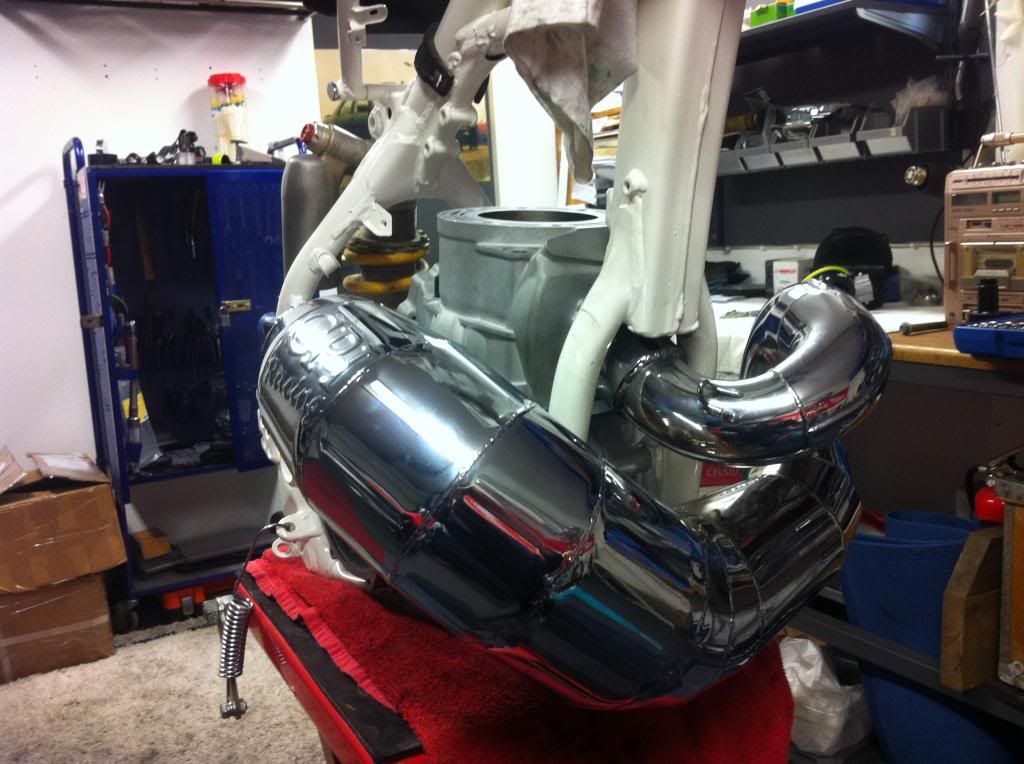
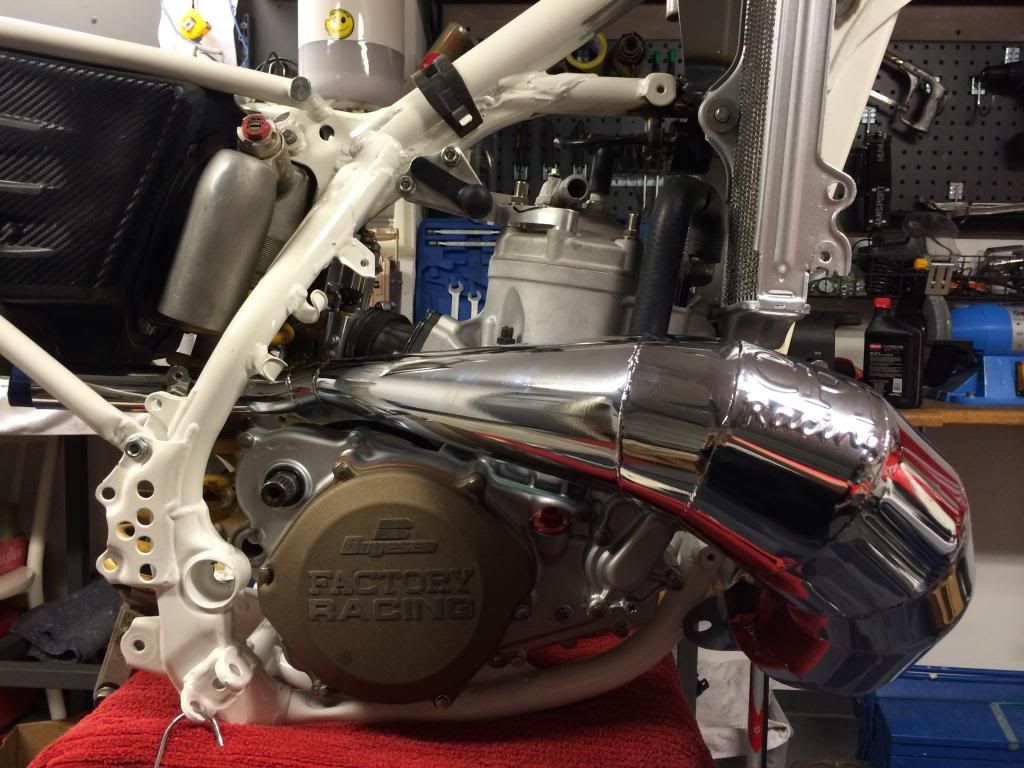
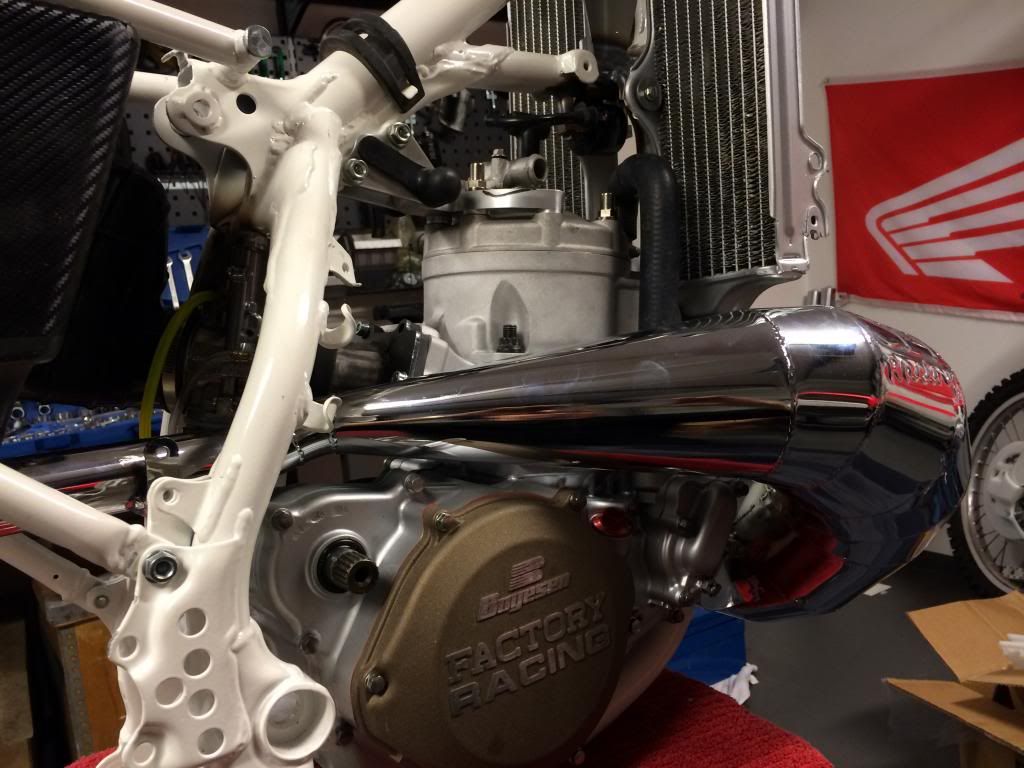
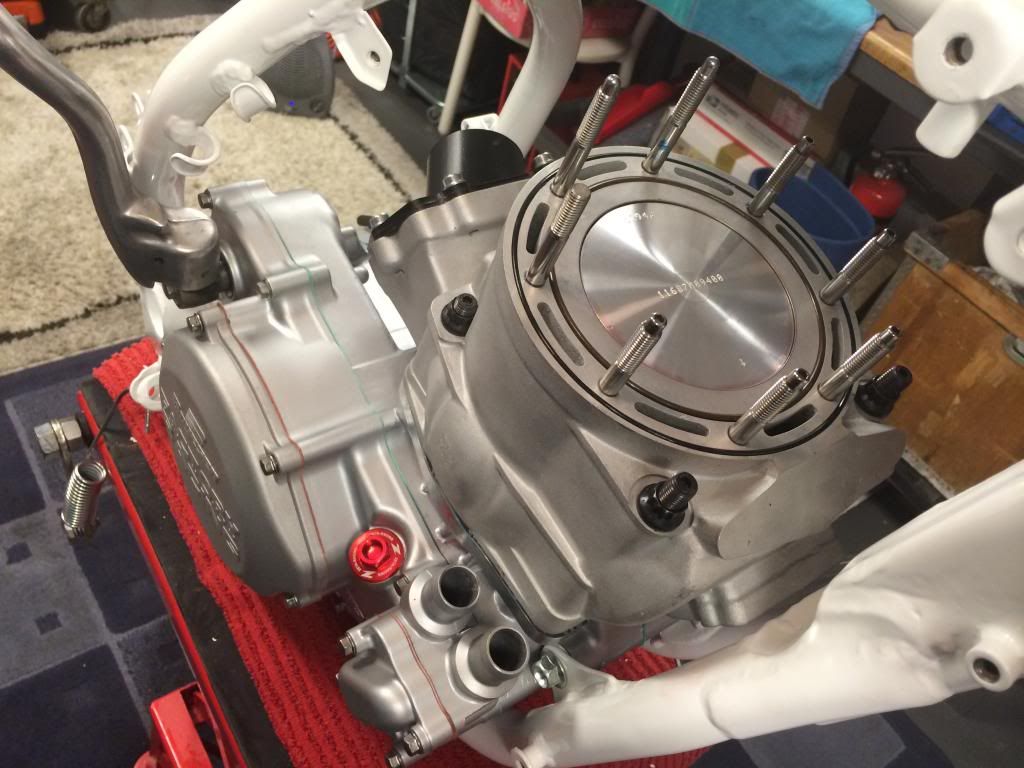
Finally i got the frame back from the powder coating yesterday. Now the final assembly can start! me and my son had some quality time today in the garage:=). We started to put the bottom end into the frame for, hopefully the final time. After that we started to put the top end in with the lightened piston first of course. Then the two base plate gaskets, slightly glued with Loctite gasket sealer. Cylinder went on nice together with the cylinder head and it's o-rings and headstay. Then some measuring with the fueltank, remove it, cutting of a pin bolt for clearance, remove again, measure, cut, ans so on. It takes time!But finally it went on nice with a little more support under the front frame rubber for the fueltank to raise it just about 3mm for clearance.
Then it was time for the tight stuff... Carb and intake. It is so tight that i only have 2-3mm of clearance between the frame and upper part of the carb and the powerjet screw.The carb sits very tight and i hope vibrations to the carb won't be an issue. Airbox and subframe went on also today. Tomorrow i will continue with more assembling!
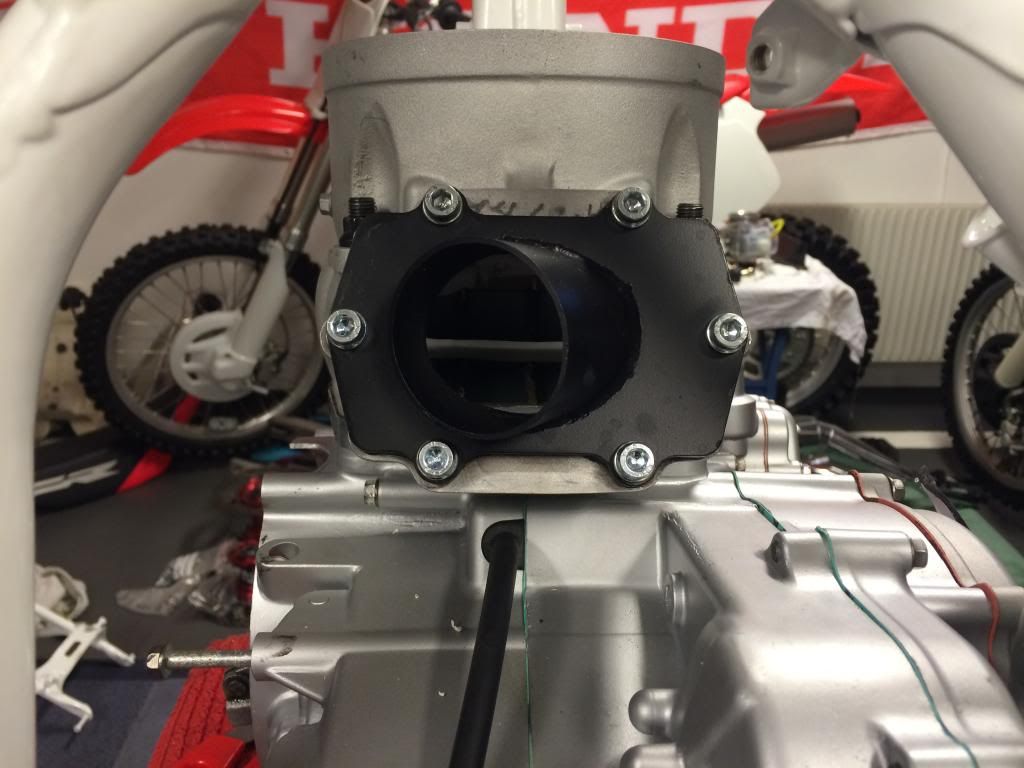

Then it was time for the tight stuff... Carb and intake. It is so tight that i only have 2-3mm of clearance between the frame and upper part of the carb and the powerjet screw.The carb sits very tight and i hope vibrations to the carb won't be an issue. Airbox and subframe went on also today. Tomorrow i will continue with more assembling!


-
johnnytheswede
- Posts: 158
- Joined: April 22nd, 2011, 3:40 pm
-
johnnytheswede
- Posts: 158
- Joined: April 22nd, 2011, 3:40 pm
-
johnnytheswede
- Posts: 158
- Joined: April 22nd, 2011, 3:40 pm
IT'S ALIVE!
Finally i got my project running and almost totally finished! There is som small stuff left to do, like making a proper water outlet Y-connector to the hoses, hopefully get my factory marzocchi forks modified to suit, and also get a good check at the jetting, probably in a dyno for a good ground setting to work further on and see how certain adjustments are affecting the performance and so on.
I am very glad that i got this quite difficult project together, and you don't build a bike like this without good help from your friends.
First of all i must say, again, that Dave has been fantastic to have as a support, problem solver, parts supplier, explainer, technical informer. Well, you get it. I have never had such support from anyone before in the motorsport business, and even that we live so far away from eachother, it has worked very good.
Then there is my friends here at home, Mats and Peter at Momek stainless and alloy fabrications, Patrik Erlandsson at Honda Sweden for example.
Anyway, here is a short movie of the first startup today. 3-4 prime kicks, and then it fired at 4th kick and ran perfectly without any adjustments on needle, idle or anything. Even the jetting seems good :=)!
Happy Sunday, guys!
http://www.youtube.com/watch?v=LZ_uURNF ... LGpAHmmg6B...
Back to top
-
johnnytheswede
- Posts: 158
- Joined: April 22nd, 2011, 3:40 pm
johnnytheswede wrote:IT'S ALIVE!
Finally i got my project running and almost totally finished! There is som small stuff left to do, like making a proper water outlet Y-connector to the hoses, hopefully get my factory marzocchi forks modified to suit, and also get a good check at the jetting, probably in a dyno for a good ground setting to work further on and see how certain adjustments are affecting the performance and so on.
I am very glad that i got this quite difficult project together, and you don't build a bike like this without good help from your friends.
First of all i must say, again, that Dave has been fantastic to have as a support, problem solver, parts supplier, explainer, technical informer. Well, you get it. I have never had such support from anyone before in the motorsport business, and even that we live so far away from eachother, it has worked very good.
Then there is my friends here at home, Mats and Peter at Momek stainless and alloy fabrications, Patrik Erlandsson at Honda Sweden for example.
Anyway, here is a short movie of the first startup today. 3-4 prime kicks, and then it fired at 4th kick and ran perfectly without any adjustments on needle, idle or anything. Even the low speed jetting seems good :=)!
Happy Sunday, guys!
http://www.youtube.com/watch?v=LZ_uURNF ... LGpAHmmg6B...
Back to top
-
johnnytheswede
- Posts: 158
- Joined: April 22nd, 2011, 3:40 pm
So, finally i have taken some short bursts with the bike. First a short slow ride to check that clutch and gearbox was working properly, and today i went out and started to give it som more throttle. I still haven't used much above half throttle because it was very slippery outside. We have -3C here, and the roads are contaminated with a layer of dirt and salt, so there was some wheelspin and the bike wanted to go sideways now and then. Just some short runs and then directly up to the garage and wash it off! I am working on the jetting, and the bike was a bit lean directly from cold, so i have to do some adjustments to that and also buy some more needles to try out.
A little movie:
http://www.youtube.com/watch?v=G7K75fFCTBE
A little movie:
http://www.youtube.com/watch?v=G7K75fFCTBE


-
johnnytheswede
- Posts: 158
- Joined: April 22nd, 2011, 3:40 pm


-
iggys-amsoil
- Posts: 3602
- Joined: June 1st, 2007, 6:09 pm
- Location: Just North of March Airfield CA
Interesting Piston design. It would be nice or is there a stocker replacement?
And or why didn't Honda do that in the first place?
Could have saved a lot of scatered piston parts.
And or why didn't Honda do that in the first place?
Could have saved a lot of scatered piston parts.
Trinity Racing mild porting FMF
62 pilot, EGH needle, 172 main
03 Gen III CR250 frame
2013 Dodger Charger 5.7 Hemi
http://www.prisonplanet.com
Your Amsoil Customer # 350882
62 pilot, EGH needle, 172 main
03 Gen III CR250 frame
2013 Dodger Charger 5.7 Hemi
http://www.prisonplanet.com
Your Amsoil Customer # 350882
-
johnnytheswede
- Posts: 158
- Joined: April 22nd, 2011, 3:40 pm