My latest project

Recount your rebuilds here!
User avatar
jbsleddin
PVT. 1st Class
Posts: 251
Joined: June 12th, 2011, 10:48 am
Location: Wheatley, Ontario, Canada

My latest project

Post by jbsleddin »

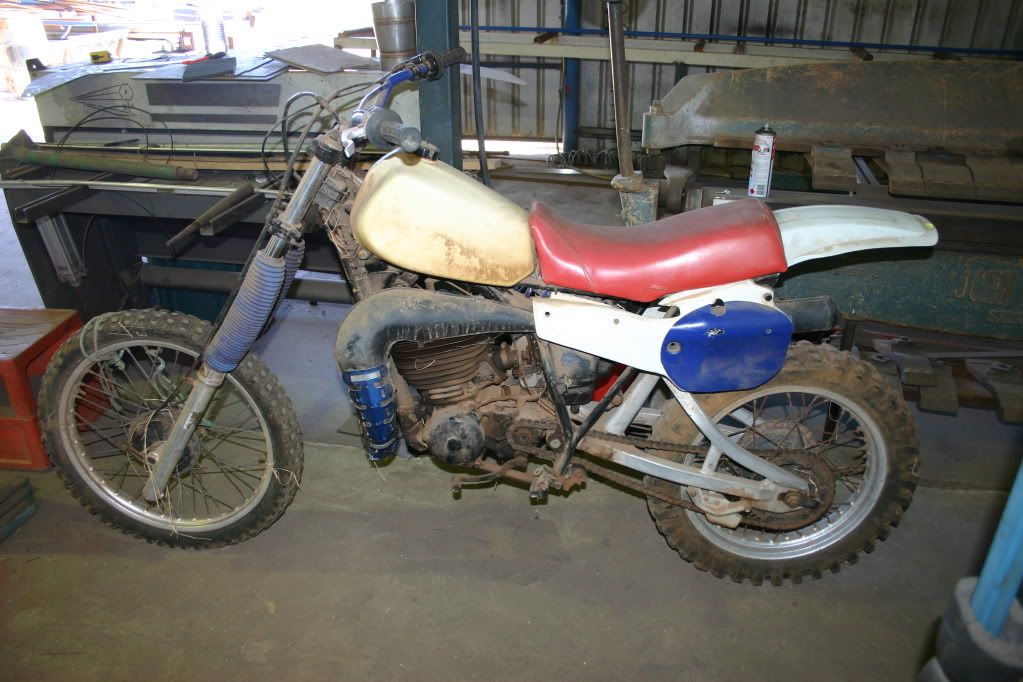
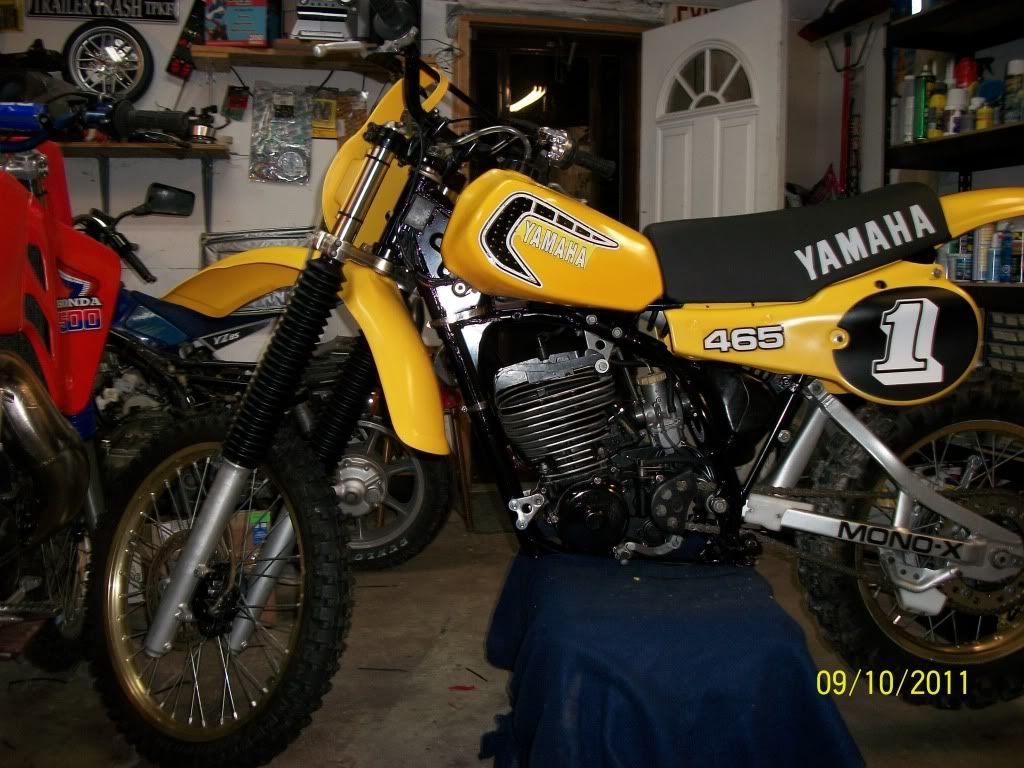
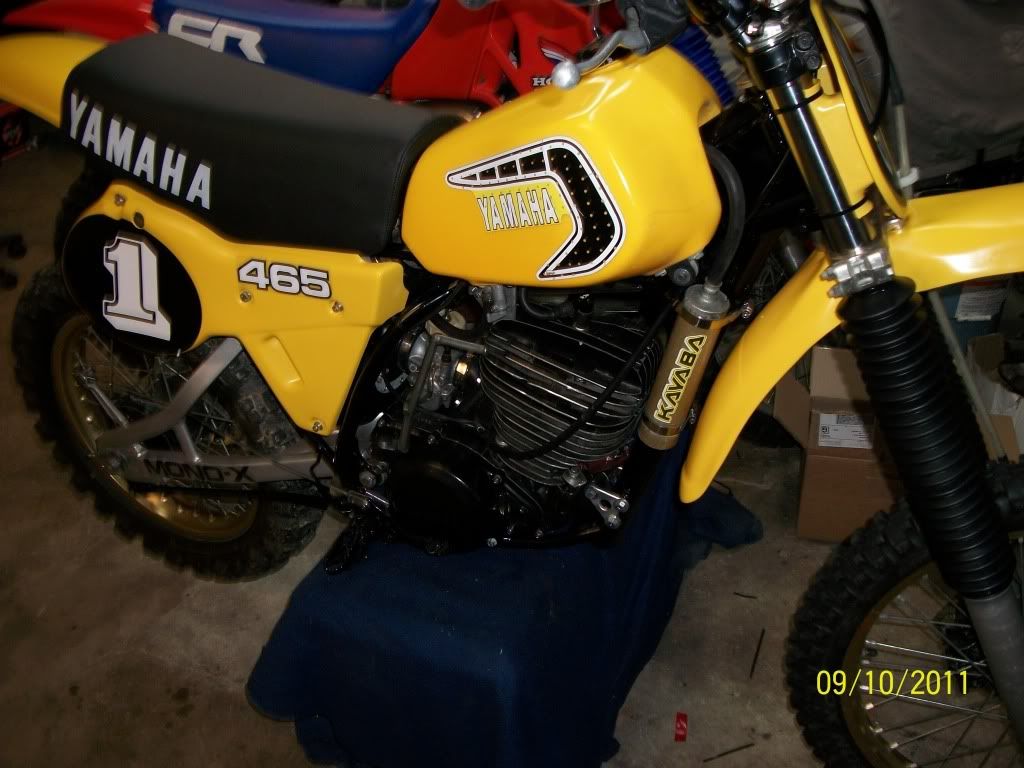
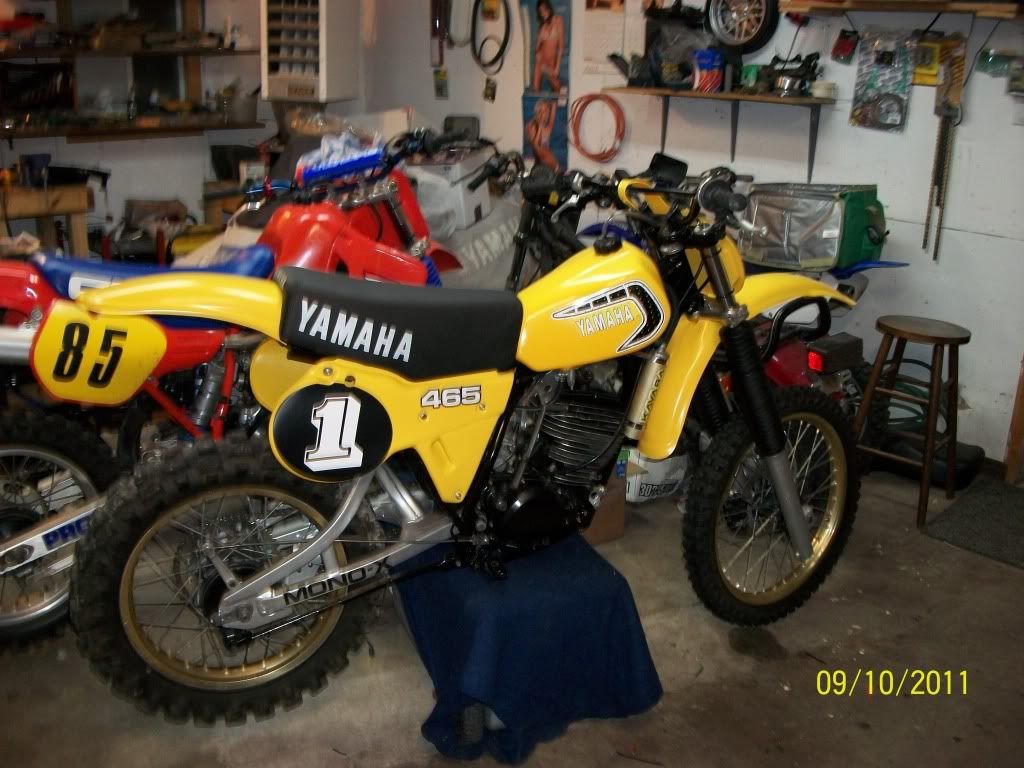
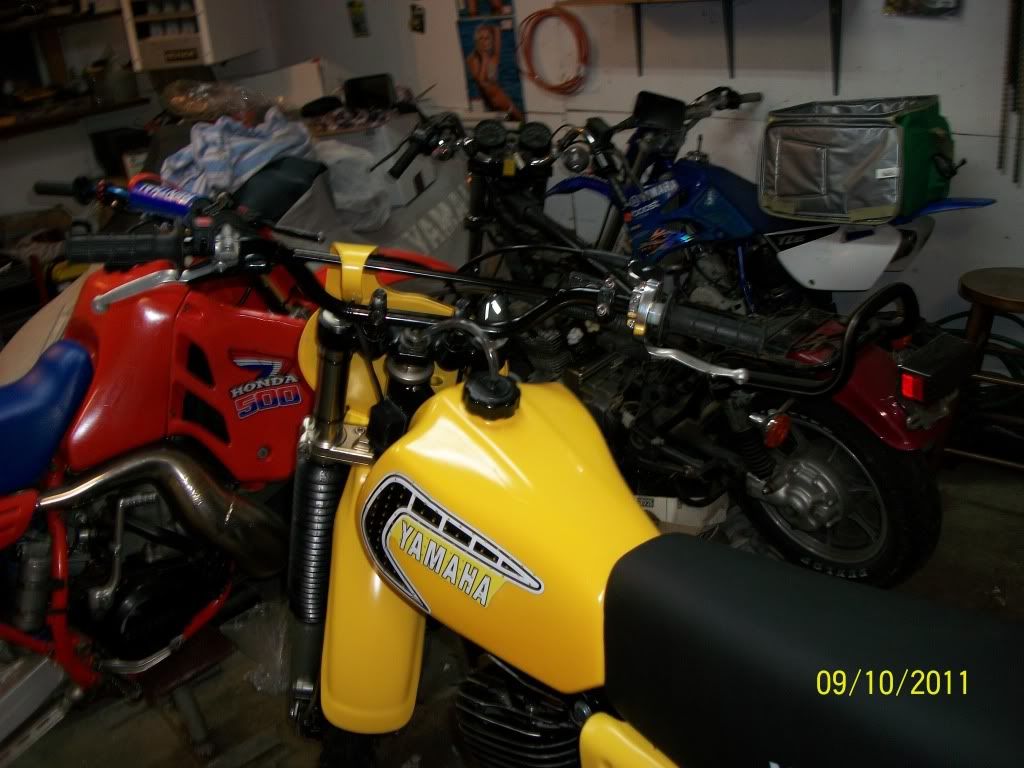
This is my latest piece of work that I plan to revive. In case you can't identify this beotch, it's an 81 YZ 465. Needed a loving home, had been neglected and beaten to the point of no return. But life will go on, and the ol' YZ will breathe fire once again. Have a look at the poor old girl as she looked when I adopted her.
Image
Image
Image
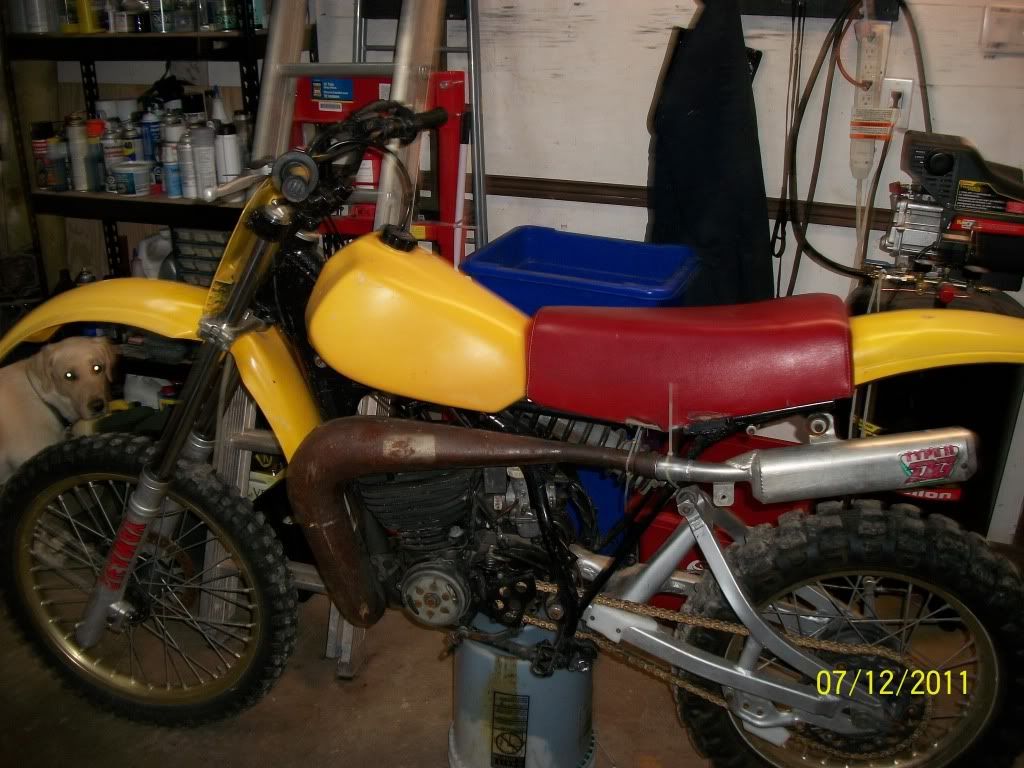
I wanted to pick up an 84 CR500, but came across this bike and couldn't pass it up. I had an 88 YZ 490 when I was 15 and loved it, now near 30 and having a mid-life crisis :lol: :lol: :lol: Just have to keep my ADHD self occupied with something, although I can never seem to finish a job before starting a new one. :wink:

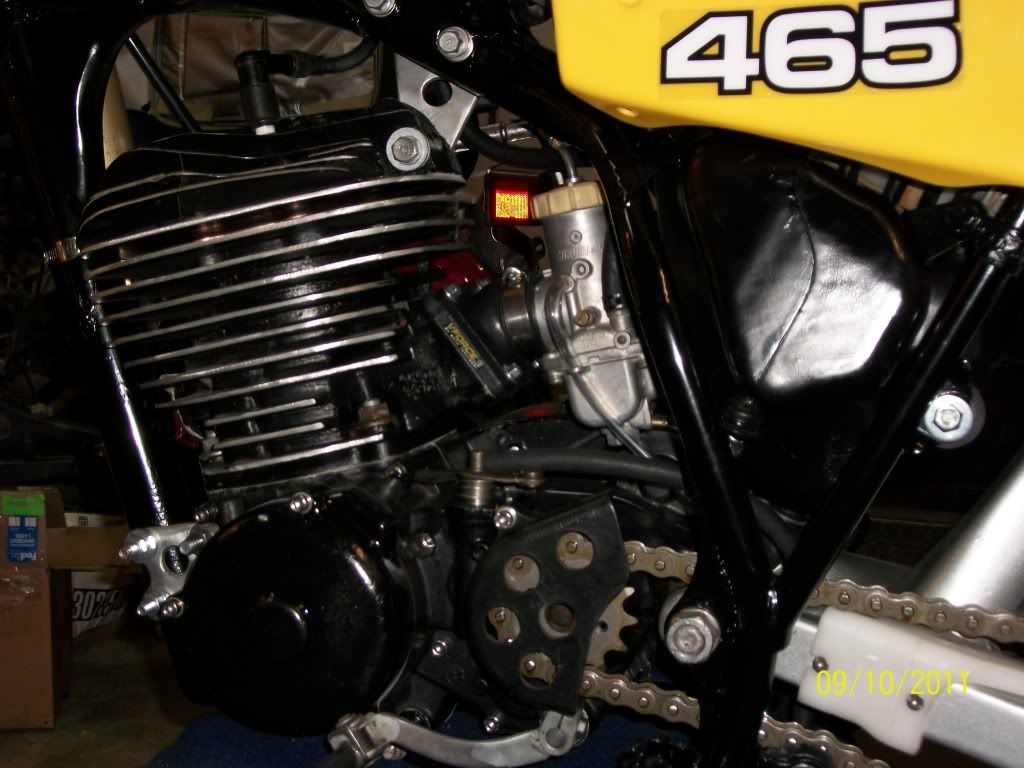
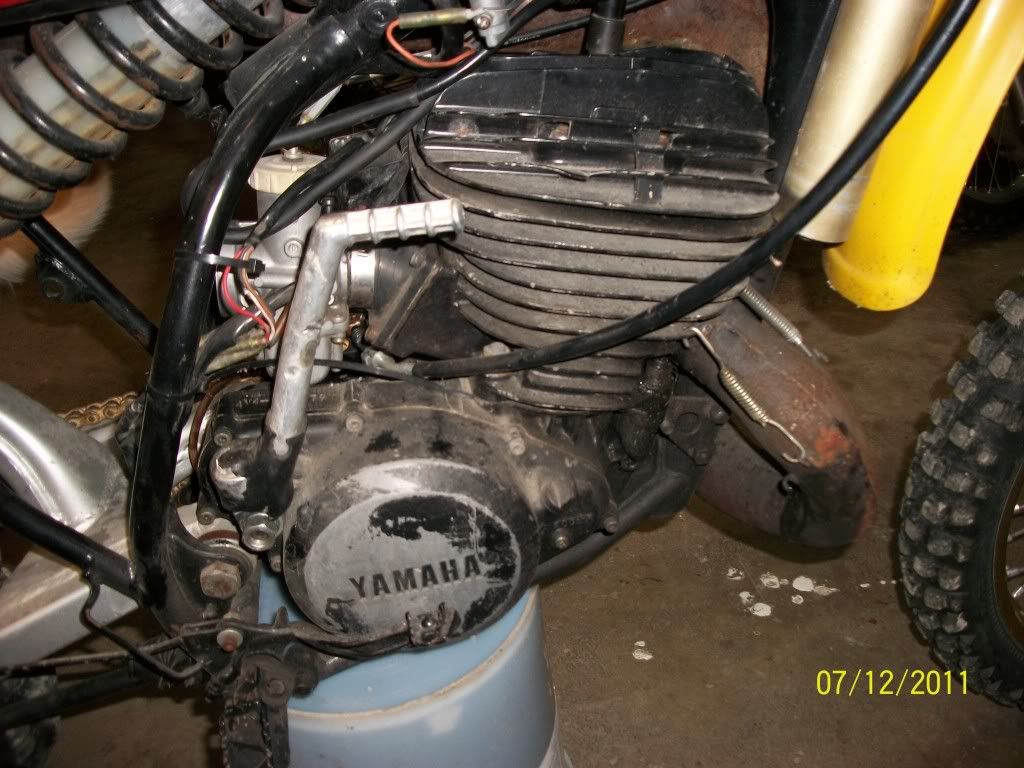
The bike is stripped and I keep finding more and more Niguyver half ass rigging than you could imagine. All frame bolts are forced into the threads, and none are metric. Must have been a "complete rebuild", using SAE bolts and binder twine. Plenty of zip ties as well. The owner told me he had a new sleeve and piston installed. Well at least that is true. He said it was hard to start because it wasn't jetted right for the DG pipe! LMFAO :lol: It was hard to start because the crank bearings were F'd and the seals were leaking. Must not have noticed that when he "rebuilt" the engine :? 
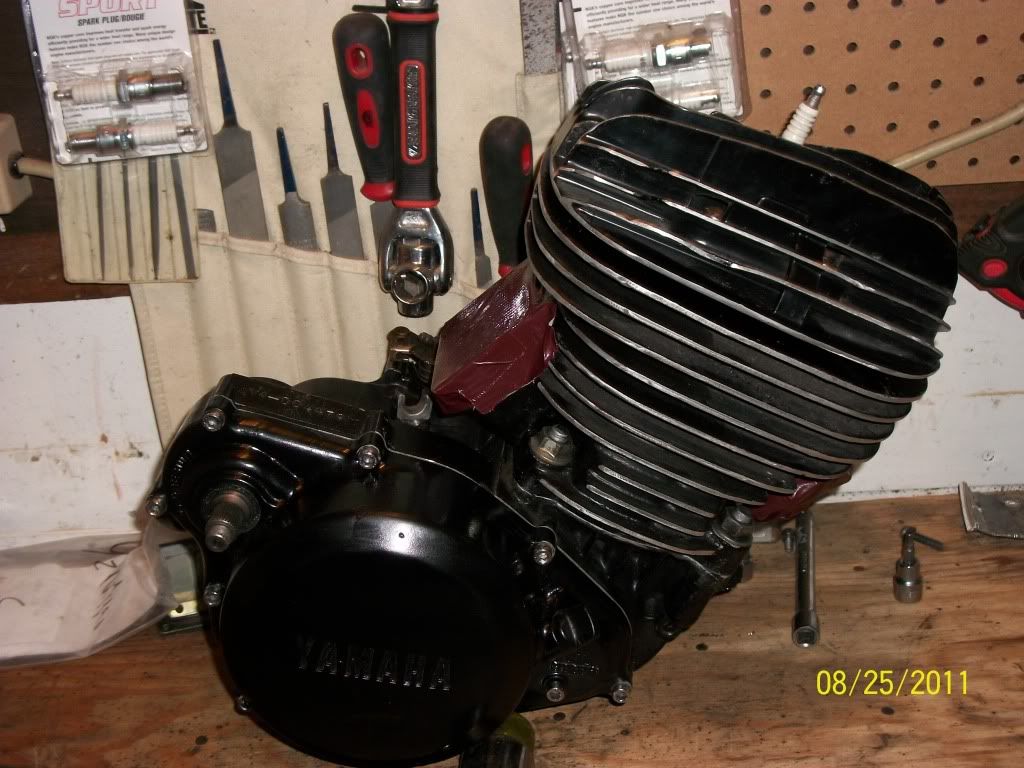
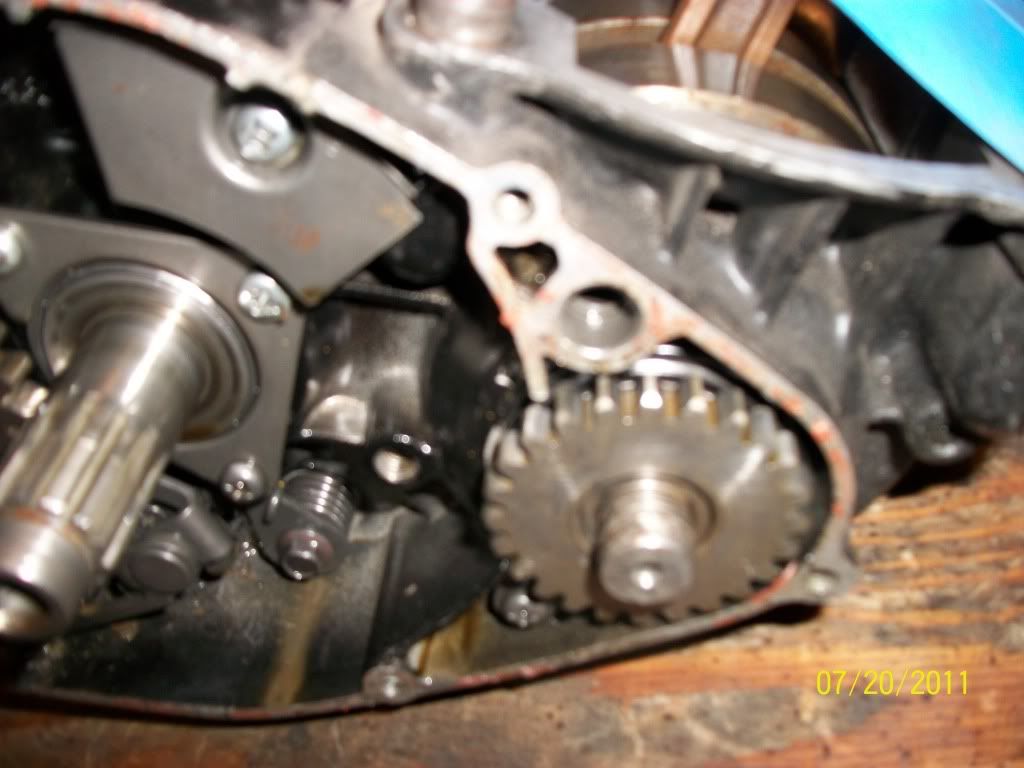
The bottom end was full of WATER and trans oil, could have also contributed to the no-start condition. The threads on the pto side of the crank are completely stripped, and in place of the nut that holds the gear on, he had a lock collar (set screw type) with a coating of JB weld overtop. Not sure what I am going to do with it at this point. Anyone ever try to cut new threads on one. I was going to try to run a die over it and put a smaller nut on, really nothing to lose at this point.
Image
Image
Image
Image
Image
Image
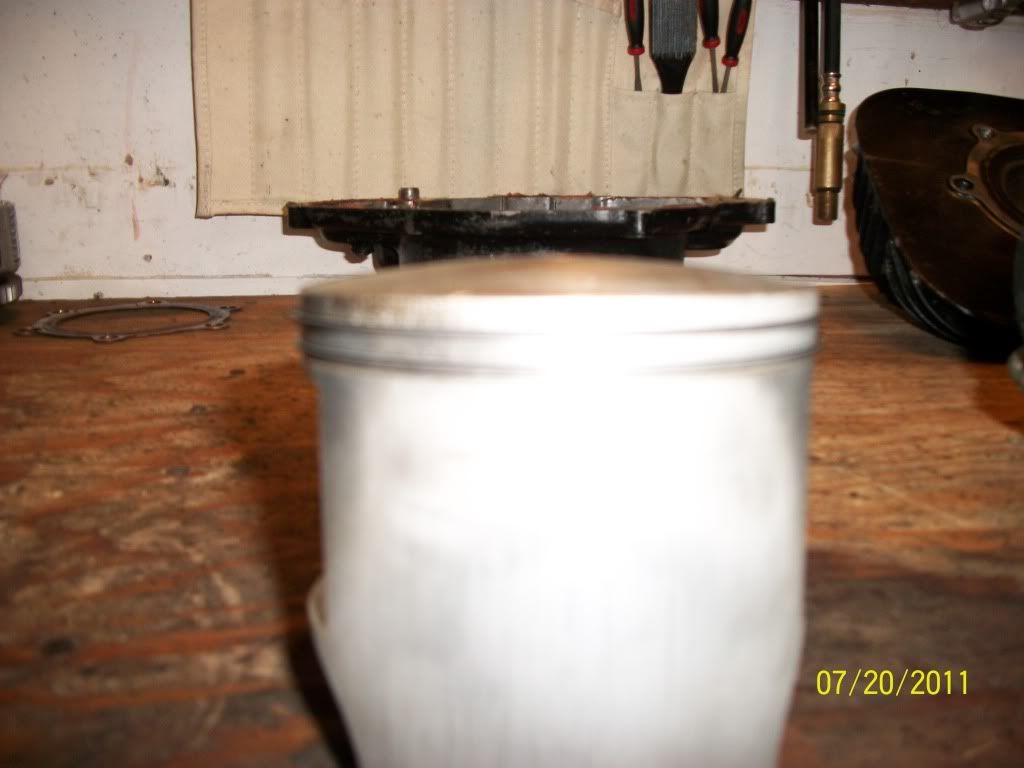
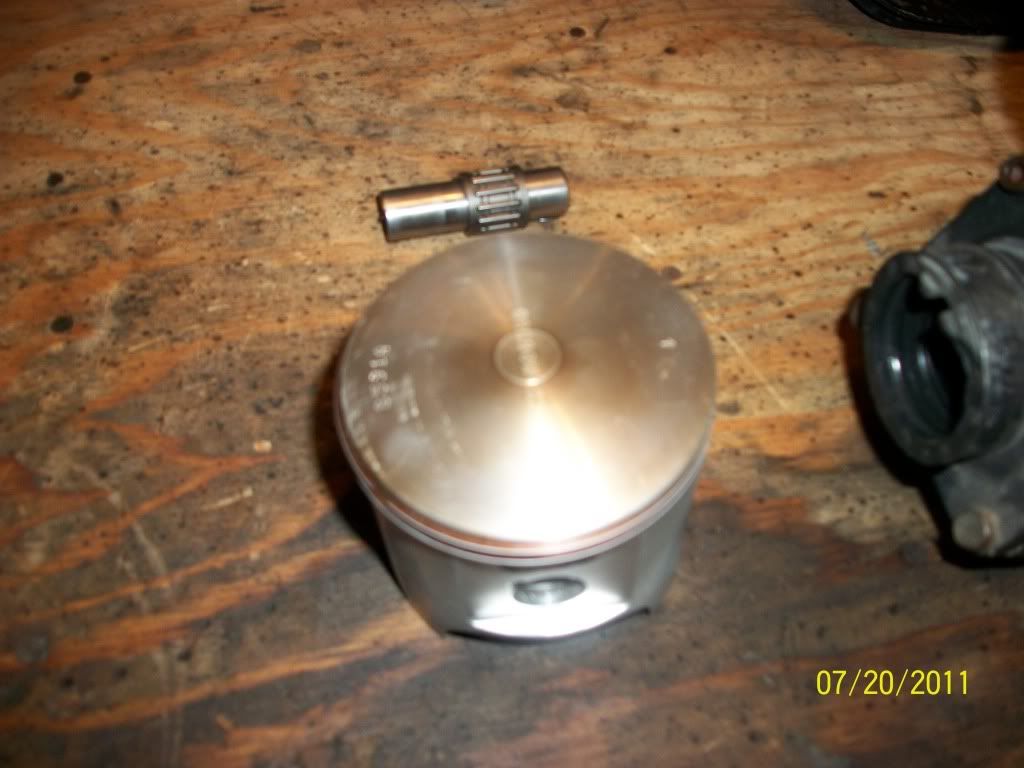
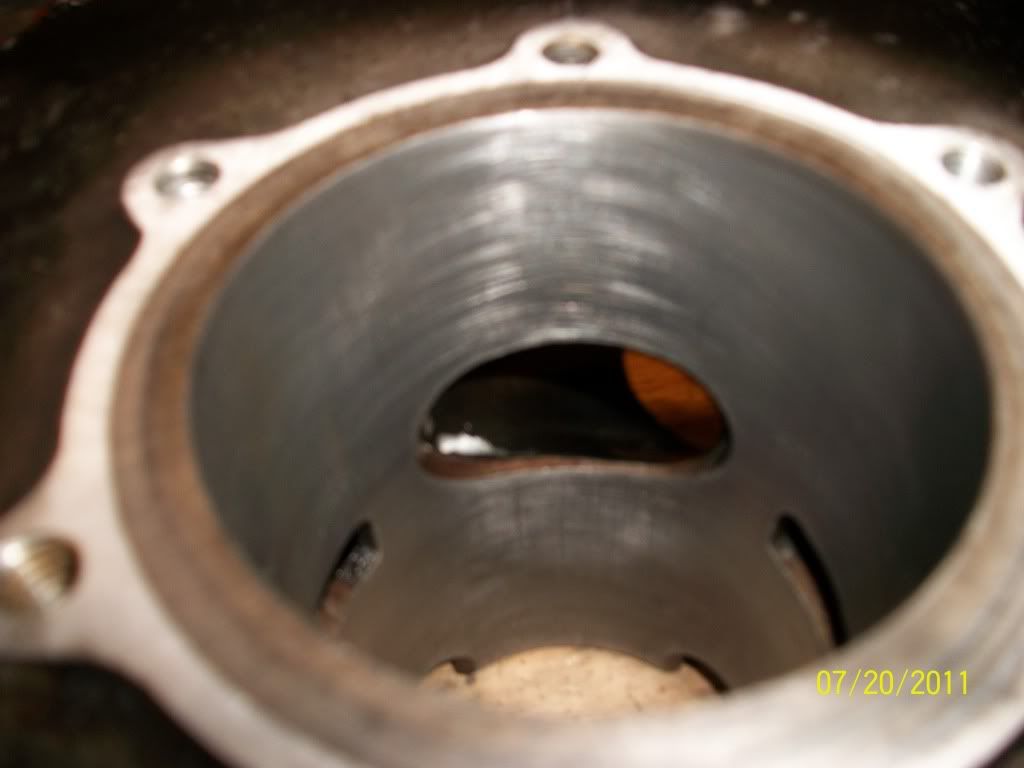
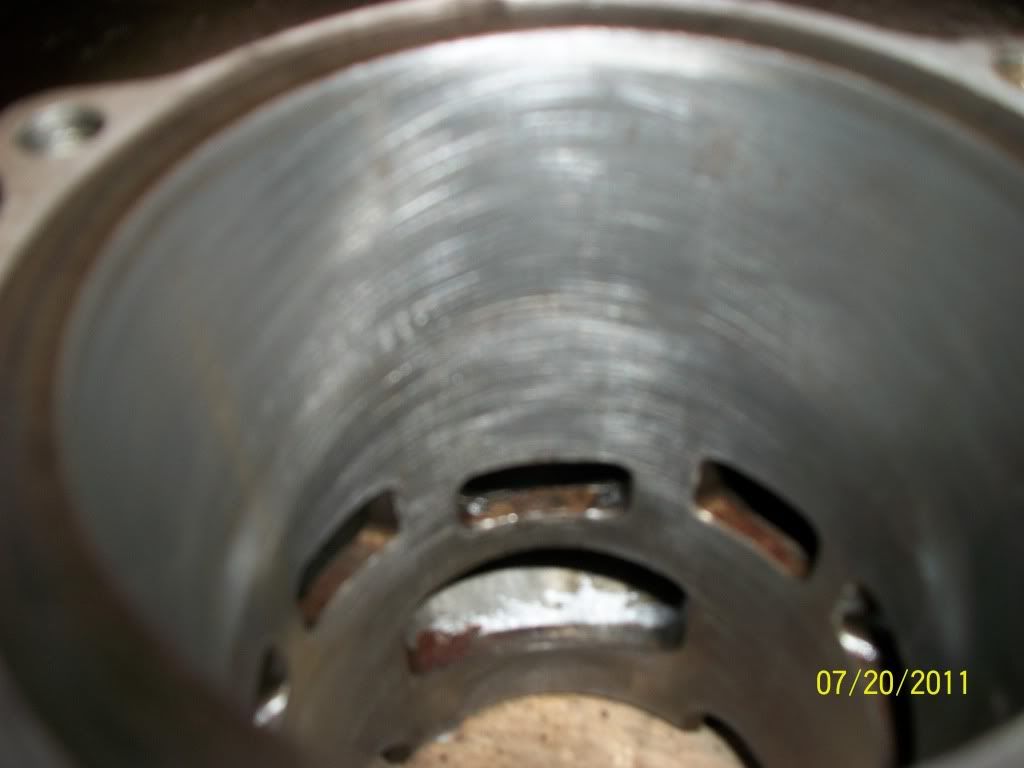
Piston is scored slightly but still in good condition. Ran a hone through the cylinder to clean it up. Losing ambition quickly, but have to keep my spirit up. IT WILL HAPPEN. MUST HAPPEN. Went on an E-Bay shopping spree to lift my spirit :lol: Here's what I stumbled upon.
Image
Image
Image
Image
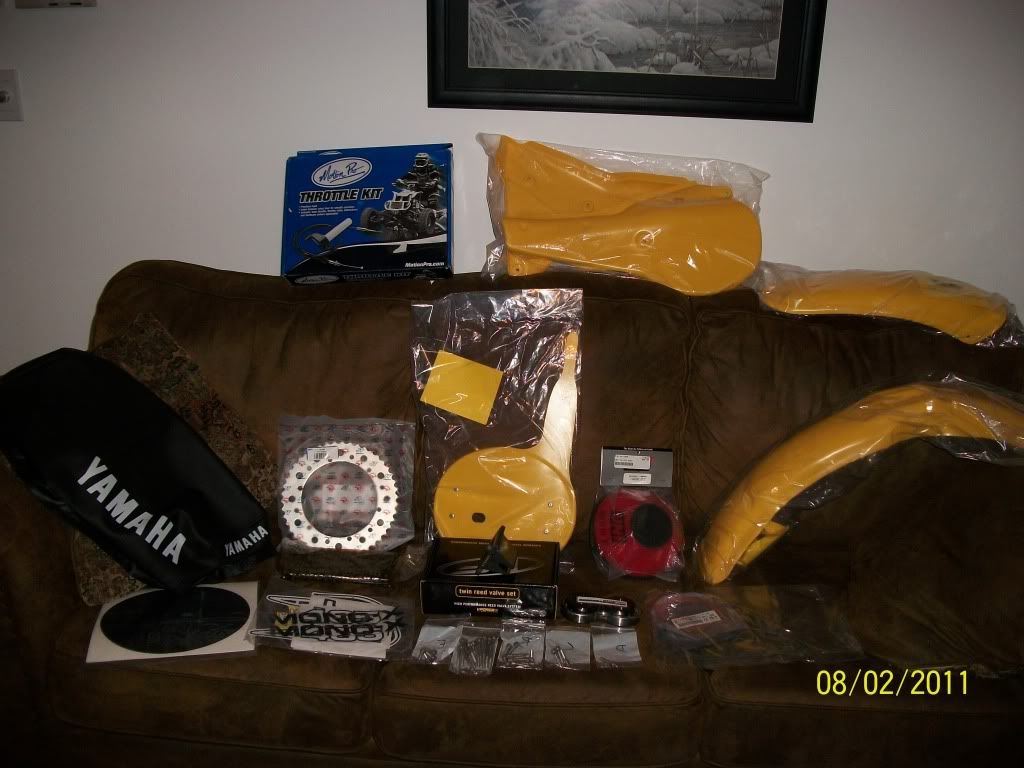
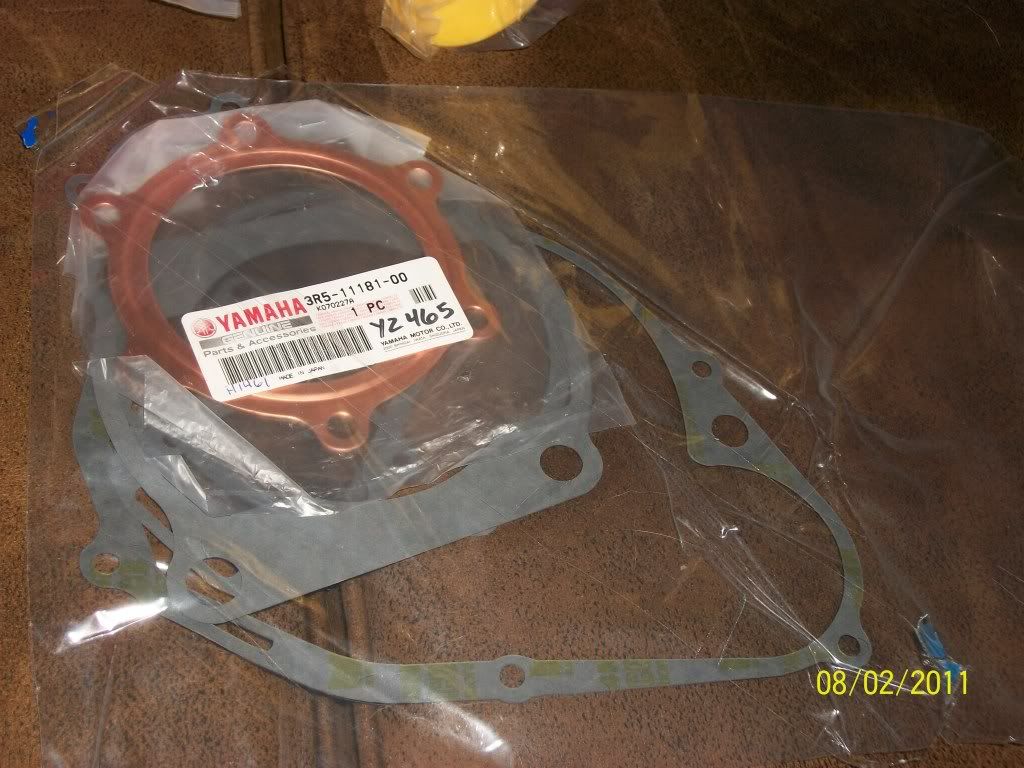
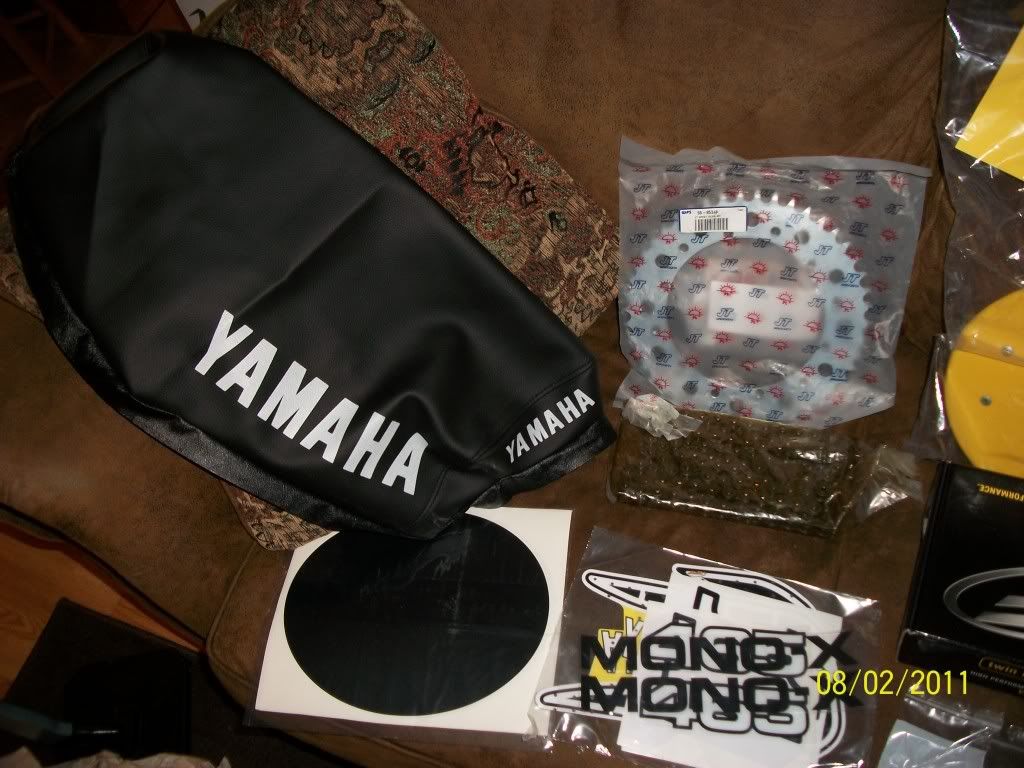
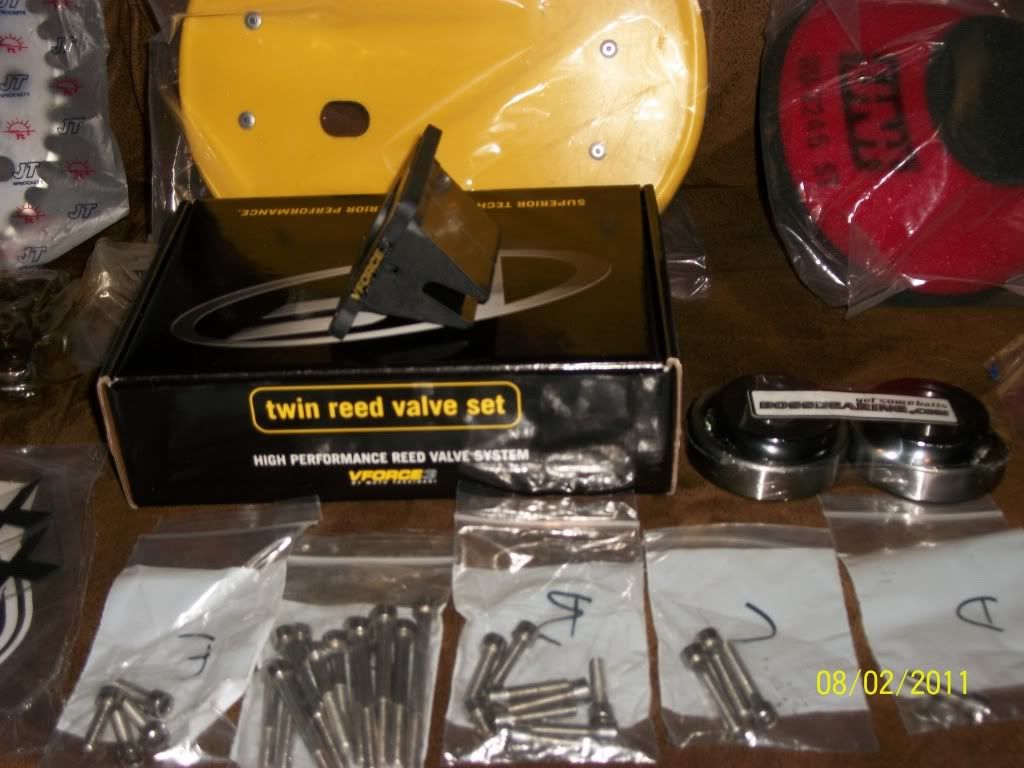
That's enough to get me started in the right direction, and piss the wife off for quite a while! :twisted: Have to take a break from the spending for a short while, till the storm blows over :lol:
Make a joke and I will sigh, and you will laugh, and I will cry.
User avatar
Tharrell
Posts: 1670
Joined: January 27th, 2010, 11:03 am
Location: Mount Airy, NC

Post by Tharrell »

Welcome to the vintage club :lol:

I have a friend with a cherry 81.
That bike is in high demand in vintage circles.
btw-Just in case you don't know about this, thought I would post it.

http://www.vintagemx.us/cgi-bin/swapmeet.cgi#top

And here is where I get genuine NOS Yamaha parts the cheapest.

http://www.nwvcp.com/pages/oemparts/vie ... amaha.aspx

Here's another one.

http://www.speedandsportinc.com/

New crank half----$415 at NW vintage.
Better put a request for one on the swapmeet :wink:
User avatar
bearorso
Posts: 300
Joined: February 28th, 2009, 10:59 am

Post by bearorso »

If you don't replace the whole crank, whilst you've got the engine apart, you could drill (a very short distance - not past the outer side of the primary gear) a hole in the end of the crank to take a bolt. With an appropriate spacer to go over the crank end to bear against the primary gear. Depends on case clearance as to what sort of bolt you use. I've used counter sunk head bolts, CS into the spacer on some ' fix up a mates basket case' projects.

Perhaps you have some serviceable thread left (lost my reading glasses, the screens a bit 'fuzzy' at the moment), you could perhaps clean it up, fit a thinner nut, or have made a 'top hat' nut made that can pick up thread that may be in the recessed section of the primary gear - Plus use the centre bolt and spacer idea.

I've done a few over the years, never had a problem whatsoever.

465 Yamahas, the first Jap bike that got the open classer right - a great bike, nearly as iconic (to me at least, and I'm a Maico owner) as the 400/ 440 / 490 Maicos.
User avatar
Tharrell
Posts: 1670
Joined: January 27th, 2010, 11:03 am
Location: Mount Airy, NC

Post by Tharrell »

Bearoso, I need a sleeve for my 1975 Maico 400.
Are they available somewhere?
100hp honda
Posts: 4394
Joined: July 4th, 2007, 6:57 pm

Post by 100hp honda »

could cut new threads back on for next smaller nut :wink:
roystoy
Posts: 6
Joined: July 25th, 2010, 5:43 am

sleeve

Post by roystoy »

try northwest sleeve think they can do just about anything really good work
User avatar
jbsleddin
PVT. 1st Class
Posts: 251
Joined: June 12th, 2011, 10:48 am
Location: Wheatley, Ontario, Canada

Post by jbsleddin »

I'm ripping my hair out at this point :evil: I got my flywheel puller and ATTEMPTED to pull the flywheel with it. Threads in the puller and the flywheel are now stripped, and the damn flywheel seems like its welded on. Split the cases with the flywheel still attached, as the Yami case doesn't have any bolts behind the stator. Tried rigging it up to my press and pressing out the crank, hoping flywheel would break loose too, no dice. Hopefully I didn't F**k up the stator in the process, didn't seem like any contact was made. GETTING VERY FRUSTRATED! Any ideas would be greatly appreciated, as the only thing I can come up with at this point would be sacrificing either the crank, flywheel, engine case, possibly stator, and/or all of the above. When I reached this point I had to take a breather and went to put my fork boots on the CR. They look nice, LOL. As they say, if it wasn't for bad luck I'd have no luck at all. Fuck Me!!!
Make a joke and I will sigh, and you will laugh, and I will cry.
User avatar
bearorso
Posts: 300
Joined: February 28th, 2009, 10:59 am

Post by bearorso »

I'd say there's a few hundred buried at the tip near Maico's home town, that were dumped there when it finally got closed down (not really a bad joke - it's true, Merkle, and others retrieved a hell of a lot of stuff that was just pushed into piles).

This Canadian mob list liners, including 400s:

http://www.maicomotorcycles.com/

Then theres a Lot of other Maico specialists out there.

I remember in the 2 seperate times I worked for the OZ Maico importers, we'd have blokes that were desperate for rings / pistons, because of sleave wear, that we'd reccomend them getting liners made - the Mahle pistons they had would often be perfect for continued use. The same blokes would bitch about the cost of rings - yes they cost a motza - rings that had lasted them, many times, 10 or more years, with bugger all wear.

Keith Stacker, here in Oz, based in Melbourne, would make liners, out of weathered steel/iron plugs he'd left outside for many, many years. I'm not sure if he's still around - he was old, when I was young.

But, liners can be made by almost any machinist - the big cost is if you get them to do the ports. I've done my own - after getting the basic sleave / liner turned up, but it is a bit of a slog :shock: :x :shock: , if really good steel /iron is used for the liner.


Tharrell wrote:Bearoso, I need a sleeve for my 1975 Maico 400.
Are they available somewhere?
User avatar
bearorso
Posts: 300
Joined: February 28th, 2009, 10:59 am

Post by bearorso »

jbsleddin wrote:I'm ripping my hair out at this point :evil: I got my flywheel puller and ATTEMPTED to pull the flywheel with it. Threads in the puller and the flywheel are now stripped, and the damn flywheel seems like its welded on. Split the cases with the flywheel still attached, as the Yami case doesn't have any bolts behind the stator. Tried rigging it up to my press and pressing out the crank, hoping flywheel would break loose too, no dice. Hopefully I didn't F**k up the stator in the process, didn't seem like any contact was made. GETTING VERY FRUSTRATED! Any ideas would be greatly appreciated, as the only thing I can come up with at this point would be sacrificing either the crank, flywheel, engine case, possibly stator, and/or all of the above. When I reached this point I had to take a breather and went to put my fork boots on the CR. They look nice, LOL. As they say, if it wasn't for bad luck I'd have no luck at all. Fuck Me!!!
.

Have you tried the classic 'hooked finger' with centre press bolt puller?

Do a bit of research as to what's available / more expensive. Then make the decision as to what part to sacrifice. Repeated heat cycles, penetrating fluid, or ultrasonic baths may get the 2 parts to 'undogknot', from each other, without sacrificing any parts, using the puller I mentioned. Tharrell above gave priceing on crank halves. Stators, Flywheels might be a dime a dozen, or easily changed to another model thats available and affordable - or priceless unobtainium, I've no idea. I think there's a hell of a lot of interchangeabilty between Yamahas of then and earlier eras. Most of the Vintage Yamaha specialists I found seem to be about body work, but there'd have to be plenty of hard parts people around. Probably amoungst Tharrells listings he gave.

I adopted my bolt fitting set up years ago for damaged crank ends, as putting smaller nuts on seemed to fail much more often than they would last. The key with a bolt retainer set up is the Spacer that you make to interface with the primary gear, crank end and bolt head. And only going in with the bolt hole a minimal depth, to avoid creating a shear point for the crank end, either near a keyway, or near the primary gears inner face.
User avatar
Tharrell
Posts: 1670
Joined: January 27th, 2010, 11:03 am
Location: Mount Airy, NC

Post by Tharrell »

You really should join the swapmeet.
490 experts are there.
Parts come up for sale trade and you can request parts.
They also have a forum for questions.
Really a bunch of great guys.
User avatar
gregrobo
Posts: 1064
Joined: April 18th, 2009, 8:47 am
Location: kalgoorlie, western australia

Post by gregrobo »

put some tension on it with the puller and give it some gentle persuasion with a copper hammer it may just need to be jarred
only posties ride 4 stroke hondas
goldfields sheet metal fabrication
98 yzfr1
05 crf 500 race tech goldies
2010 rmz 500af
01 banshee
User avatar
Tharrell
Posts: 1670
Joined: January 27th, 2010, 11:03 am
Location: Mount Airy, NC

Post by Tharrell »

gregrobo wrote:put some tension on it with the puller and give it some gentle persuasion with a copper hammer it may just need to be jarred
I've had to do this to other small engines and it works, I hesitated to suggest it in lieu of other proposals.
I always pry under the flywheel and coordinate a slight pry action with the hammer striking the crank.
Be careful to not damage the case when you pry, you may want to put a piece of wood between the case and your pry bar.
User avatar
gregrobo
Posts: 1064
Joined: April 18th, 2009, 8:47 am
Location: kalgoorlie, western australia

Post by gregrobo »

i dont like the prying idea on aluminium cases seen to many broken cases by cowboys.
i love the 465s we picked up 2 a couple years ago to restore but never got around to it yet 1 is complete one in bits

Image

not to bad for being stored outside leaning against a shed
only posties ride 4 stroke hondas
goldfields sheet metal fabrication
98 yzfr1
05 crf 500 race tech goldies
2010 rmz 500af
01 banshee
User avatar
bearorso
Posts: 300
Joined: February 28th, 2009, 10:59 am

Post by bearorso »

If you got it out your way, Gregrobo, the bloody thing would have been hermetically sealed in dester dust. About the only thing that might have made it rust was shop dogs / farm dogs pissing on it. Though with the sun out there, it's a miracle the plastic isn't dust itself. :)
User avatar
gregrobo
Posts: 1064
Joined: April 18th, 2009, 8:47 am
Location: kalgoorlie, western australia

Post by gregrobo »

1/2 dozen kicks and the big girl fired only problem was the bottom end was full of oily spoodge and filled the shed with speckles of oil
Last edited by gregrobo on August 21st, 2011, 3:56 am, edited 1 time in total.
only posties ride 4 stroke hondas
goldfields sheet metal fabrication
98 yzfr1
05 crf 500 race tech goldies
2010 rmz 500af
01 banshee
User avatar
jbsleddin
PVT. 1st Class
Posts: 251
Joined: June 12th, 2011, 10:48 am
Location: Wheatley, Ontario, Canada

Post by jbsleddin »

Life will go on! :lol: I got the bastard off, finally. Used the f'd up flywheel puller, with a pile of dogshit weld to hold it on. The turning point was due to the discovery on my miracle penetrant, "DEEP CREEP", good stuff. I soaked it for a few days then tried the impact gun on the puller again, came right off. I've used this stuff to unseize a PWC engine that a guy left outside for several years and improperly stored. Pistons were rusted seized, and this stuff had it turning over the next day! :shock: Anyway, the build must go on now that I am past this little speed bump. More progress to come, as soon as I get off my ass and do something :lol:
Make a joke and I will sigh, and you will laugh, and I will cry.
User avatar
jbsleddin
PVT. 1st Class
Posts: 251
Joined: June 12th, 2011, 10:48 am
Location: Wheatley, Ontario, Canada

Post by jbsleddin »

Finally put some fire under my own ass and got shit done! The engine is complete now, looking much cleaner than before, and should actually run now! :lol: I don't know how it ever ran before, with bad crank bearings, leaking seals, blown head gasket, etc. Must have been a super lean popping machine, don't know, never heard it run yet. Not about to get excited like the other guy and jump the gun, this baby isn't going to be Niguyvered!
Image
I plan to start on cleaning up the frame in the next few days, getting ready for paint. Not gonna powdercoat it, I've done several paint jobs on my own with good results, so I'm trying to keep my cost down and do everything myself. Only need to find some time to do it, hard to do right now, working 7 days a week and up to 12 hours a day, until busy season is over, probably another month of this crap! :evil: It will happen eventually........... :wink:
Make a joke and I will sigh, and you will laugh, and I will cry.
User avatar
jbsleddin
PVT. 1st Class
Posts: 251
Joined: June 12th, 2011, 10:48 am
Location: Wheatley, Ontario, Canada

Post by jbsleddin »

Well the "budget restoration" idea isn't going as planned, more like a "breaking the bank resto." :lol: I ordered my brand spanking new DG exhaust for her today, decided I wasn't going to bother trying to restore the old beaten one, pipe is bent, dinged, rusted, brackets missing, holes patched and silencer looks like it has rubbed the sprocket or someone took a grinder to it! Not gonna cut it for this baby, so new is on the way! What else will I find?!!! :?
Make a joke and I will sigh, and you will laugh, and I will cry.
User avatar
Tharrell
Posts: 1670
Joined: January 27th, 2010, 11:03 am
Location: Mount Airy, NC

Post by Tharrell »

DAMN!
Aren't these air cooled big bores just friggin beautiful?
Image
User avatar
jbsleddin
PVT. 1st Class
Posts: 251
Joined: June 12th, 2011, 10:48 am
Location: Wheatley, Ontario, Canada

Post by jbsleddin »

My thoughts exactly, something about the old air pingers that makes me feel all fuzzy inside, like a young boy going on a rollercoaster for the first time :shock:
Make a joke and I will sigh, and you will laugh, and I will cry.
User avatar
jbsleddin
PVT. 1st Class
Posts: 251
Joined: June 12th, 2011, 10:48 am
Location: Wheatley, Ontario, Canada

Post by jbsleddin »

This long weekend isn't seeming so LONG, as it seems I'm supposed to praise my boss for a day off! Sounds as though I might have 2, was hoping to be firing this girl up this weekend, but looking highly unlikely at this point in time, still MUCH work to be done before the engine goes into the frame. Work schedule is really pissing me off, boss turned into a slave driver since we had a breakdown for 3 weeks and now we are "making up for lost time" by running 8 days a week! :evil: Hope to have her running before snow hits the ground. :roll:
Make a joke and I will sigh, and you will laugh, and I will cry.
User avatar
jbsleddin
PVT. 1st Class
Posts: 251
Joined: June 12th, 2011, 10:48 am
Location: Wheatley, Ontario, Canada

Post by jbsleddin »

Much progress to report of! This crappy weather has assisted me greatly, giving me 4 consecutive days off of work, allowing for some quality time to be spent in the garage. I was going to post some sneak peek pics, but the garage is a disaster (as usual) and I didn't want anyone seeing it that bad. Besides, the longer wait makes it worthwhile. :P The engine is in the frame, all buttoned up, just waiting for her new DG exhaust which the wife doesn't know about yet. :cool: Basically just doing minor things now like fitment of the new plastics, decals etc., killing time waiting for the pipe. Once I get it, I'll be ready to fire her up for the first time since I've owned it, I'm SO F'N EXCITED!!! :nanna: Just like a little kid on Christmas morning waiting for Mom and Dad to get their asses out of bed to let me tear into the presents! :lol:
Make a joke and I will sigh, and you will laugh, and I will cry.
User avatar
AlisoBob
"Hoon-father"
Posts: 15404
Joined: May 31st, 2007, 6:39 pm
Location: Aliso Viejo Ca

Post by AlisoBob »

:cool: :cool: :cool:
User avatar
Tharrell
Posts: 1670
Joined: January 27th, 2010, 11:03 am
Location: Mount Airy, NC

Post by Tharrell »

You cleaned the engine up nice and broke the bank on parts. I can't wait to see it myself.
Post some vids if you can.
User avatar
jbsleddin
PVT. 1st Class
Posts: 251
Joined: June 12th, 2011, 10:48 am
Location: Wheatley, Ontario, Canada

Post by jbsleddin »

Well boys, the wait is over! I was worried this was going to happen, I think it may be nicer than my CR! I have a few sneak peek pics to pacify the curious minds out there. I consider it 99% finished, only thing I plan to do next is buy new grips and bolt on the new DG exhaust once it arrives. Oh yeah, AND FIRE IT UP!!! :headbang: Here she is, and I'm proud to say that everything was done in my own disaster of a garage! :lol:
Image
Image
Image
Image
Image
Image
Make a joke and I will sigh, and you will laugh, and I will cry.
Post Reply