2006 gen3 conversion

Building Tips, Suspension Set Ups, Conversion Parts .... Build to your Heart's Content!
User avatar
coley13
Posts: 262
Joined: June 15th, 2007, 11:19 pm
Location: australia

2006 gen3 conversion

Post by coley13 »

A modern CR500 in the making.. This will take a little while to do so bare with me for updates and i will document my build.... when funds allow me i'll do a little more....

First you take this motorcycle
Image

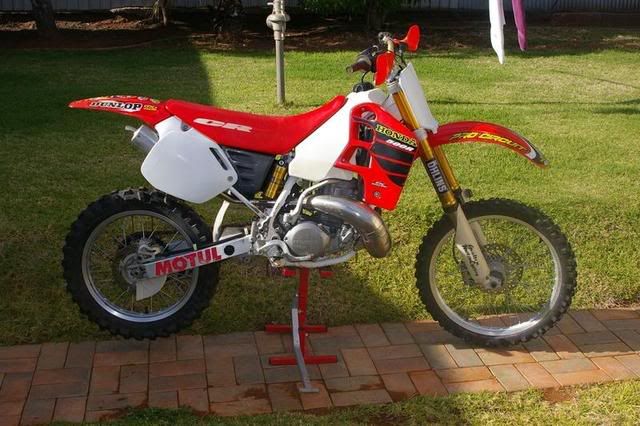
Are you mad? No way in hell i'm chopping a thing of beauty like that up. No i've decided to take that bike to my grave.... Instead i have opted for another option. Unfortunatly it will cost me more money, seriously it would be blasphamy to part such a fine peice of motorcycle history


Over the last few months i have been compiling a few bit's and peices to make my project finally a reality.


Image

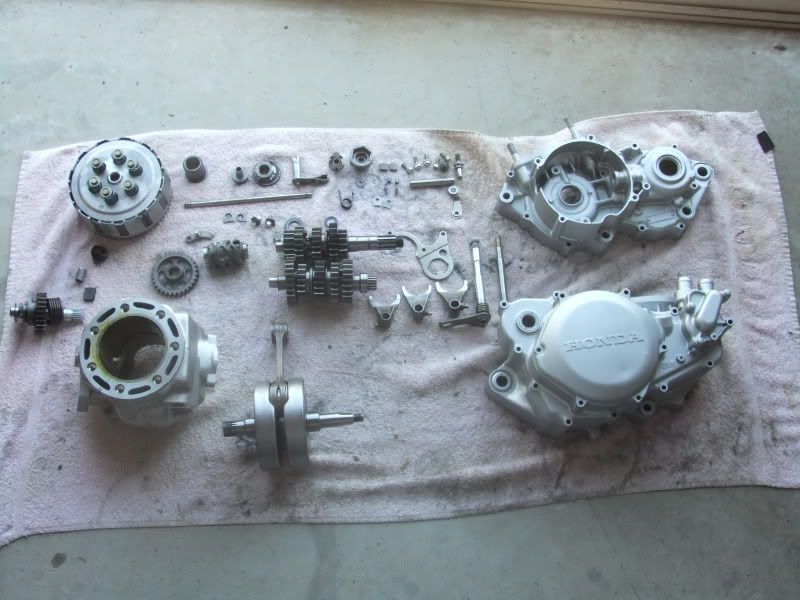
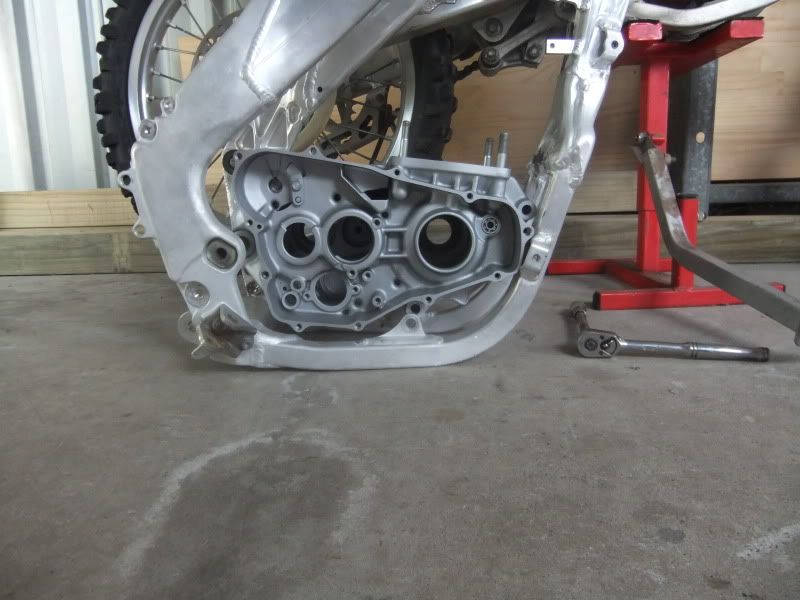
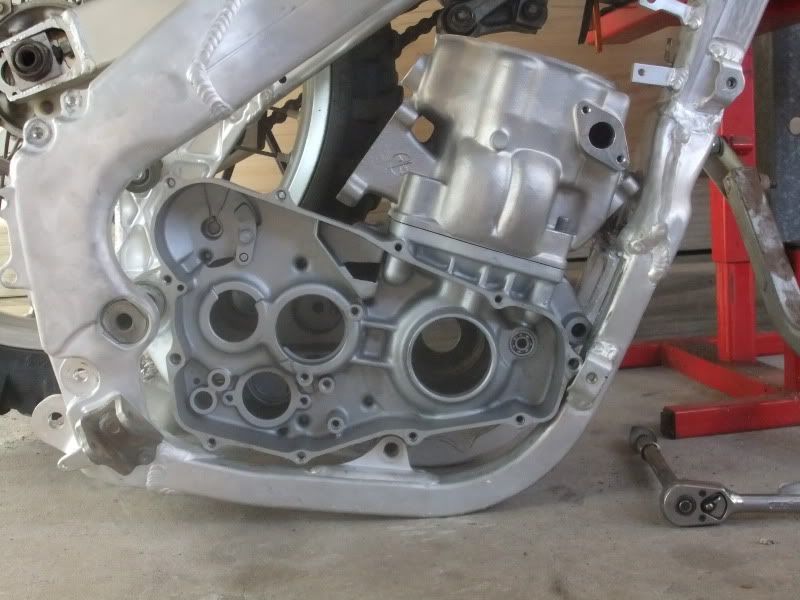
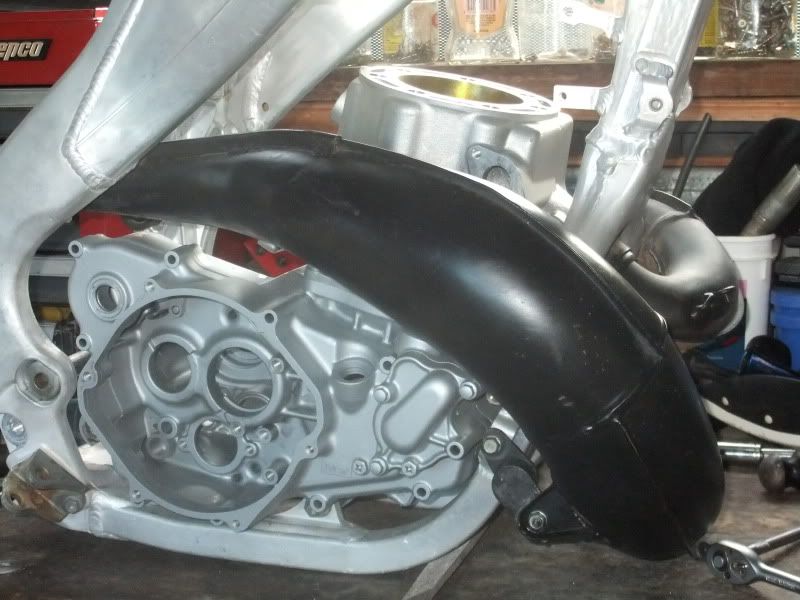
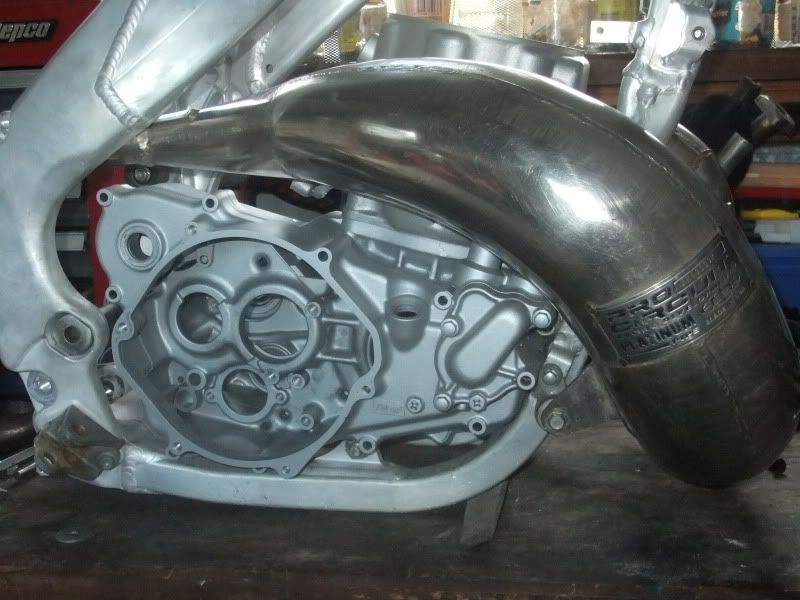
So far i have poured a couple $$$$ on the engine, this includes Brand new crankshaft and cylinder. I will be running a 93+transmission..


This wont all happen unless a have a motorcycle to put my new engine into, Luckly here's one i aquired earlier. It's a 2007 cr125. Very low hour bike


Image


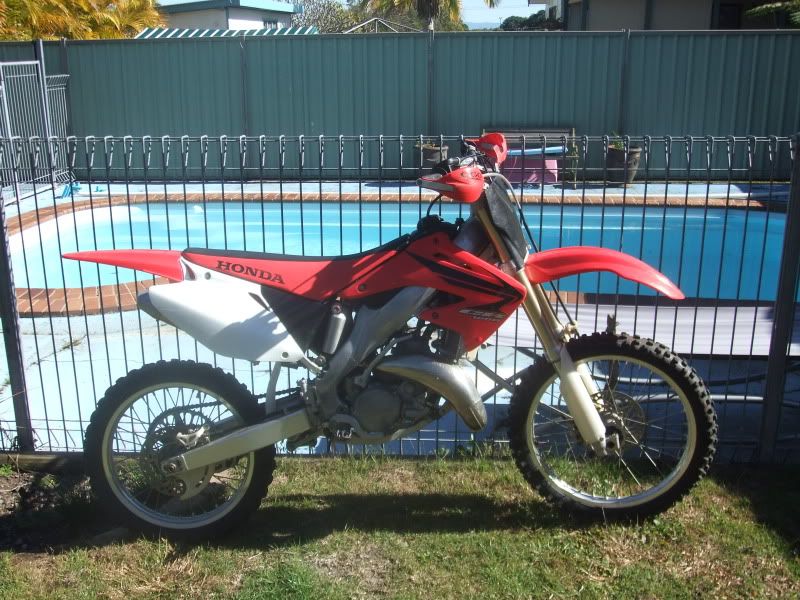
I've painstakingly been trying to determine the best method for a 125 conversion, after doing many many hours of research i have opted NOT to convert the 125 chassis due to the heavy modifications required to do the frame.


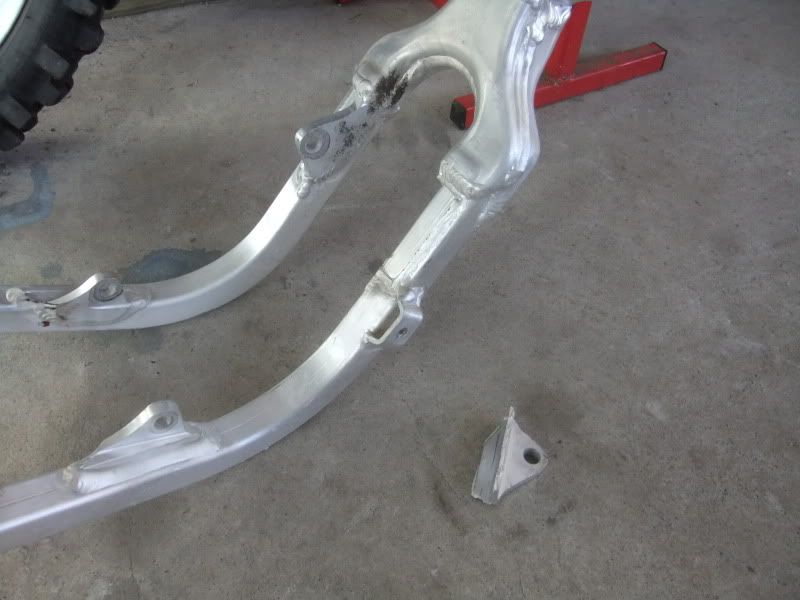
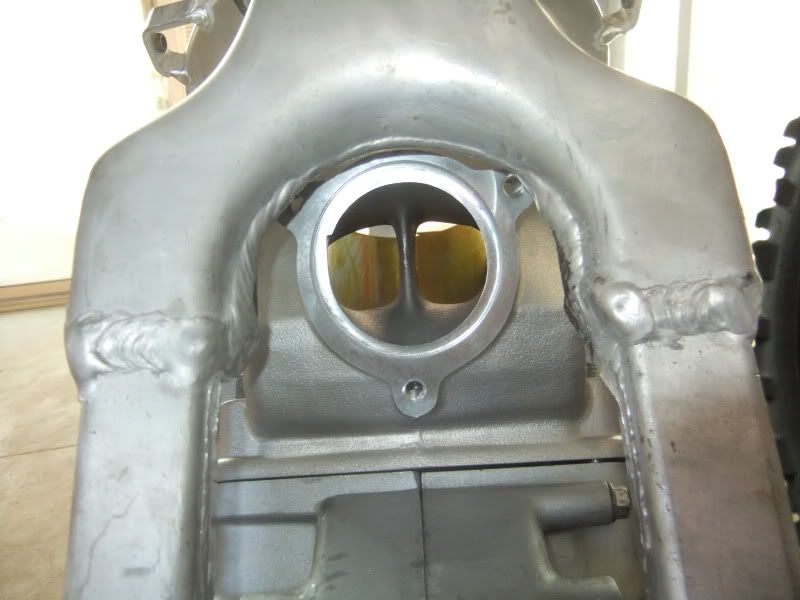
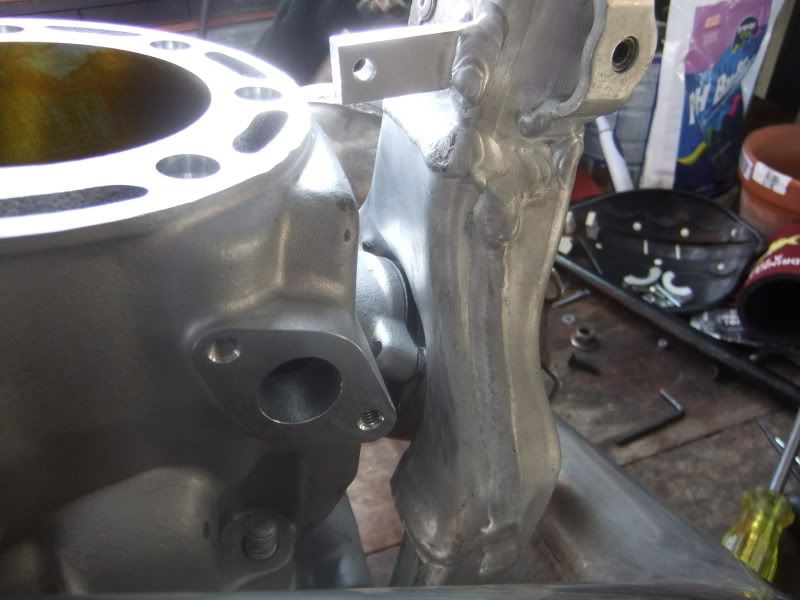
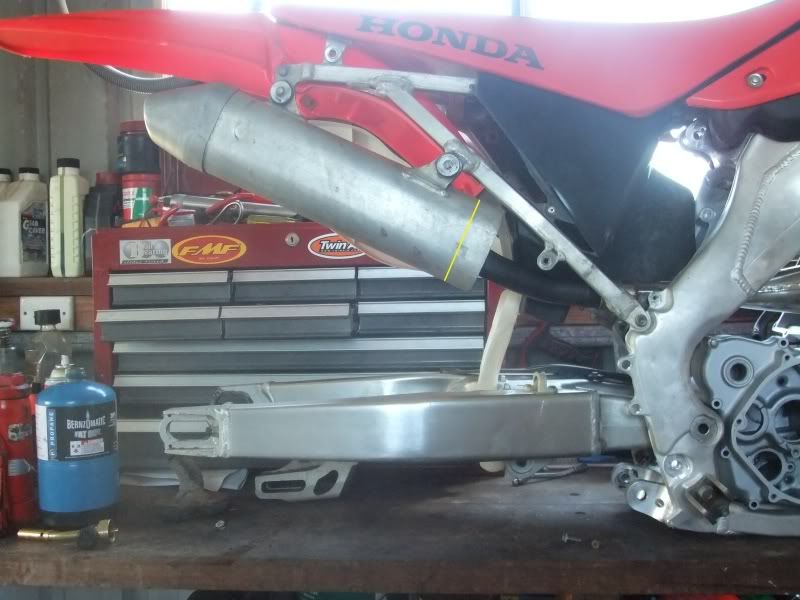
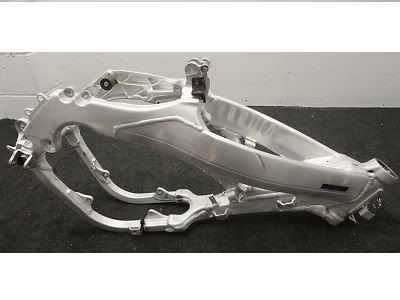
Leads me to the next part, i have just purchased a cr250 frame. This is 2006 model... These frames are the same 02-07... Luckily everything will bolt straight over from my 125...


Image

I have decided to build it Stoffers method

stay tuned
13 isnt unlucky i just keep falling off
User avatar
ZETTNORCAL
Posts: 202
Joined: October 4th, 2008, 9:14 am

Post by ZETTNORCAL »

cool :cool:
User avatar
maddog1927
Posts: 313
Joined: April 4th, 2010, 8:10 am
Location: Mesa, AZ

Post by maddog1927 »

I love the gen 3 frames.

Good choice going with the 250. I know you wanted to do the 125 bad. Do the 250, if you still want to do a 125 you can always do it later.

Have you considered doing the Algava method? It is my fav. for sure. I have one most of the way done in my garage that a friend is doing. Very easy compared to my 125 build.
User avatar
AlisoBob
"Hoon-father"
Posts: 15404
Joined: May 31st, 2007, 6:39 pm
Location: Aliso Viejo Ca

Re: 2006 gen3 conversion

Post by AlisoBob »

coley13 wrote: I have decided to build it Stoffers method
Send the 125 frame to Paulie.....

:twisted:

He can do a new cradle, and a gen 4 250F cast "Y" for it....

OEM
User avatar
maddog1927
Posts: 313
Joined: April 4th, 2010, 8:10 am
Location: Mesa, AZ

Post by maddog1927 »

The pipe is a big issue as well. If you do a 250 conversion the standard cr500 pipe fits well. For a 125 it is extensively modified. Then if you mash it, you gotta mod another.
User avatar
maddog1927
Posts: 313
Joined: April 4th, 2010, 8:10 am
Location: Mesa, AZ

Post by maddog1927 »

I wish I would have known the full extent of the pipe issue before I started my conversion.

I thought that when I got to the point to do the pipe, I could just buy a SH LE pipe if I got lazy.

I got to that point, and got lazy and wanted to by a pipe just to find out the LE pipe is the same as all the others (std 500 pipe with relocated rear mount)

I have read that "engine placement" for the SH LE pipe (remember same as other pipes) is key.

There is NO WAY to clock a 500 motor in a 3rd gen 125 frame so as to use a standard pipe. Which leads me to believe that the 22 some odd LE owners have shiny spots on their head pipes.

I had to take 1 1/8" out of my head pipe, plus cut in 3 other places to get my pipe to fit right.

I don't ride often, and mostly in the sand so I doubt I will mash it and need to do another.

Another problem is now I do not have a plated pipe. I really dig the looks of a nickle plated pipe. To get mine plated, it would cost as much as a plated pipe!
User avatar
Roostius_Maximus
Site Admin
Posts: 4641
Joined: November 16th, 2007, 3:24 pm
Location: Mt Nebo, Manitoba, Canada
Contact:

Post by Roostius_Maximus »

I also have to do something about the pipe :roll:
the fatty i have on it fits not bad, but clearence will be an issue
User avatar
yota
Posts: 429
Joined: March 25th, 2009, 2:21 pm

Post by yota »

I have an 03 cr125 AF and the SH pipe works fine.
09 TTM CR500AF
08 KTM 200 XC
08 Ducati Hypermotard
03 CR125
95 CR250
83 Husqvarna 125 XC
73 Maico MX250
User avatar
2strokeforever
Posts: 1524
Joined: November 13th, 2009, 1:04 pm
Location: Vernon B.C Canada

Post by 2strokeforever »

do you bottom? even on my 250f chassis the tire hit with brand new pc and fmf pipes.... hammer fixed it
the 450 will have less power and will be harder to start, and will be heavier, but to make up for it it will require more maintenance.
4stroke=dead fish
User avatar
coley13
Posts: 262
Joined: June 15th, 2007, 11:19 pm
Location: australia

Post by coley13 »

Does not matter now with the 250 frame. Bob I would love to send it away but the logistics and service will cost me a small fortune. I am much more confident with a 250 frame and happy to do the leg work. In the mean time I will search for a hopefully competant welder
13 isnt unlucky i just keep falling off
User avatar
maddog1927
Posts: 313
Joined: April 4th, 2010, 8:10 am
Location: Mesa, AZ

Post by maddog1927 »

yota wrote:I have an 03 cr125 AF and the SH pipe works fine.
Is it the LE pipe? Maybe there is a difference in the LE pipe. That would be great if there was, and I would be very happy to hear about it.

Have you ever taken your fork caps off and fully compressed the forks?

Man I hope I am wrong on this one, and can buy a SH pipe plated for my ride.
User avatar
coley13
Posts: 262
Joined: June 15th, 2007, 11:19 pm
Location: australia

Post by coley13 »

update....

250 frame arrived this afternoon..

first i needed to remove front engine mounts as they do not line up.. I used a grinder with an ultra thin cutting wheel. BEWARE not to cut the frame. Luckily i have an eye like a dead fish.

here's the first mount off, must say it was a little tedious and i was a tad nervous making the first cut.

Image


as you can see there is still little bit of previous weld, i will file that later.. The idea is NOT to grind the frame as fragments will fly of the grinder and contaminate the aluminium... I got it close and then finessed it off with a knockohmeter..
13 isnt unlucky i just keep falling off
User avatar
coley13
Posts: 262
Joined: June 15th, 2007, 11:19 pm
Location: australia

Post by coley13 »

Image


Now i'm starting to get nervous... I'm going to do the next part very slowly.
13 isnt unlucky i just keep falling off
User avatar
Gmbond
Posts: 381
Joined: September 14th, 2009, 7:17 pm
Location: Ontario Canada

Post by Gmbond »

Just sneak up on it and surprise it when it's not looking!

I found a hydraulic jack easier to use than the screw type (toyota tundra) jack, just meant you had to jig the frame so the jack was upright.
User avatar
coley13
Posts: 262
Joined: June 15th, 2007, 11:19 pm
Location: australia

Post by coley13 »

Image


i've decided not to touch the Y for exhaust clearance, it's going to be tight fit but i subscibe to the KISS theory as bearoso says

Image
13 isnt unlucky i just keep falling off
User avatar
AlisoBob
"Hoon-father"
Posts: 15404
Joined: May 31st, 2007, 6:39 pm
Location: Aliso Viejo Ca

Re: 2006 gen3 conversion

Post by AlisoBob »

coley13 wrote: I have decided to build it Stoffers method

stay tuned
If you jacked the frame open, thats the Aliso Bob method.

If you want to leave the "Y" untouched, there is no way to put the upper flange springs on.

Image

IF you can find an older flange from an air cooled 500, or is it from a 480? (Roosty might know the year), the upper flange spring eyelets are below the upper bolts, not above them.

That might work.

You could just use the lower springs, and RTV the shit out of the connection or nig-guiver some other way to use the upper springs.

Give it some thought.
User avatar
coley13
Posts: 262
Joined: June 15th, 2007, 11:19 pm
Location: australia

Post by coley13 »

Will do Bob. Couldnt of done it with you guys posting your builds.. Sorry i do owe you credit for the streching method. mentioned paul as i was thinking of the Y cutout with the hole saw

As per springs i have a plan involving different springs with a longer straight section, pilot a small hole into the back of the flange bolts and sit the springs from the underside but i will look into the flange you mentioned as it would probably be easier...

Jacking the frame was quite easy, the spring back was the hard part. I swear i spent half a day jacking the damn thing doing absolutely nothing. I couldnt beleive how far they actually stretch.
13 isnt unlucky i just keep falling off
User avatar
AlisoBob
"Hoon-father"
Posts: 15404
Joined: May 31st, 2007, 6:39 pm
Location: Aliso Viejo Ca

Post by AlisoBob »

coley13 wrote:I couldnt beleive how far they actually stretch.
Some do, some dont.... One I did fractured without stretching at all.

It appears the OEM material and final heat treat vary quite a bit.

HOONS, BE CAREFUL WITH THIS METHOD!!!

Pauly has had good success with it by heating the frames before and during the stretching process.
User avatar
AlisoBob
"Hoon-father"
Posts: 15404
Joined: May 31st, 2007, 6:39 pm
Location: Aliso Viejo Ca

Post by AlisoBob »

Image

I always considered "notching" the radius at the 11 o'clock and 1 o'clock positions and laying in some half round aluminum tubing to provide clearance for the upper bolts / springs.

Roosty, Clyde, or Karty... can you make a photo that shows what I'm describing?
User avatar
coley13
Posts: 262
Joined: June 15th, 2007, 11:19 pm
Location: australia

Post by coley13 »

AlisoBob wrote:
coley13 wrote:I couldnt beleive how far they actually stretch.
Some do, some dont.... One I did fractured without stretching at all.

It appears the OEM material and final heat treat vary quite a bit.

HOONS, BE CAREFUL WITH THIS METHOD!!!

Pauly has had good success with it by heating the frames before and during the stretching process.
i agree, i used heat. I think another thing to watch is some frames even though they are the same have slight differences. One may need squeaking forward 5mm, the next frame may require 8mm or more. Mine didnt require to me moved very far which was great. I must say even doing that i was very nervous.. mine would stretch 15mm easily but spring back 14.9mm. i felt like i was going knowhere.

One part scared the shit out me, as i was jacking an old paint tin under my bench made a popping noise. I nearly had a heart attack :shock:


PS, i think i have seen pics before of half moon you mentioned
Last edited by coley13 on July 24th, 2011, 3:32 pm, edited 1 time in total.
13 isnt unlucky i just keep falling off
User avatar
coley13
Posts: 262
Joined: June 15th, 2007, 11:19 pm
Location: australia

Post by coley13 »

edit - double post
13 isnt unlucky i just keep falling off
User avatar
coley13
Posts: 262
Joined: June 15th, 2007, 11:19 pm
Location: australia

Post by coley13 »

tight fit.

Image


looks like lower pipe mount will fit with stock pipe but will not fit with PC pipe. I've got a plan and will post pics later. Hopefully no welding reguired. My aim on this build is do little as possible.

Ohh, incase your wondering i rotated the flange
13 isnt unlucky i just keep falling off
User avatar
coley13
Posts: 262
Joined: June 15th, 2007, 11:19 pm
Location: australia

Post by coley13 »

here is the stock pipe, front mount fits awesome. I'll mock up the PC pipe later, after all i want to use my PC not stock.

Image
13 isnt unlucky i just keep falling off
User avatar
coley13
Posts: 262
Joined: June 15th, 2007, 11:19 pm
Location: australia

Post by coley13 »

for the PC pipe i will use this little mount. It's the rear expansion chamber mount. I may aswell put it to good use. Fits well

Image
13 isnt unlucky i just keep falling off
User avatar
coley13
Posts: 262
Joined: June 15th, 2007, 11:19 pm
Location: australia

Post by coley13 »

I've been experimenting today to try eliminate welding new mount tabs on the subframe for the exhaust silencer..

The standard cr500 silencer and cr125 silencer has exact same outer core size. I've swapped the guts of the 500 core into the 125 silencer so it lines up at the tabs.

The angles where a little different and some tweaking was required. See the yellow line, thats where i need to cut the outer core, drill couple holes and screw it back together... Also still a little fine tuning on the angles are required for a more relaxed fit

I am not certain whether i will use this setup yet, i need to find out what effect this length silencer will have on my engine first as it will be a little shorter than Pro Circuit 304. Last thing i want is a poor running bike or a melted piston or something silly.

Image
13 isnt unlucky i just keep falling off
Post Reply