Page 1 of 1
Ready to start the conversion.
Posted: May 22nd, 2011, 5:01 pm
by plynn41
Posted: May 23rd, 2011, 7:40 am
by hoofarted
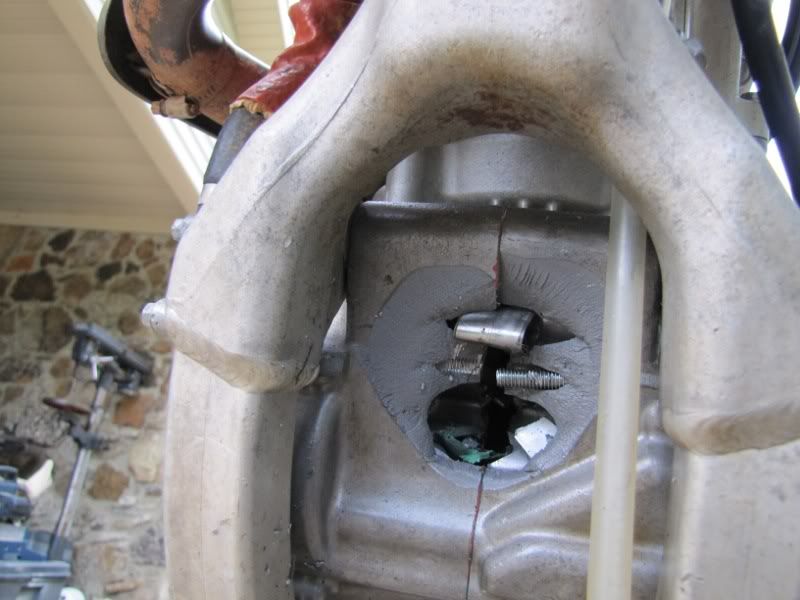
Look at that - it made its own exhaust port in the proper location -

g/l with the convo!
Posted: May 23rd, 2011, 12:24 pm
by Kuma
hoofarted wrote:Look at that - it made its own exhaust port in the proper location -
Posted: May 23rd, 2011, 1:50 pm
by plynn41
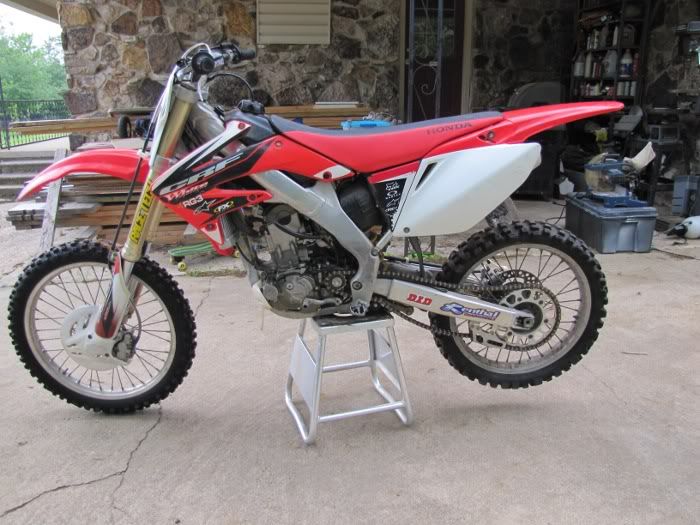
Folks, that was a new HotRods crank with about 2 hours on it. My friend who did the build has got tons of experience and did the job right. He assured me he won't use HotRod cranks again. I took the engine apart today and the head is undamaged. The cylinder almost survived, but not quite. I'll have a pretty good list of CRF250R engine parts for sale in a day or so. If you need anything pm me for the hoon discount before I put it on Ebay. The bike has got the '06 twin pipe setup btw--that will be for sale.
Posted: July 25th, 2011, 9:12 am
by plynn41
Here's what I've salvaged on EBay out of the blown CRF250R so far.
- $20 - Head Pipe
$30 - OEM camshaft
$25 - CDI + wiring harness
$45 - Kickstarter
$130 - Carburetor
$40 - Clutch
$49 - Clutch case w/ water pump and cover
$300 - Head
$75 - Exhaust
$719 Total
So I'm in so far for -$19. (Really not that much if I were to have taken EBay seller fees into consideration.) I've got another couple of things to try and sell that may or may not move.
The new cradle/motor mount kit and other accessories are on the way from Paul Stoffers. I've done the Sawzall work on the original frame and have nearly got the receiving pockets ready to accept the new frame rails for welding.
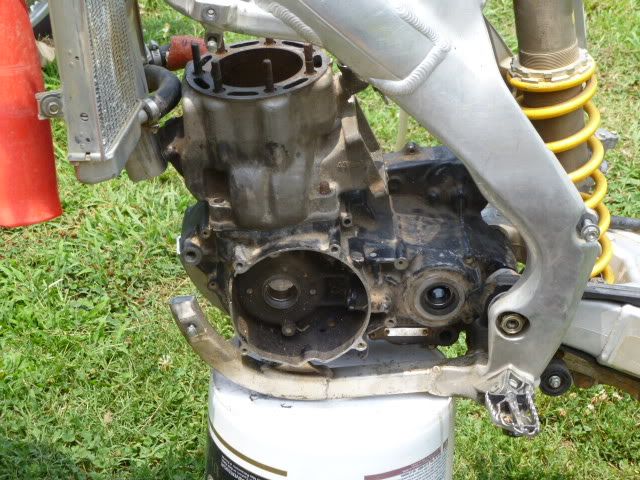
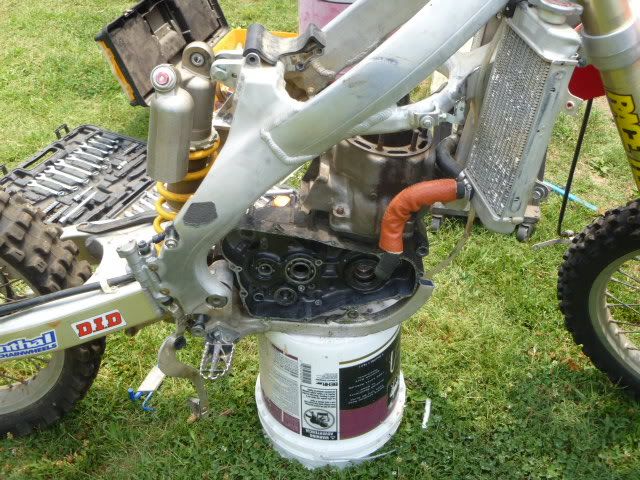
I have an '88 engine that needs a complete rebuild that I was planning on using for this project, but it looks like I might only use the '88 transmission and head. The cases need some minor welding, and I've just about convinced myself to go ahead and buy a new set of cases. I'm using the '88 clutch case on my '85 engine, so I'll be buying a new '01 clutch case so I can run the late model clutches. I've also decided to use a later model head so I can avoid pipe/coolant line clearance issues.
The pictures aren't much, but I was excited to see what the 500 engine looked like in the frame. I haven't totally removed the lower rails in the pictures yet. I'll post better ones when I'm getting the new frame rails welded in.
Gas tank welding
Posted: November 25th, 2011, 1:49 pm
by plynn41
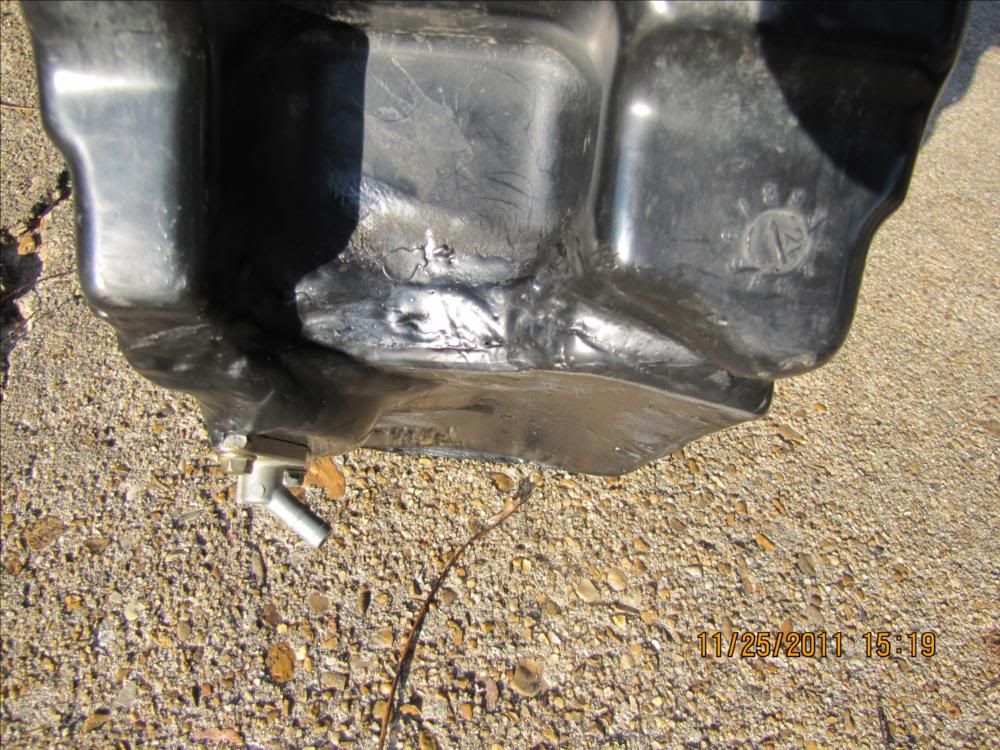
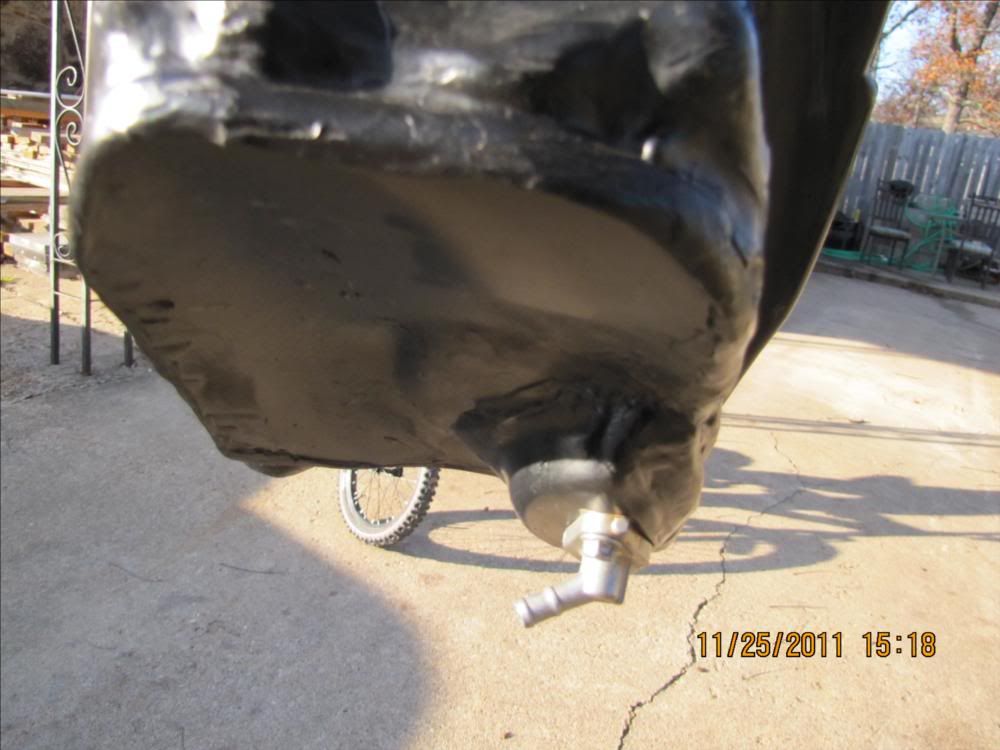
Here's some pics I promised. This is the first time I've welded plastic. I used a propane torch, which is not the optimal tool, but it can be done. My welds aren't as pretty as I would like, but the tank holds water. I will pressure test it before filling it with fuel.
To be brief, I tried and failed miserably at deforming the bottom of the stock CR250R tank. So I cut the bottom of the tank off, bought a 12x12" piece of 1/4" HDPE black plastic from Graingers, and welded on a new tank bottom. I cut the bottom bulge for the fuel spigot off of the original tank bottom and reinstalled it on the new bottom.
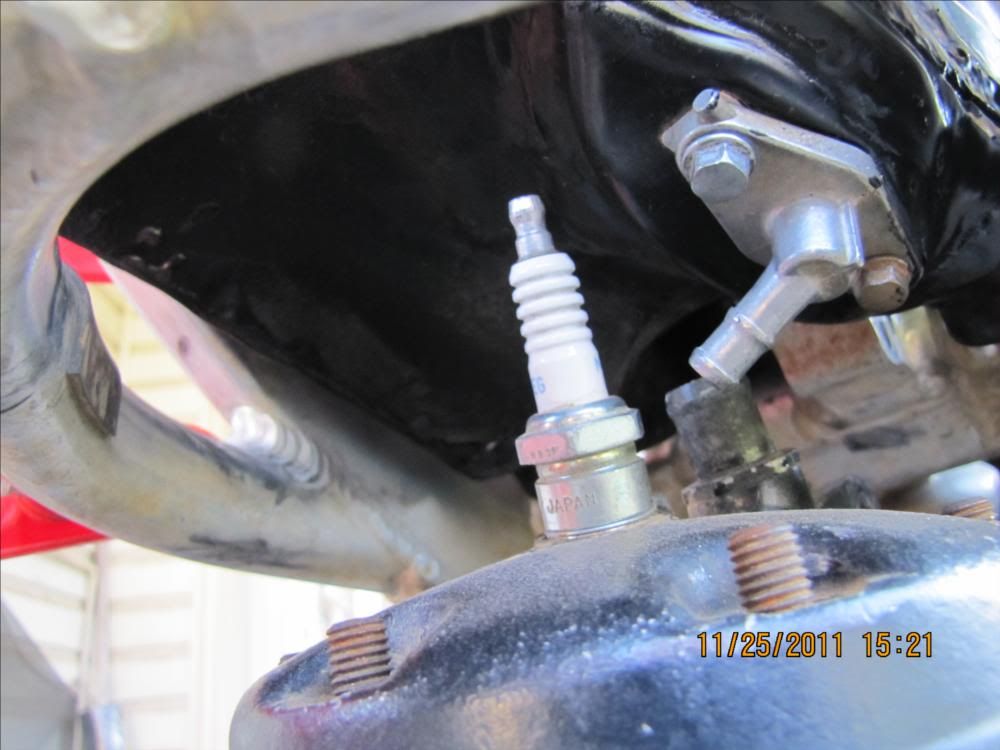
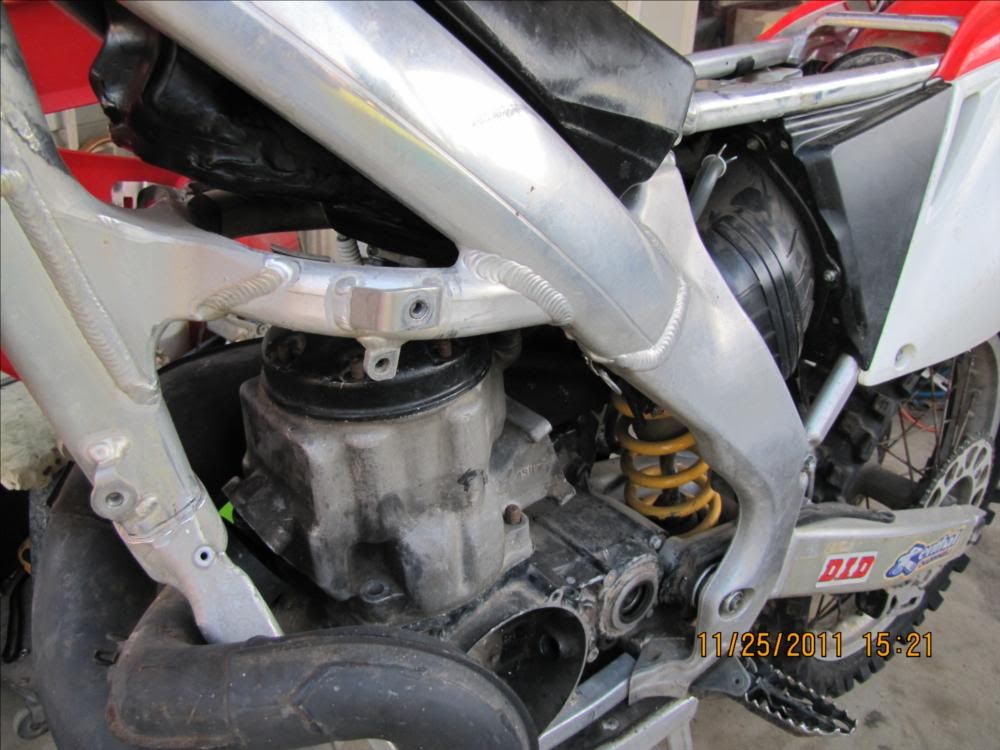
In these pictures, the engine is sitting in the new frame rails which are not yet welded together. The engine is probably sitting 3/4" higher than it will be when welded. The spark plug had plenty of room, and best of all, I believe I'll be able to run stock radiator hoses to an unmodified head. I haven't measured the tank's new capacity, but would guess it holds over a gallon--more than enough for a couple of 5 lap motos in the vet class. BTW, I know the spigot is on backwards in the pictures. It had to be that way when I was welding it.
I'm not too concerned about changing the center of gravity, because that all got changed anyway when I decided to put the 1/2 liter engine in.

Posted: December 18th, 2011, 6:58 pm
by maddog1927
Did you mill out the swingarm bushings, or did you remove the 250F bushings and use those? I tried milling out some '88 bushings. They are hard as diamonds.
Posted: December 18th, 2011, 11:08 pm
by gregrobo
did you sell the exhaust yet if not pm me
Posted: December 20th, 2011, 1:01 pm
by plynn41
Maddog--One of the hoons here had given me a set of bushings that work.
Gregrobo--The bike had been changed over to the '06 dual exhaust setup, and yes, it was the first thing that sold.
This project has been on the shelf more than it should. I've got my tank looking good, but the plastic welds won't hold 100 psi. I've put more work into the tank than it's worth, but I still think I might be onto a good fix. Stay tuned for next update on the tank.
I hope to get the frame welded together in the next couple of weeks. Then I'll start putting the engine together. Hope to have it rideable for the first motos down here in February.
Posted: December 20th, 2011, 2:40 pm
by AlisoBob
plynn41 wrote:....but the plastic welds won't hold 100 psi..
WTF!

Posted: December 20th, 2011, 2:41 pm
by britincali
Posted: December 20th, 2011, 2:43 pm
by plynn41
Honestly, I don't know if I need to go ahead and try to run it, knowing the tank isn't pressurized. It will hold water indefinitely, but I know it's going to be bounced around on this bike, and I don't want to be the dude at the track that set's his homemade bike on fire in the middle of a race.
I've got an idea for making it bullet proof, just haven't had time to fab it yet.
Posted: December 20th, 2011, 4:03 pm
by gregrobo
maybe 1 or 2 psi but a hundred and it didn't explode or look like a balloon