Gen 3 CR125 Started

Building Tips, Suspension Set Ups, Conversion Parts .... Build to your Heart's Content!
User avatar
maddog1927
Posts: 313
Joined: April 4th, 2010, 8:10 am
Location: Mesa, AZ

Gen 3 CR125 Started

Post by maddog1927 »

I have had a Gen 2 bike for quite some time, all the while lusting after the Gen 3 bikes. Is it the sleek hour glass curvature of the frame, the line going down the spars that reminds me of the line going down the back of sexy stockings, or the cool shape of the weld where the spar meets the cast or forged portion, maybe it is the whole package. I did a body conversion on my gen 2, but this lust could not be overcome with make up.

I did not do enough research on the 125 vs 250 conversions. I had seen some smoking deals on 125s in the phoenix area, so I bought a billet wye, and head stays for gen 3 125 on ebay. I have not seen a smoking deal on a 125 since! I ended up getting a frame only for now.

Hind sight being 20/20, I have decided I would be better served had I done a 250 conversion “Algava Style”

http://cr500riders.com/cgi/yabb/YaBB.pl ... 913934/0#0

I think the "algava" 250 is the cleanest, most straight forward way to do it. I would eliminate the 125 pipe / tire contact problem, and the rake angle is probably better for the riding I do, dunes.

There are some cool things about the 125 though.

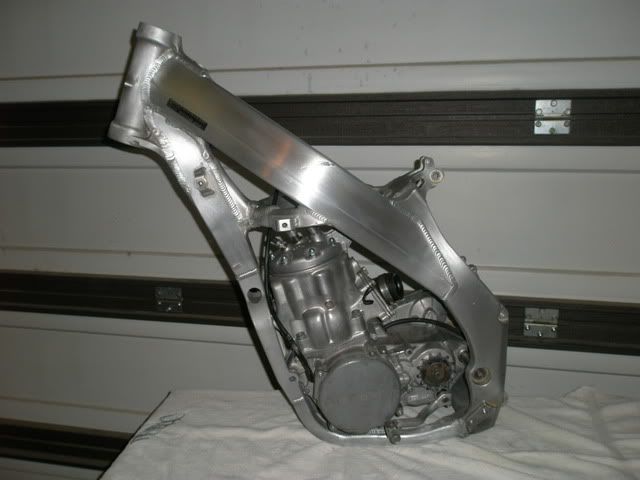
On the earlier years, probably ’02 – ’03, the left hand spar does is a lot cleaner than the 250. It does not have the brackets on the left spar for the power valve the way the 250 does. The handling should be quite nimble. It comes stock with the correct swing arm spacers, and lets face it to the average Joe telling them I put a 500 engine in a 125 will seem way cooler.

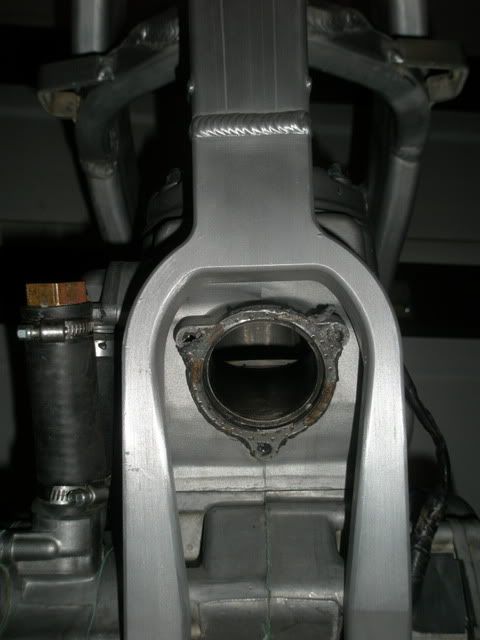
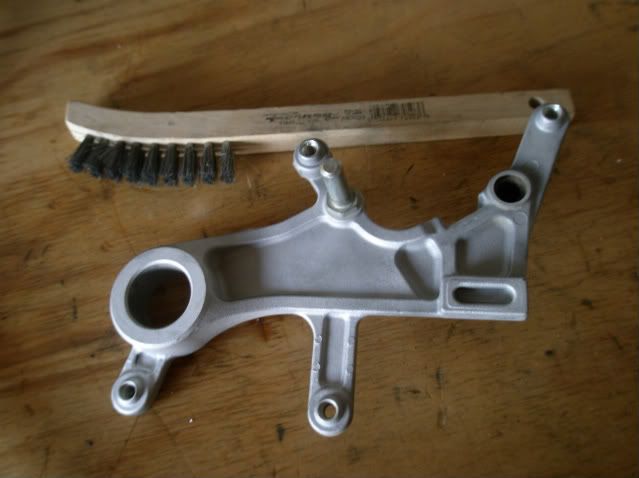
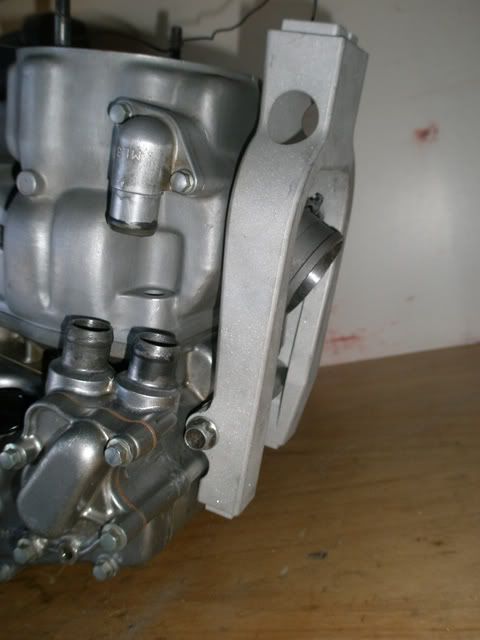
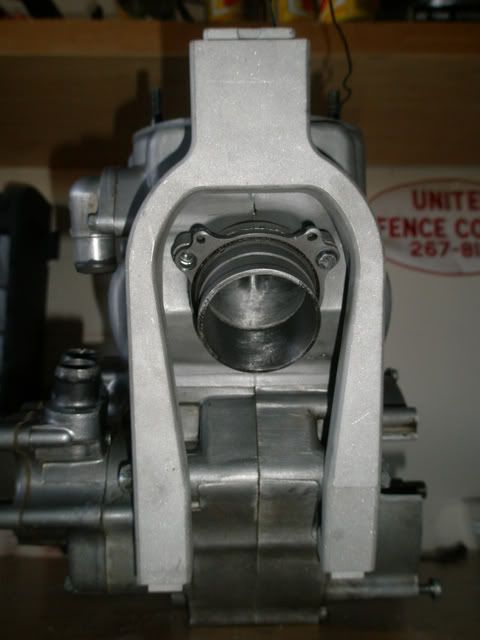
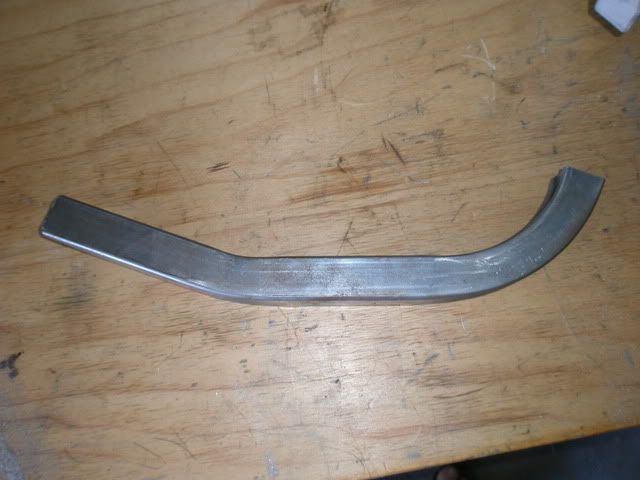
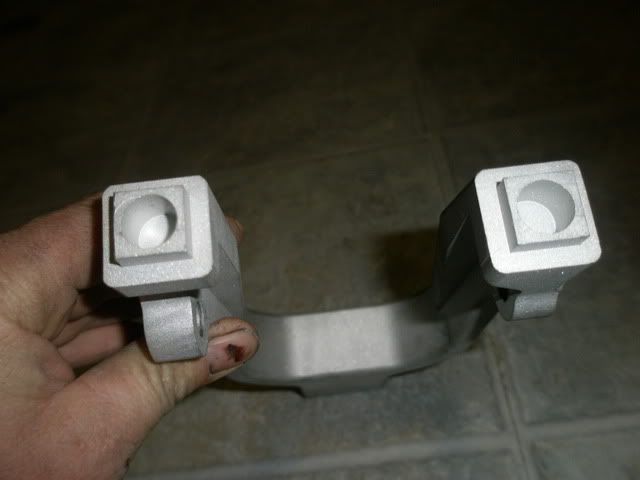
The wye that I got is very nice. It has built in front mounts and it really hugs close to the engine, allowing max space for the pipe.

Image
Image

Although the kit came with a steel model by which to have new lower tubes bent, I decided to try to keep the original tubes. I used AF’s post as reference.


http://cr500riders.com/cgi/yabb/YaBB.pl?num=1104642490

Image

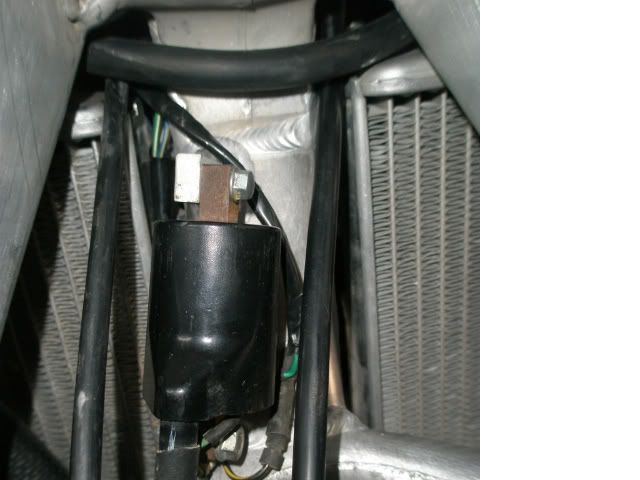
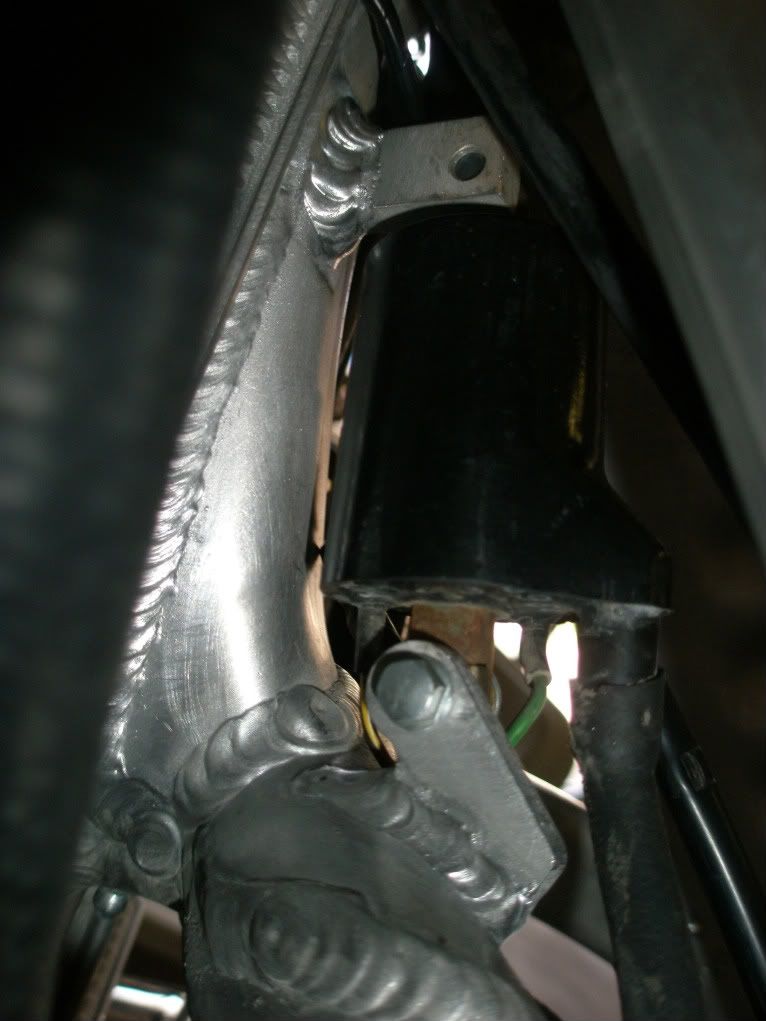
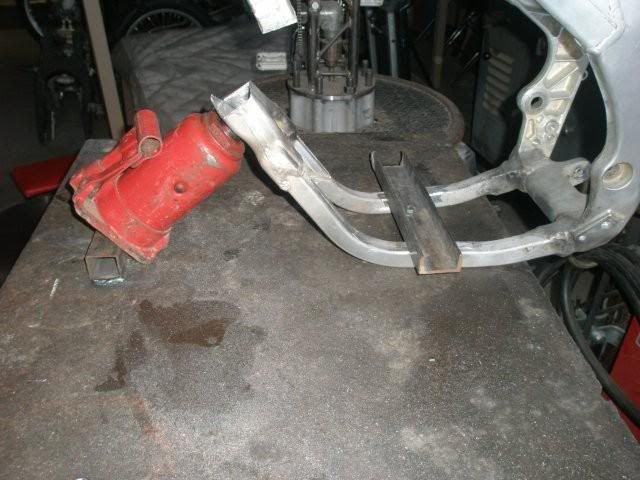
I removed the front mounts, and I cut the top welds on the oem wye. I followed the techniques I read in other posts, patience is key. Go slow and keep an eye on the entire radius of the cut off wheel. If you are looking only at the blade and where you want to cut, elsewhere on the blade it may be cutting somewhere you do not want. For this conversion I would have been well off to have just cut the down tube just above the oem wye with a portable band saw, I did the careful removal as practice. I would also have been well off to have removed the lower mounts, and the coil mounts at this point.

Next I set about to take some of the bend out of the oem cradle down by the pegs. I left the oem wye in tact to help keep both sides bending at the same rate. In AFs post he said he used a press, and it took 5 tons of force to bend. I am assuming he was bending each tube individually. I decided to try to take some temper out of the tube before bending.

One time I needed to bend a piece of aluminum tread plate as a rock guard for the front of a trailer. The tread plate was tempered and hard to bend. A friend taught me to light a rose bud with acetylene only and spread soot all over the tread plate, then to turn the oxy on and get a good flame and heat the piece until the soot burned off, let the piece return to room temp on its own and then bend. Once bent some of the temper returned. The soot / burn off is just an indicator of temperature. You must keep the torch moving fast as not to burn through in one spot.

I used this technique on the lower bend by the pegs. I am not sure what effect it had. I could not bend by hand. I had to bolt the frame to my welding bench and use a jack to bend. It seemed to bend very easy. I did not even use a handle in the jack.

Image

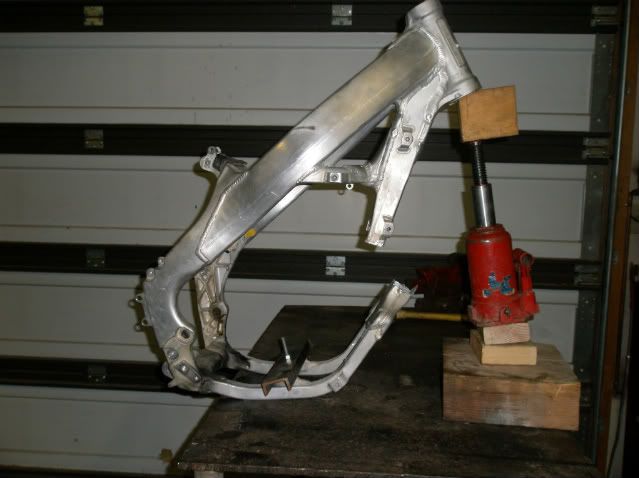
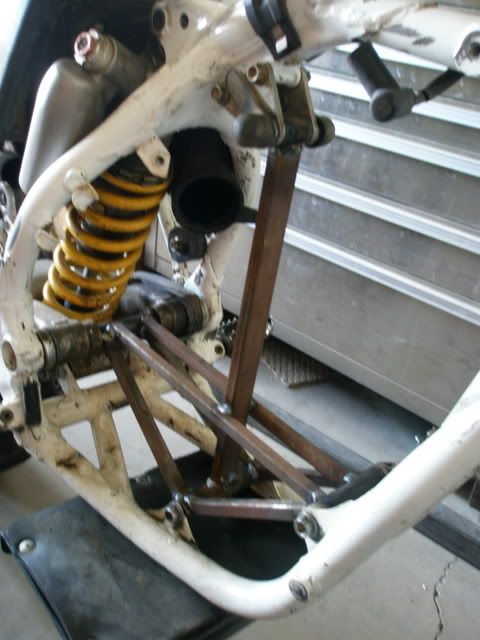
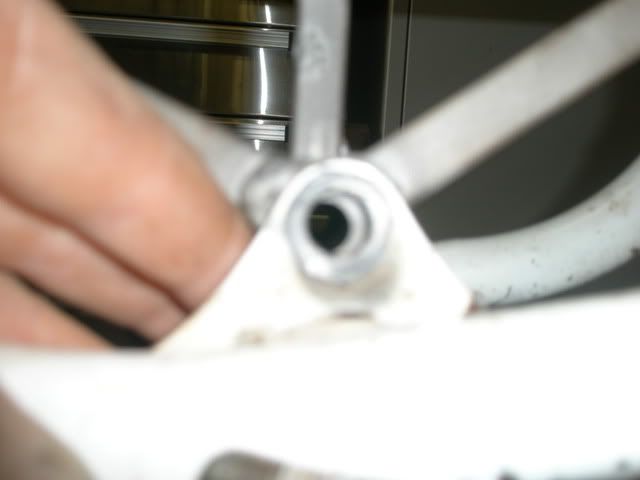
I bent little by little test fitting the engine after each bend. I was hoping that when I got to the right bend the lower mounts would magically be in the correct location. I was able to get the lower mounts to line up, and get both the swing arm bolt and lower mount bolt in, but the nose was too far up. The kick starter did not fit in the frame, nor the head stay. I ended up removing the lower mounts. I will either reuse them located about ½” back or use the front mounts that I removed. My preference is the front mounts they are slightly shorter so the frame would hug better, but I may have bent the frame too much to use them.

Image


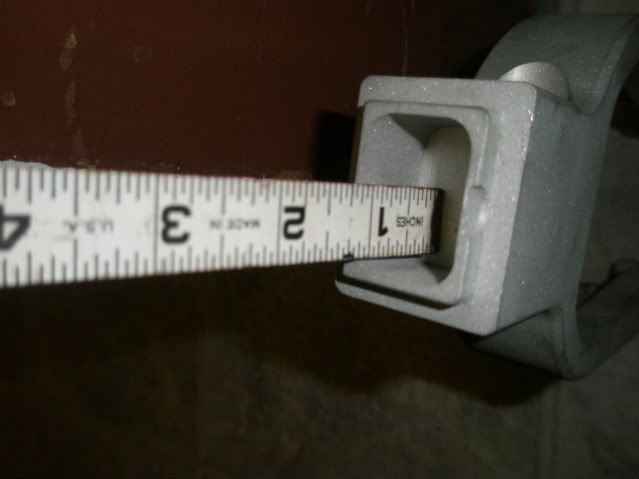
All the broken bikes that have broken in half that I have seen have been billet wye bikes, most likely due to the billet being so thick and not heating enough to get good penetration. This wye has milled pockets that should help out. I also plan on pre heating a bit.


Image

Image

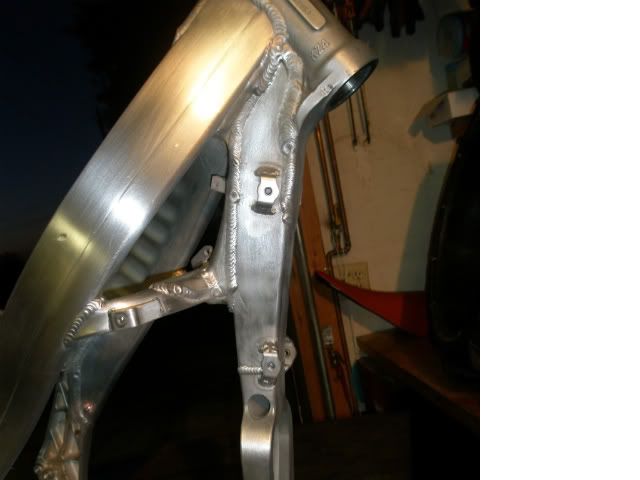
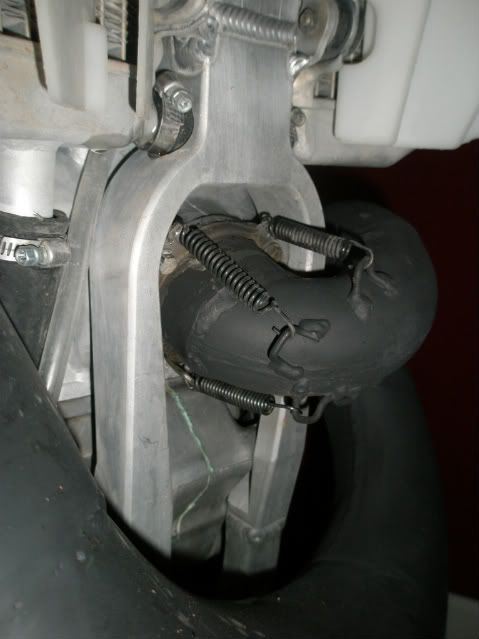
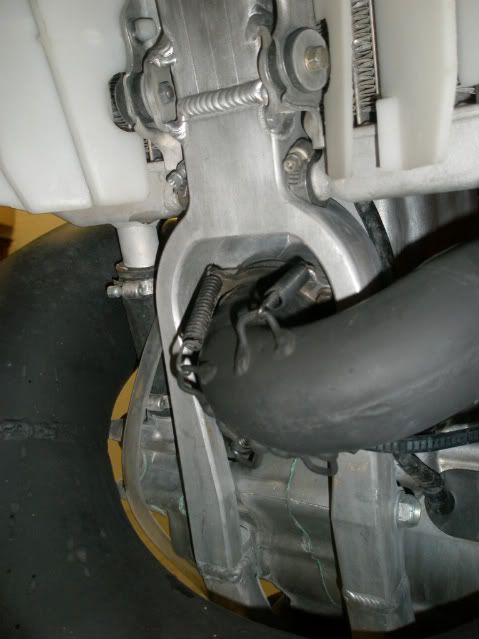
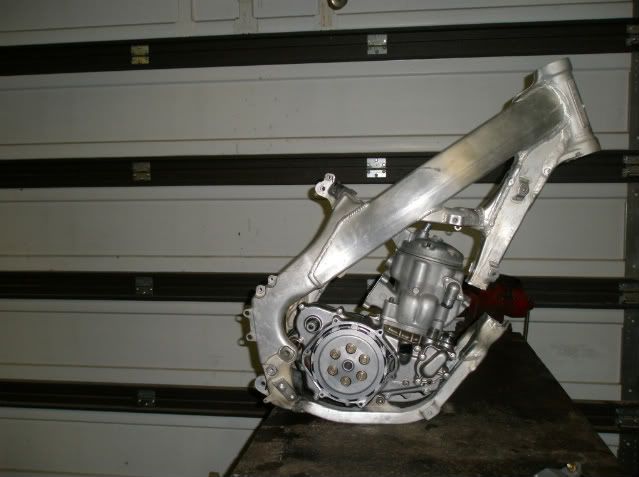
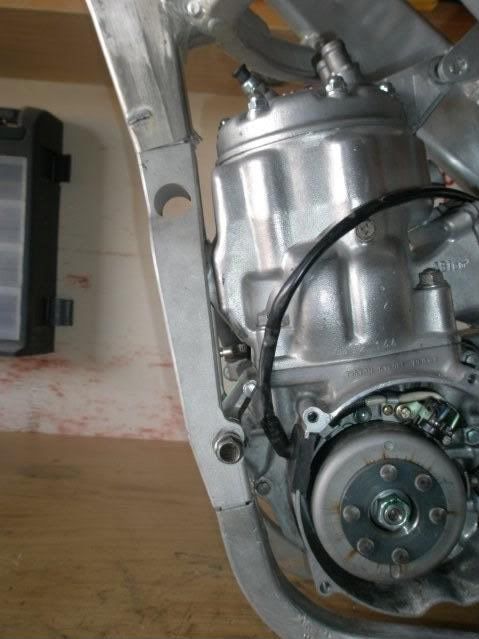
I did some work bending the front of the tubes. I left the oem wye intact for a more uniform bend. I used the same soot it up and burn it off procedure detailed above. I was in a hurry trying to squeeze it in before guests showed up for my 8 yr. old’s birthday party, and I broke the #1 rule, patience, and over bent a bit. The left hand tube turned out nice. There is a lot of room on that side, also the LH down tube form the wye is about a ½” further back. The right hand side is a tight fit, and by just continuing the oem bend, it kicked the tube into the water pump. Hind sight I should have cut the wye before bending the front tubes and bent them independent. I should have just continued the oem bend on the left side (as I did), but for the right side I should have used the cut a pie shaped piece out and bent as detailed in AF’s build, or as Jercs recommended. I also had to tighten up the spread between the tubes as the connection to the billet wye is a little tighter.

Image


Image


Getting a little closer, I need to cut about another 1/8” to ¼” off the down tube to raise the wye to rotate the engine up so it fits the head stay.

Image


Any recommendations on a welder in the phoenix area? I have access to a very nice TIG, but do not feel comfortable welding aluminum.
User avatar
maddog1927
Posts: 313
Joined: April 4th, 2010, 8:10 am
Location: Mesa, AZ

Post by maddog1927 »

I got tired of taking the engine in and out so I set about to build a jig. The jigs that I have seen have not had a mock up of the mount on the head. I have a head stay that is set up to position the engine so that a 2000 cr 250 air boot will line up nice, so I wanted a jig that had a representation of a head mount.

For the rear mount, where the swing arm bolt passes through, I cut a piece of ½” schedule 40 steel pipe a little long, then squared the cut, trimmed to exact length, and bored to 17mm using a lathe. Using the swing arm bolt as a guide, I bored till it would just pass through.

The other 3 mounts, head, lower, and front, use a 10mm bolt. For those I also used 1/2” schedule 40 pipe. I cut short, welded some thick 5/6” washers on the ends, then squared up, trimmed to exact length, and bored washers to 10mm using the lathe.

I installed the 4 sleeves I had built and then cut and welded braces in between.

Image

The next day when I went to take the jig out, I was disappointed that the bolts did not just slide right out. I had been careful to center in the oversized mount holes on the frame, but now they were way off.


Image

I suspect the hollow tube used for the braces were the culprit. I think that the ends, where welded were expanded in the molten state during welding, then contracted upon cool down. If I would have used solid round or square, and welded in multiple stages, I may have had better success. To fix I filed out the holes, which was not too bad since I had used washers welded on the ends of a larger diameter pipe, then welded in the area opposite of where I filed, then filed back out to round. In the end I could slide all the bolts in and out effortlessly, and everything lined up well.
User avatar
pstoffers
Posts: 1652
Joined: May 31st, 2007, 8:04 pm
Location: Oakdale, CA

Post by pstoffers »

:itsok:
NAHA PRO HILLCLIMBER #216
LIVIN THE DREAM!!!

NOTHING BUT GREEN LABEL BLENDZALL!!!

http://sponsorhouse.loopd.com/Members/P ... /Home.aspx
http://www.pro-hillclimbers.org/
User avatar
maddog1927
Posts: 313
Joined: April 4th, 2010, 8:10 am
Location: Mesa, AZ

Post by maddog1927 »

I got the frame back from the welder.

Image

Image

The engine is a tight fit. I had to take off the exhaust flange.
User avatar
Gmbond
Posts: 381
Joined: September 14th, 2009, 7:17 pm
Location: Ontario Canada

Post by Gmbond »

Sure looks like you found a good welder to do the job!!! NICE!

Sweet y piece too. That looks lime it belongs and Soo tidy!!
100hp honda
Posts: 4394
Joined: July 4th, 2007, 6:57 pm

Post by 100hp honda »

damn nice welds its appears. was it someone local in phoenix ?
User avatar
maddog1927
Posts: 313
Joined: April 4th, 2010, 8:10 am
Location: Mesa, AZ

Post by maddog1927 »

thanks guys.

Welder is a friend of a friend in East Mesa.
vhoney
Posts: 113
Joined: January 14th, 2009, 6:59 pm

Post by vhoney »

looks awesome!!
User avatar
britincali
Posts: 8207
Joined: May 31st, 2007, 7:10 pm
Location: Barstow, CA

Post by britincali »

Looks really good, nice one!
Coolness list by 90cr500guy

Bob's = 50/50
Cepek = cool
Solidbro = cool
Brit = loser
Stoffer = 1 up from Brit
MFDB = cool
Danny = ok
User avatar
2t500nutter
Posts: 11
Joined: February 16th, 2011, 11:12 am
Location: Lake Macquarie NSW Australia

Post by 2t500nutter »

Nice, the only thing I don't like is the big hole bored through the Y piece.. I know it will make the hose between radiators line up without any mods but why weaken a billet piece.. It looks awesome though.. I use Pro Circut pipes on 125 conversions & they clear the tire easy, once you have the wheels on it pull the caps off the forks, remove the springs & run the forks through the entire stroke with an overinflated tire to check for clearance.. You will need heavier oil in the forks now anyway, I use heavier springs too.. I'm doing 2 125's now so I can give you some tips as I get further into it.. I use custom PWR radiators but they would cost too much if you shipped them to the states.. They're made close to my home in Australia, they have a thicker core for better cooling & they can make any configuration of outlets & inlets.. It's been a while since I built an AF, but I've still got all my notes & sketches..
Horible noise & shredded metal inside the crank case.. Time to visit the doctor...
TM 300EN 2009
CR 500 AF 2007 frame 2000 engine
GSXR 1000 2010
Jercs

Post by Jercs »

That looks awesome Maddog. It really pays to have a professional welder TIG it together doesn't it? It looks way better than mine done with the same Y-piece. I have more of those Y-pieces available now if anyone is interested. Just PM me. You can have it with or without the hole for the crossover tube.


..
User avatar
maddog1927
Posts: 313
Joined: April 4th, 2010, 8:10 am
Location: Mesa, AZ

Post by maddog1927 »

Image
Image

seat, chain, pipe, and kicker are "mocked up"

I have been taking pictures along the way. I will do a better write up later.
User avatar
AlisoBob
"Hoon-father"
Posts: 15404
Joined: May 31st, 2007, 6:39 pm
Location: Aliso Viejo Ca

Post by AlisoBob »

2t500nutter wrote:Nice, the only thing I don't like is the big hole bored through the Y piece.. I know it will make the hose between radiators line up without any mods but why weaken a billet piece....
Even with the hole, that piece is prolly' 3x as strong as the OEM "Clamshell" that is replaces.

I would worry too much.....
User avatar
1fstdsl
Posts: 2
Joined: October 19th, 2010, 8:55 am
Location: Gilbert, AZ

Post by 1fstdsl »

maddog1927 wrote:Image
Image

seat, chain, pipe, and kicker are "mocked up"

I have been taking pictures along the way. I will do a better write up later.
That thing looks slow :roll:
oggo69
Posts: 259
Joined: November 6th, 2008, 5:48 am
Location: Dublin , Ireland

Post by oggo69 »

thats the ticker maddog ... swwccchhiinnng
sugarshane
Posts: 178
Joined: January 7th, 2010, 3:35 am
Location: Phoenix, AZ

Post by sugarshane »

Sweet looking bike Maddog.
How is the clearance for the front tire?
It looks like it will hit the pipe quite a bit but that might just be the angle of the photo.
And the black fork tubes look way better that the OEM goldish color
User avatar
maddog1927
Posts: 313
Joined: April 4th, 2010, 8:10 am
Location: Mesa, AZ

Post by maddog1927 »

That pipe was on as a mock up. Tire was into it at about 1/2 travel! same as other pipes (PC FMF). I reworked a PC to fit yeaterday. I will post pics later. I had to take about 1 1/8" out of the head pipe, right where it comes out of the exh flange, along with some other reworking.
User avatar
maddog1927
Posts: 313
Joined: April 4th, 2010, 8:10 am
Location: Mesa, AZ

Post by maddog1927 »

I used 2002 CR250 radiators. I Relocated the two lower cross overs about 3/4" forward. I could have just bent the cross overs a tad to line up with the hole in the wye, but the lower mount would have been overhanging the front of the frame by quite a bit, and I would have had to trim the fender. The mounts moved up about 1". For the lower outlet I cut off the OEM one, and installed a larger one that had been lathed from some aluminum pipe to have a hose retention lip at the bottom, oem style. A “Step Drill” comes in handy for opening up the lower hole to the correct size. To plug the holes I used 1/16" sheet aluminum. Cross over plugs punched with a ½" hollow punch. Lower outlet plug was larger, so I trimmed, filed, sanded, grinded, etc. with what ever I had.

http://www.harborfreight.com/9-piece-ho ... -3838.html

For the pipe mount I reused the stock 125 rigid mount. I had removed it from the frame to allow for bending of the cradle. I used a 500 pipe and a 250 double eyed rubber mount to position, although exact placement is not critical since I will be customizing the pipe and can relocate the mount on it.

For the coil mounts, once again I used the 125 OEM’s that I had cut off. I relocated them as shown. I later moved the coil to the other side of the mounts that shown in the pic, for tank clearance.

Image

Image

I have a tig welder so I was able to tack the 7 tabs in place before I took it to the welder, otherwise I would have had to been there when the welding happened to get placements correct. (4 radiator, two coil , 1 pipe mount)

Frame after tabs welded:

Image
User avatar
gregrobo
Posts: 1064
Joined: April 18th, 2009, 8:47 am
Location: kalgoorlie, western australia

Post by gregrobo »

nice build maddog y looks nice and strong
only posties ride 4 stroke hondas
goldfields sheet metal fabrication
98 yzfr1
05 crf 500 race tech goldies
2010 rmz 500af
01 banshee
User avatar
racein01
Posts: 162
Joined: March 23rd, 2009, 2:21 am
Location: Central Qld Australia mate.

Post by racein01 »

Love this bike :cool: . top job maddog
User avatar
4Z
Posts: 299
Joined: February 7th, 2008, 7:38 pm
Location: Western WA
Contact:

Post by 4Z »

Very high sex appeal MD. That thing is looking GOOD!!!!
User avatar
maddog1927
Posts: 313
Joined: April 4th, 2010, 8:10 am
Location: Mesa, AZ

Post by maddog1927 »

Thanks for the kind words.

A few pics of the radiators

Image

Image

Image
User avatar
maddog1927
Posts: 313
Joined: April 4th, 2010, 8:10 am
Location: Mesa, AZ

Post by maddog1927 »

While the frame was at the welder I worked on cleaning up all the parts that were going back on. I found a small sauce pan with about a pint of mineral spirits to be a good substitute for a parts washer. I use diesel fuel in my large parts washer. Because my wife does not like the smell of diesel fuel, I only use it for the larger projects. What is up with that? I like it when she smells all flowery and like a woman, you would think that when I come in smelling like diesel fuel, or after a week of elk hunting when I smell as manly as it gets she would not be able to keep her hands off.

Many of the parts I used the abrasive blaster to clean up, which leaves a porous and easily dirtied surface, so I use a stainless steel wire brush to close the pours and give it a brushed look. The brush shown is may favorite, but I have a larger and smaller one that come in handy sometimes. I have found a course scotch brite, and stainless steel wire brush to be the way to go in search of the clean brushed aluminum look. Worked well on the frame as well. I used to use WD-40 and a scotch brite, but now I opt to go dry. Short strokes with the brush also seem to be better than long stokes.


Image

A few tricks with the abrasive blaster, mine was clogging up down where it picks up the media. I found that lowering the level of the media so that there was only about ½" to 1" above the pick up tube, Also I fixed, or rather, oiled the bearings in the vibrator motor which helped.
User avatar
maddog1927
Posts: 313
Joined: April 4th, 2010, 8:10 am
Location: Mesa, AZ

Post by maddog1927 »

Image

Image

Image
User avatar
coley13
Posts: 262
Joined: June 15th, 2007, 11:19 pm
Location: australia

Post by coley13 »

Awesome, any updates on you pipe issue?
13 isnt unlucky i just keep falling off
Post Reply