Page 1 of 2
Finished building the engine for my AF project
Posted: January 3rd, 2011, 6:17 pm
by dogger315
I finally finished the engine for my AF project. I put a lot of time and
effort into this one and it put a serious dent in my build fund, but I'm
happy with the way it turned out.
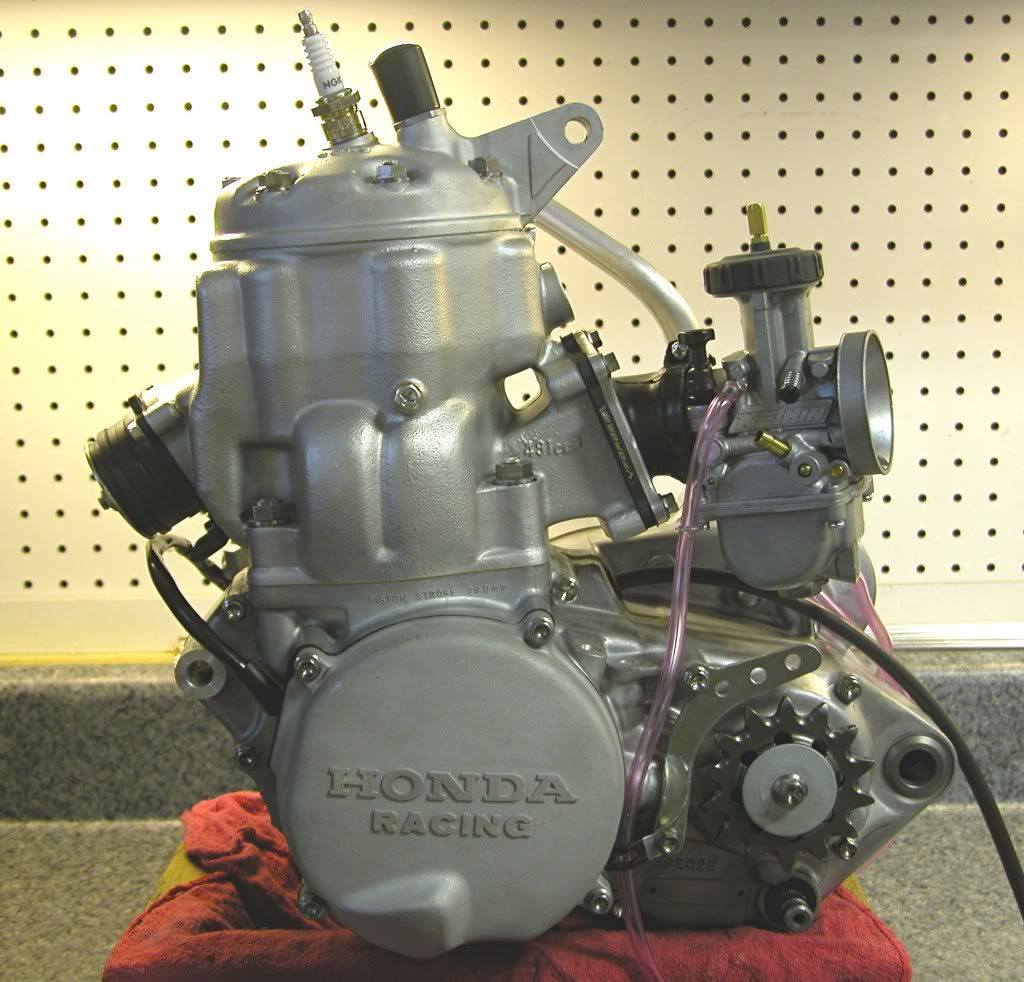
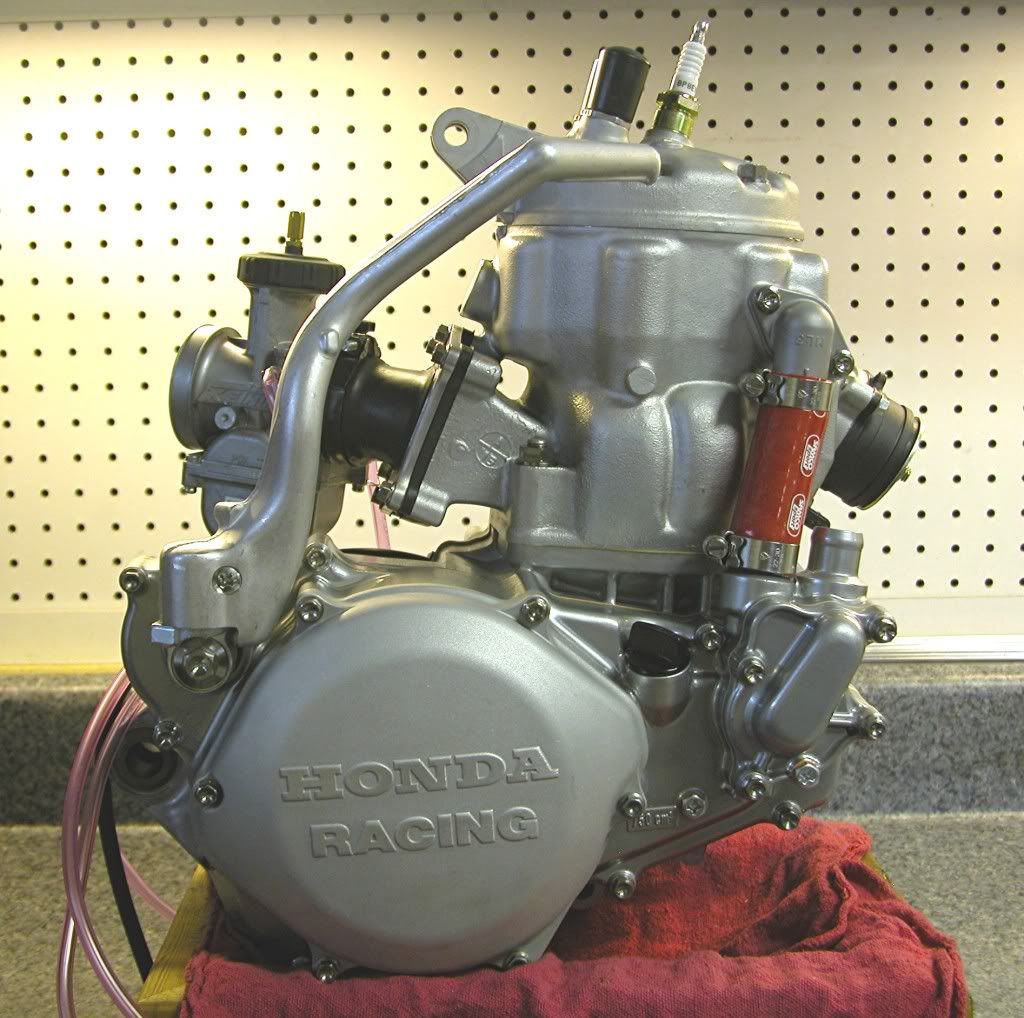
Here are a couple of "finished" pictures.
dogger
Posted: January 3rd, 2011, 6:26 pm
by maddog1927
Posted: January 3rd, 2011, 6:50 pm
by robfromga
Details?
Posted: January 3rd, 2011, 8:56 pm
by fastkart
robfromga wrote:Details?
Right off hand I think I see new cases, new clutch case and cover, new front sprocket, new exhaust flange with a plug in it, so I'm assuming a near 100% fresh bottom end (maybe used clutch basket & inner hub) thats had a leak down, VF3 reeds, water joint on the cyl with a bling hose, stainless bolts, possibly a new PWK carb, possibly a new kicker, and non-GSS ported, freshly bored used jug & head with either a Wiseco or Pro-X inside. How'd I do?

Posted: January 3rd, 2011, 11:35 pm
by kball1313
Nice hardware. Ti stuff?
Posted: January 4th, 2011, 4:15 am
by 2strokeforever
possibly a new PJ carb
PWK
Posted: January 4th, 2011, 6:07 am
by Tharrell
I wish you would have documented it like your 250 build I followed on tt.
I think it was TT.
Anyway, that series was fantastic.
Btw-I copied your leakdown tester and posted it here for the hoons a while back. That thing rocks!
Posted: January 4th, 2011, 6:50 am
by fastkart
2strokeforever wrote:possibly a new PJ carb
PWK
It was getting late.
Posted: January 4th, 2011, 9:47 am
by dogger315
I did document the build on another site (ATM). I didn't post it here
because I wasn't sure anybody would be interested in seeing another
500 build on a 500 specific site. I'd be happy to post the build series if
anyone is interested.
By the way, there are four used parts on the engine: Cylinder head,
right side clutch cover, exhaust flange and hose joint. There are a
total of nine steel fastners: Three drain screws, three exhaust flange
bolts, kickstart knuckle screw and two hoseclamp bolts. Everything
else is ti.
dogger
Posted: January 4th, 2011, 9:59 am
by Roostius_Maximus
post it up, its good lookin work

Posted: January 4th, 2011, 12:40 pm
by dubious01
Looks great.
I like the ti flange head bolts.
Where did you get them?
and the clutch and ignition covers rock...$$
Posted: January 4th, 2011, 1:34 pm
by Tharrell
I don't think anyone would mind if you posted, matter of fact we've been waiting for it since you became a member and posted your intentions.
Only a butthole would mind.
btw-The 250 build would be a bonus on here.
I'd like to see what you could do with a 73-4 Elsinore based on what I've seen.
Oh shit!
I just went to ATM and checked it out.
Other than the actual build which is 1st rate I only have one question right now.
What kinda camera are you using bro?
Those are fantastic pics!
You gotta post that on here, hardons for everybody!
DOH!!!
I was checking out your posts and saw your 73.
Let me try again.
I'd like to see what you could do with a 71 CZ380? hint hint!
Posted: January 4th, 2011, 5:50 pm
by dogger315
Thanks for the kudos. All compliments are eagerly accepted

I posted part one tonight. I am headed out for a week (day job),
so I'll post the rest of the series when I get back.
The camera I use is a Nikon Coolpix 5700.
The ti flange bolts come from Racebolts as does all the other ti.
dogger
Posted: January 4th, 2011, 6:56 pm
by robfromga
Saw the ATM threads, nice!
Posted: January 5th, 2011, 3:36 pm
by matt_NC
What is the ATM site?
That motor is beautiful!!!
Nice work

Posted: January 5th, 2011, 4:16 pm
by knobby668
Posted: January 7th, 2011, 8:52 am
by Roostius_Maximus
I need a lesson in a few things,
starting with section 1 of the rebuild, How can I magnaflux my case

in section 5,
" Even though the cylinder is brand new, it was bored "one" over to ensure a
perfectly concentric bore. In addition to the port work, the base was
machined to lower the ports (alter the timing) and the intake inlet and
exhaust outlet were matched to the VForce and exhaust flange respectively. "
Unless it was meant to read as +.001",
if not, then why would you have a 871MO
8900
piston in a bore thats "one over" at 89.25 with an oem or pro-x part, or 89.50mm with anything else, and its clearly visable to be a STD bore 89mm piston part number in the pictures
Posted: January 7th, 2011, 11:26 am
by AlisoBob
Roostius_Maximus wrote: .... its clearly visable to be a STD bore 89mm piston part number in the pictures
I like when the truth rises to the top.....
Posted: January 8th, 2011, 2:06 pm
by dogger315
I use a kit available from Aircraft Tool Supply. The kit consist of the
various dye penetrants and a black light along with a good manual
on how to test various metals and alloys. I highly recommend it
to anyone reusing used parts.
You are absolutely right about the bore, EG just knocked off enough
metal to ensure a concentric bore - so .001 may be an accurate
number. He said he gets better results doing this on new cylinders
because production tolerances aren't what they used to be. I
didn't measure the bore when I got it back, but the ring
gap is closer to the max than the minimum. At any rate, "one
over" was not the correct term. "One thousands over" may
have been better.
Another point I would like to make in regards to the ATM series,
the first post concerning the tear down was done to demonstrate
how that is done so I needed a used engine for that. I had
originally intended to rebuild that used engine for my AF but
decided against it after further consideration. I ended up re-
storing and selling all the decent parts from the used engine
except the parts I mentioned earlier.
dogger
Posted: January 8th, 2011, 2:18 pm
by AlisoBob
dogger315 wrote:The kit consist of the
various dye penetrants and a black light along with a good manual
on how to test various metals and alloys. .....
EG just knocked off enough metal to ensure a concentric bore - so .001 may be an accurate
number. He said he gets better results doing this on new cylinders
because production tolerances aren't what they used to be.
A dye penetrant has zero to do with the magnaflux process used on ferrous metals. Your kit sould like a knock-off of Zyglo.
As far as "cleaning up your bore".... taking 0.0005 off each side isnt going to staighten anything out. I'd trust Honda more than Gorr. I just sent Roosty a brand new OEM jug that was dead nuts on the bore.

I've never seen Honda finish a cylinder like that.
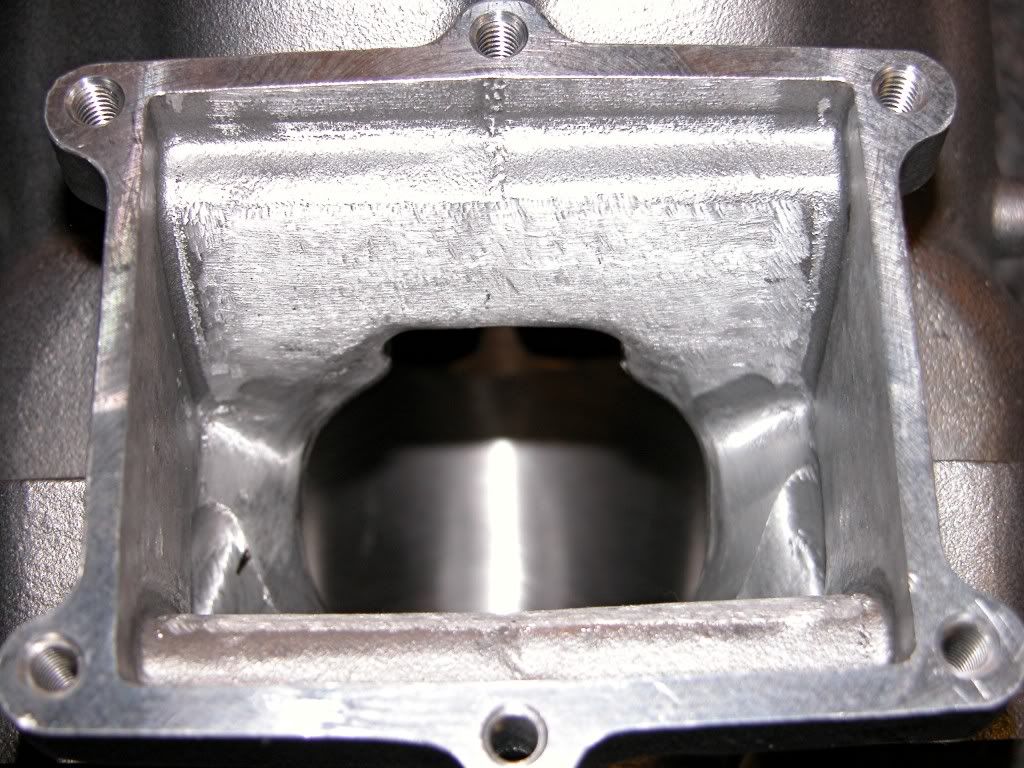
WTF?? Theres no air flowing where the inlet has been all ground and roughed up??
I went to ATM to see you build.... good work.
Posted: January 11th, 2011, 9:57 am
by dogger315
A dye penetrant has zero to do with the magnaflux process used on ferrous metals. Your kit sould like a knock-off of Zyglo.
True statement except for the knock-off part. The kit is manufactured
by Magnaflux for non-ferrous metal and is an actual Zyglo test kit.
I use the Magnavis kit by Magnaflux to test ferrous metal. This kit
consist of a yoke (to produce the current) and different kinds of
magnetic particle powders.
As far as "cleaning up your bore".... taking 0.0005 off each side isnt going to staighten anything out. I'd trust Honda more than Gorr. I just sent Roosty a brand new OEM jug that was dead nuts on the bore.
As far as EG's work, I hire these services out because IMO, port and head
work is better left to a professional - I'm an Aerospace Engineer by
education, not a motorcycle engine porting wiz. I tell them what kind of
power and power band I want and they do the work from their superior
skills and experience to produce it. This is why I clearly spell out up front
on any engine build post, what work I outsource. Any questions or
comments on how and why he does what he does should be directed to
him. All I care about are results, if the engine performs the way I want,
I'm happy. If it doesn't, I find somebody else.
I went to ATM to see you build.... good work.
Thanks a bunch. I just got back from six days of travel abroad. Once
I recover from the jet lag, I will post up the remaining sections.
dogger
Posted: January 11th, 2011, 10:53 am
by AlisoBob
dogger315 wrote: I will post up the remaining sections.
dogger
It was cool to see an actual crankshaft locking tool.
I always use a penny.

Posted: January 11th, 2011, 12:31 pm
by Tharrell
Ya know what I really like about doggers posts?
I've followed several threads of his and his stuff is just so friggin clean.
Heck, all my shirts have grease or oil stains in the back from leaning up against something.
You can imagine what the rest of me looks like when I'm actually workin on something!
Oh yeah, that and they're engines and stuff I like!
Keep it coming dogger.
Posted: January 11th, 2011, 2:54 pm
by blownbillybob
WOW!!!!!! First time I seen gorrs work??
I thought he could do better guess I was wrong
Cyl. finish looks alittle rough and one of his apprentices ported it?????
What did he charge you for it?
Posted: January 11th, 2011, 3:14 pm
by Roostius_Maximus
theres one thing i see that doesnt look Gorr, the exhasut port is missing the super wide eyebrows he likes to do.