Page 4 of 4
Posted: August 8th, 2011, 4:41 am
by bearorso
Shim the mounts.
Your engine and frame will thank you for doing that. Large diameter, to minimise dig in of the engine to the frame, and vise versa. Sharp edges of washers (under nuts and bolt heads), away from the frame.
Simple things like those can make a frame last a hell of a lot longer.
I'm glad you did the front weld - the other idea was intriguing, but a lot more effort. The welder obviously didn't 'go the gouge' on his few inches of bead. Most of them welcome something a bit different, to break the day up.
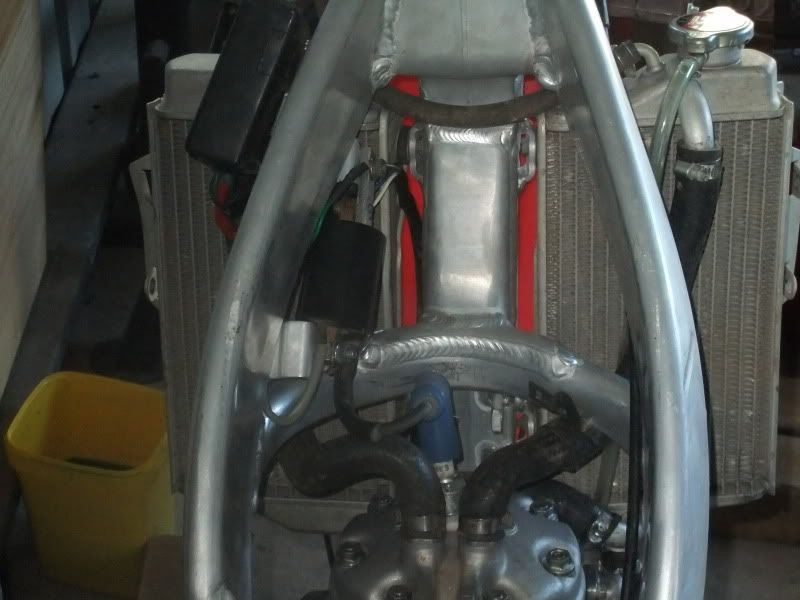
Are the shock / linkages hooked up properly in that pic? Looks like a much to big gap between the wheel and the fender. As little as a 1mm difference in linkage lengths/ pivot points / shocks from std can royally stuff up the rear end. And the whole bike.
Posted: August 8th, 2011, 1:14 pm
by coley13
AlisoBob wrote:coley13 wrote:
Anyway doesnt matter now, it's done
I would install the engine that I intended to use, and then "Match Drill" all 3 engine mount bolt holes to 7/16" ( Slightly oversize from 10mm) so the holes line up exactly with zero slop.
Then, shim any gaps ( dont draw the frame closed with the mounting bolts)
Done.

Thanks Bob. i would not of thought of that. Thankyou.
Posted: August 8th, 2011, 1:18 pm
by coley13
bearorso wrote:Shim the mounts.
Your engine and frame will thank you for doing that. Large diameter, to minimise dig in of the engine to the frame, and vise versa. Sharp edges of washers (under nuts and bolt heads), away from the frame.
Simple things like those can make a frame last a hell of a lot longer.
I'm glad you did the front weld - the other idea was intriguing, but a lot more effort. The welder obviously didn't 'go the gouge' on his few inches of bead. Most of them welcome something a bit different, to break the day up.
Are the shock / linkages hooked up properly in that pic? Looks like a much to big gap between the wheel and the fender. As little as a 1mm difference in linkage lengths/ pivot points / shocks from std can royally stuff up the rear end. And the whole bike.
if you look close the upper shock bolt is not installed, she's sitting below the hole.
The invaluable advise from yourself and Bob is what helps me learn. Thankyou
Posted: August 9th, 2011, 5:08 am
by bearorso
For a moment there, I thought you might have the ultimate 'Stink Bug' going.
Top exhaust springs and airboot sorted?
Have fun on it.

Posted: August 14th, 2011, 6:58 pm
by coley13
OK, had a bit of a hold up. My plan was to put my steely motor in until i saved up money to build my new motor. Murphy's law my steelie motor got dusted so i had to rebuild it.
Motor is in the frame, tell you what it was a pain. Empty cases are one thing but getting a full motor in is another story. Heavy thing..
I've started to hook up the electrical, hoses etc.
The upper radiator hoses are standard 500 hoses from the steel framed bike.
With the ignition ECM i've slotted the rubber and installed it on the left frame spar. It will sit behind the radiator shroud. I would of prefered to mount it behind the front number plate but the wires are too short. I will look into this later but for now it's going on the left spar.
i must say, i'm getting over trial fitting, experimenting, removing, fitting again. Giving me the shits to behonest. But i'm getting there i guess. Better be worth it.
Posted: August 14th, 2011, 6:59 pm
by coley13
it's finished

Posted: August 14th, 2011, 7:03 pm
by coley13
bearorso wrote:For a moment there, I thought you might have the ultimate 'Stink Bug' going.
Top exhaust springs and airboot sorted?
Have fun on it.
3 springs sorted thus far, 1 to go. I'm going to have a look at that after. I see how it goes with 3 first. The rad valve is a more relaxed fit, so no issues with the airboot
Posted: August 14th, 2011, 7:52 pm
by Kuma
coley13 wrote:it's finished

not quite... don't forget to put on a chain for your first ride

Posted: August 14th, 2011, 8:43 pm
by coley13
Trying to trick Bob, he cant say the chains too tight

seriously though, couldnt of done it without everyones help. So a big thanks
Posted: August 14th, 2011, 8:45 pm
by coley13
actually another thing i need to do is setup the suspension, i'm thinking new springs are in order. See what numbers i come up with first. She maybe a tad undersprung now
Posted: August 18th, 2011, 12:35 pm
by coley13
had to make a few final adjustments after geiving everything the twice over. One area of concern was the fuel line runs awfully close to the reed block. Was thinking either a P clamp off the reed block or a protective rubber over the existing fuel line. Last thing i want is a hole rubbed through on a hot engine

Regarding the rear wheel, being 125 it's quite small. What sort of size tyre are you blokes getting on a 1.85 rim? or is swapping the rim over to 2.15 a better option?
hopefully get to take it out for a spin this weekend
Posted: August 18th, 2011, 3:08 pm
by cmotodad
I have ran the 125 rim with a 120-80 tire. Works fine except we cracked it after awhile. No fault of the rim. It now has the 2.15 rim and we use the same tire.
Posted: February 27th, 2012, 7:09 pm
by Steve_K
I just installed the steelie spokes and rim onto the gen 3 hub. easy. I even left the tires on.
Posted: February 29th, 2012, 2:44 am
by coley13
i went with a dunlop 756 with a neutech tubliss. Jury is out on the tubliss still, i like very low pressures and this combo is not low enough i think mainly too much side wall strength. with ZERO psi reading albiet with guage readings that actual work maybe 3 to 4 psi at a quess. 6 to 8 would be ideal.
The flatter the tyre the better
It was lighting up the rear, my biggest problem was a soft rear spring that was unloading violently rebound and lighting the rear wheel. The correct spring fixed this however i would like a little more grip, it's close, but not quite there..
Joys of owning a 5 hundy