Page 2 of 6
Posted: June 4th, 2008, 5:31 pm
by Balaclava
ok man i gotta ask you what size tubing your welder used for the extensions on the frame? i need to find something somewhere that can work for my frame, i never thought it would be so miserable trying to find some...by the way that looks very clean...and you can't even see the welds anyways...going to be a sick bike...
Posted: June 5th, 2008, 4:15 am
by HrcRacing
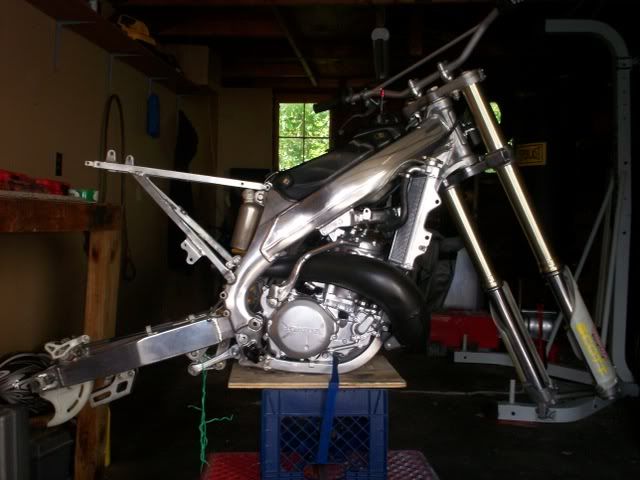
That's looking great man. I especially like the headstay. Very nice.
Way to stick with it!

Posted: June 5th, 2008, 5:55 am
by AlisoBob
Posted: June 5th, 2008, 12:08 pm
by eyesky2002
Balaclava wrote:ok man i gotta ask you what size tubing your welder used for the extensions on the frame? i need to find something somewhere that can work for my frame, i never thought it would be so miserable trying to find some...by the way that looks very clean...and you can't even see the welds anyways...going to be a sick bike...
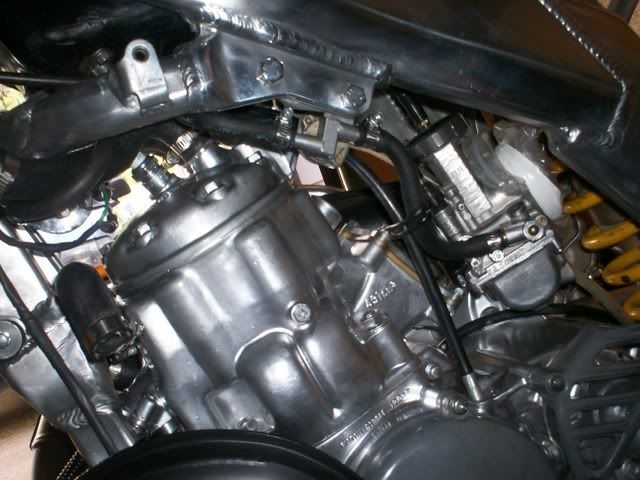
My welder (s) did just that... welded

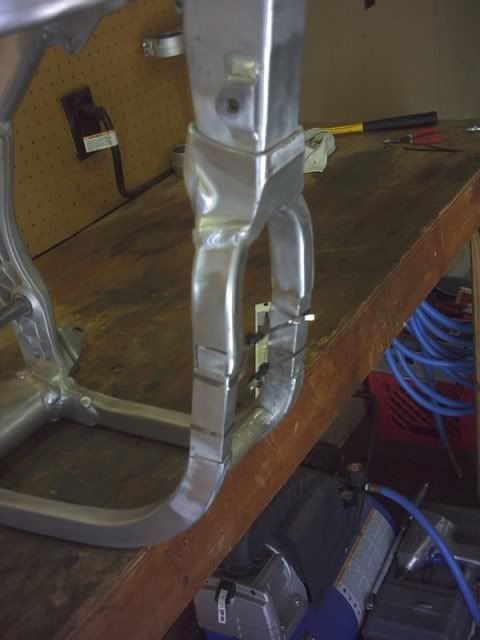
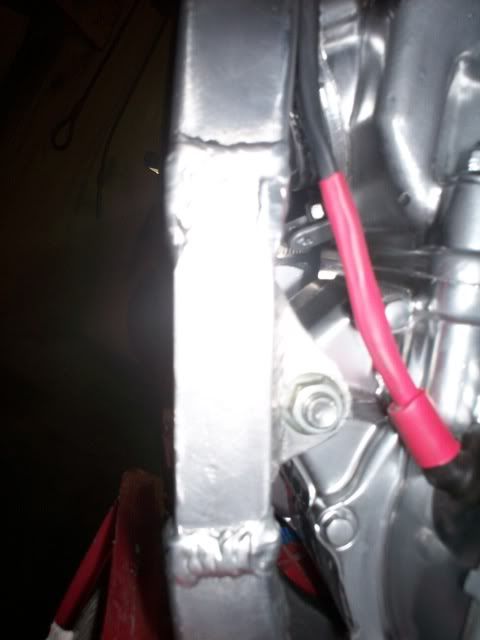
I used solid bar to fill in my frame section; which by the way came with the frame when I bought it, so I can tell you little about it. It was the same width as the frame section only a little less than a 1/16 of an inch shorter. You can see the diff in this pic!
Posted: June 5th, 2008, 7:18 pm
by HrcRacing
The billet pieces are 6061-T6 stock that I bought from onlinemetals.com.
Posted: June 5th, 2008, 11:03 pm
by Balaclava
what measurement exactly?
Posted: June 6th, 2008, 7:01 pm
by eyesky2002
Balaclava wrote:what measurement exactly?
1" x 3/4"


Posted: June 9th, 2008, 8:34 am
by Balaclava
thanks man...you have been a massive help to my build...
Posted: July 8th, 2008, 3:48 pm
by eyesky2002
Posted: July 8th, 2008, 4:13 pm
by britincali
Posted: July 9th, 2008, 9:37 am
by ben
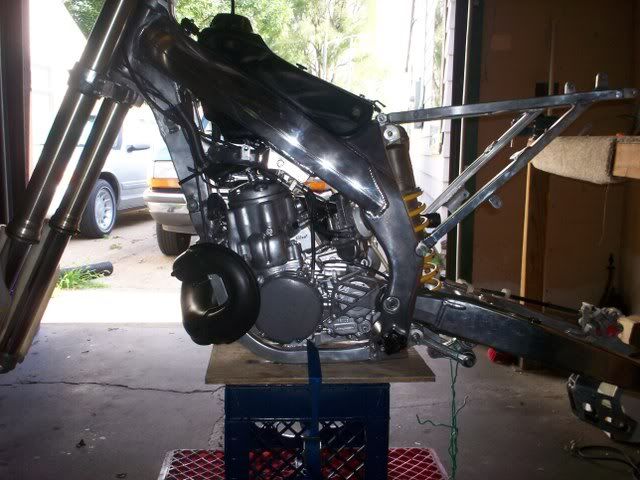
looking good
Posted: July 9th, 2008, 12:06 pm
by HrcRacing
Looks great man.

Posted: July 9th, 2008, 6:48 pm
by nmdesertrider
looking really good. Wait till you ride it, these things are awesome!
I have bought bikes out of a crate brand new but have never had the pride of ownership you get from riding a bike you built yourself. I actually wash it and change the air filter more than once a month.
Posted: July 12th, 2008, 8:56 am
by eyesky2002
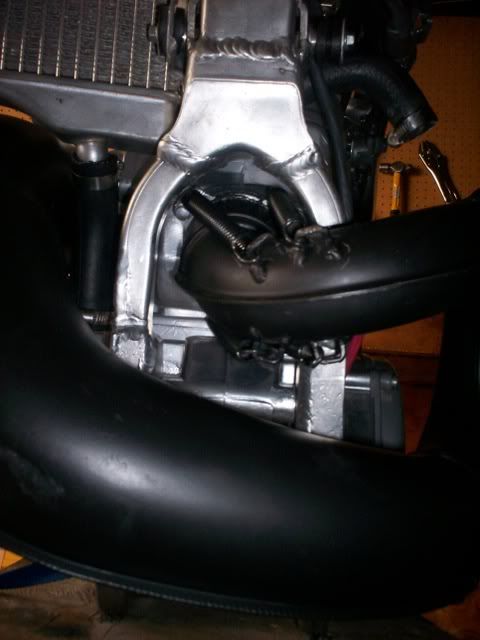
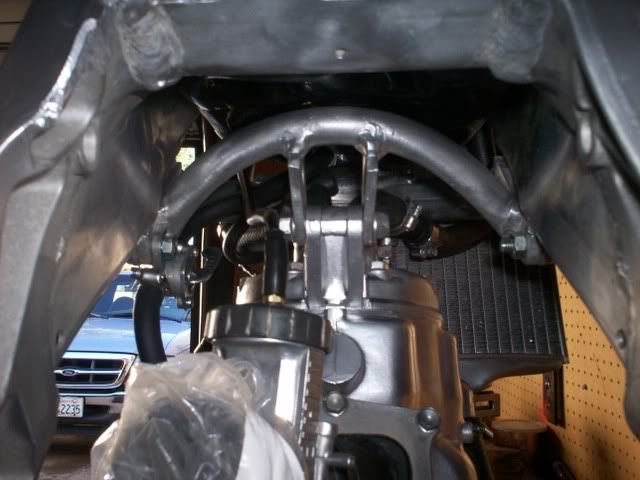
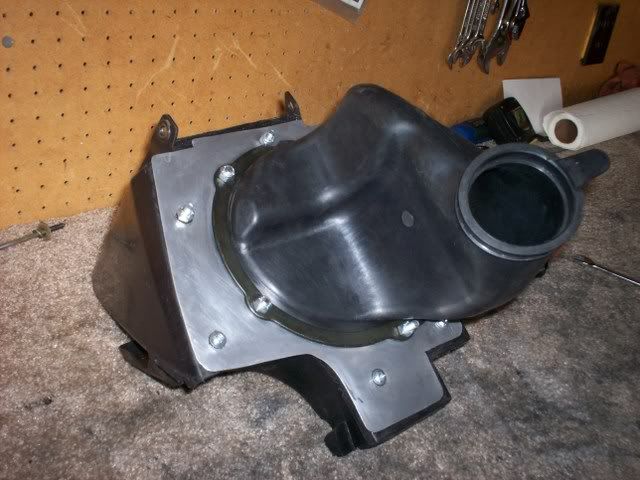
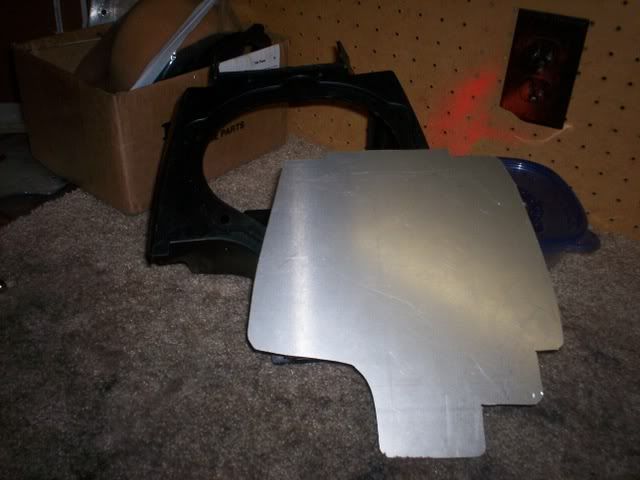
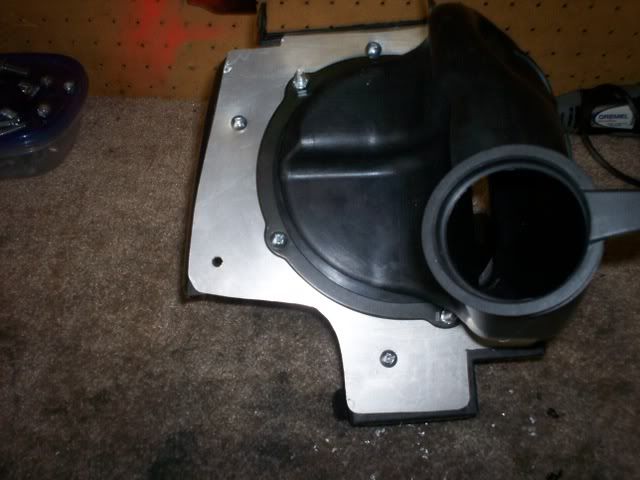
Got down and dirty with the airbox this morning. Went with a thin aluminum plate for the airbox. Stock 450 airbox, filter ring and filter. 1998 CR250 boot and outer metal boot ring. Cut the plate to fit with a jig saw and then cleaned the edges up with the Dremel.
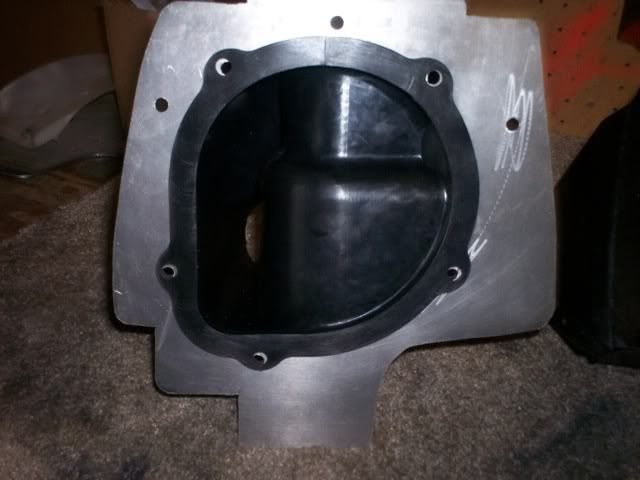
Mounted the plate to the front using the top 3 holes for the 450 air filter internal ring, they feel outside of the 250 boot. Stuck teh boot on the carb and fit it in all nice, attached box to sub frame and assembled. Marked out where 250 boot fit, this was after I applied a little heat and got things sitting nice and plumb. Cut hole in plate for 250 air boot and mounted boot to plate.
Outside shot

Inside shot
Mounted plate to airbox, added a couple extra bolt points. Fits nice, once I get the proper bolts and assemble it with silicon I will post the shots of it on the bike
Outside shot
Inside shot

[/youtube]
Posted: July 12th, 2008, 12:53 pm
by ben
have you bolted it on the bike yet does it clear the shocker ok
Posted: July 12th, 2008, 5:38 pm
by eyesky2002
Posted: July 12th, 2008, 5:42 pm
by AlisoBob
eyesky2002 wrote:
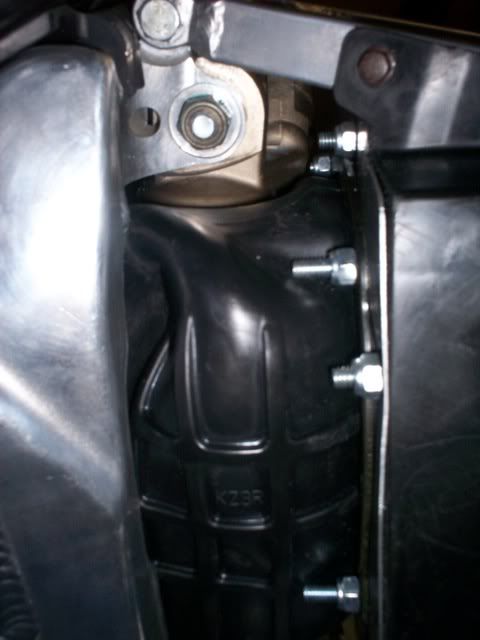
I did have to put a little heat on the top of the boot where it hit the frame, basicly poked the corner in and its holding that shape
I ground the frame a little on mine to gain some clearance with a similar issue....
Posted: July 12th, 2008, 5:52 pm
by eyesky2002
AlisoBob wrote:eyesky2002 wrote:
I did have to put a little heat on the top of the boot where it hit the frame, basicly poked the corner in and its holding that shape
I ground the frame a little on mine to gain some clearance with a similar issue....
I did too, but that corner still hit and threw the hole thing off, said puck it and poked it in!
Posted: July 12th, 2008, 6:01 pm
by CRMOE500
Nice work on that airbox Eyesky2002.
Posted: July 13th, 2008, 8:06 am
by Balaclava
so the 250 boot fits the 500 carb? can't wait for the bike pics...
Posted: July 13th, 2008, 8:10 am
by Balaclava
cause i tried heat expanding my boot and i ripped it...is there any issues with how it lines up from the box to the carb?
Posted: July 13th, 2008, 8:26 am
by eyesky2002
Balaclava wrote:so the 250 boot fits the 500 carb? can't wait for the bike pics...
Yes fits perfect, both the 250 and 500 PJ's have the same inlet size only the bore is different. Nothing is going to line up with the 450 boot pattern, so only thing left to do was make a new face for the box.
Posted: July 13th, 2008, 6:18 pm
by Balaclava
wicked man...you fuckin rule...you have single handedly figured most of the 450 conversion out for everyone...that looks sick, i'm gunna give her a tryi...
Posted: July 13th, 2008, 6:56 pm
by eyesky2002
Balaclava wrote:wicked man...you fuckin rule...you have single handedly figured most of the 450 conversion out for everyone...that looks sick, i'm gunna give her a tryi...
I did not figure out anything, just followed what others had done; only it took a while to have it come to vision in my mind.
Posted: July 13th, 2008, 7:21 pm
by AlisoBob
eyesky2002 wrote:.... so only thing left to do was make a new face for the box.
Looks familiar.....