Page 2 of 3
Posted: November 28th, 2010, 6:26 pm
by jarnott71
is your sprocket on right looks like it needs to be turned over the right way to line up?
Posted: November 28th, 2010, 6:49 pm
by mxdogger
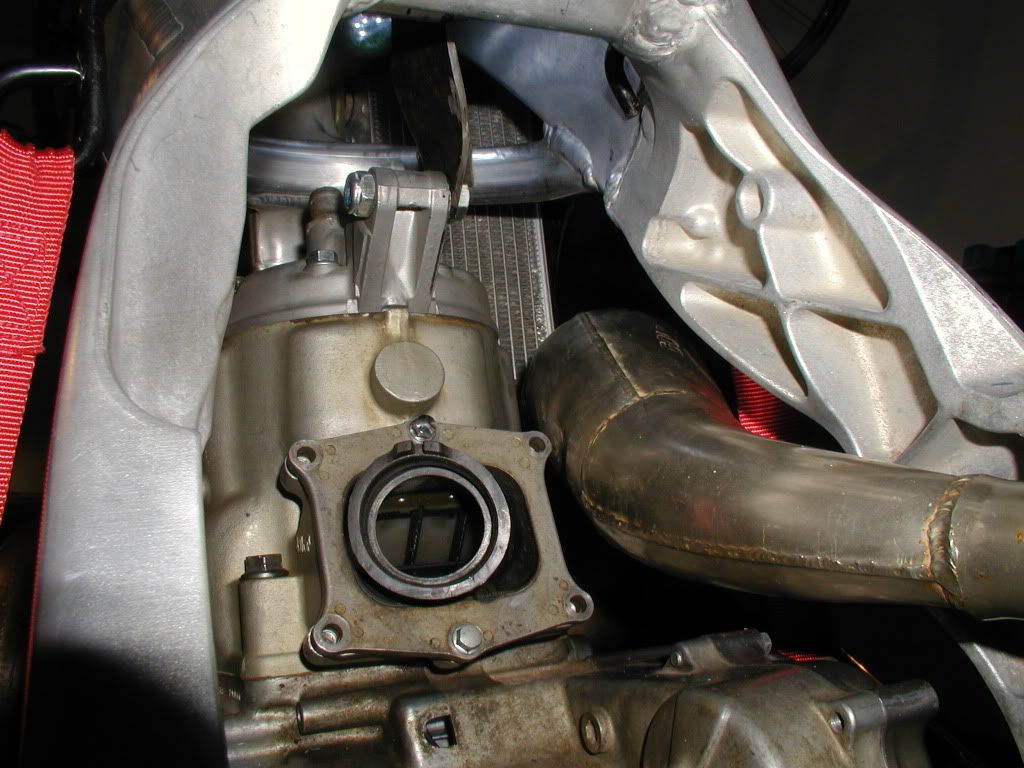
riverman i mounted a fatty on my crf250 conversion without problems, is your pipe tweaked ? i made a new stinger mount thats it.
on the sprocket side collar i made mine 52mm and it lined up perfect.
heres a pic of my pipe to cylinder intake clearance
Posted: November 28th, 2010, 6:50 pm
by riverman
I'll check it out that is the how it came on the donor bike.
Thanks
Posted: November 28th, 2010, 6:54 pm
by riverman
Wow that is night and day differance. I can barely get the pipe on.
It could be I bought it used . But it looks brand new just one small dent on the left side that sticks out past the stator cover.
Thanks
Posted: November 28th, 2010, 7:02 pm
by jarnott71
the bigger step goes on the out side it will line up TNA when you flip it.
they should mark it out side but they dont?
Posted: November 28th, 2010, 7:04 pm
by mxdogger
a hit on that side of the pipe could tighten up the way it wraps around.
be sure to figure out your silencer mounting before making that rear stinger mount, do that one last after you have the whole exhaust where you want it. it should all bolt up without any pulling or tension on it that could cause it to crack later.

Posted: November 29th, 2010, 6:35 pm
by riverman
jarnott71 I flipped it around and guess what it lines up perfect.
Thanks
Posted: November 29th, 2010, 8:10 pm
by AlisoBob
More pipe fitting
Posted: November 30th, 2010, 7:17 pm
by riverman
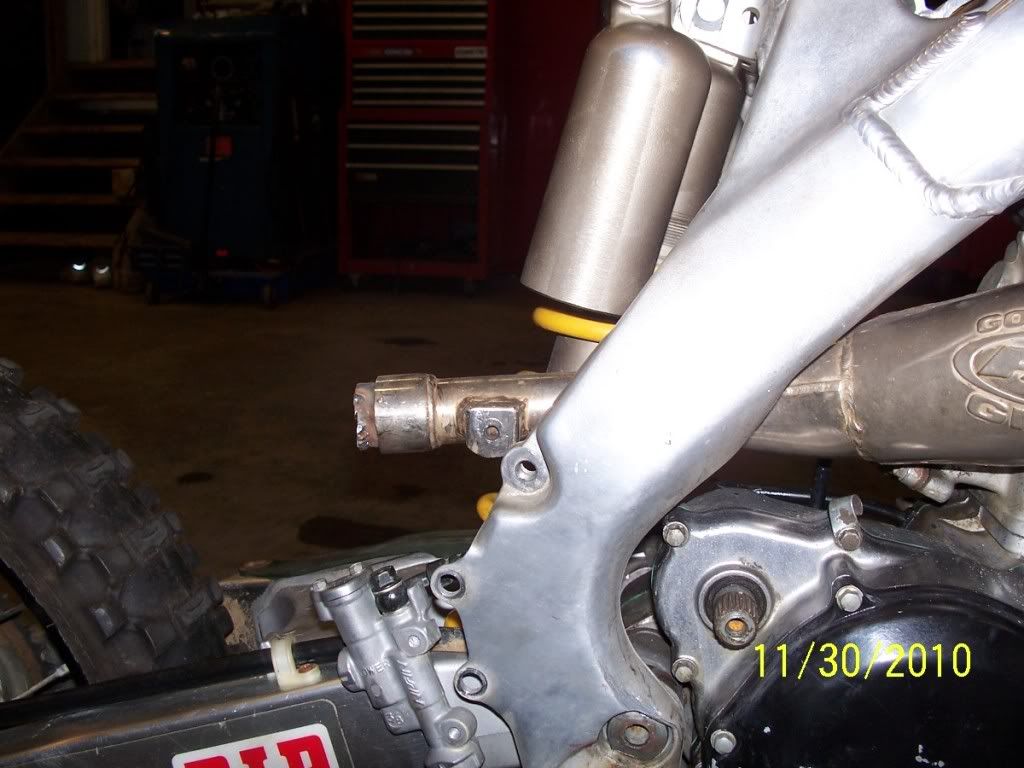
I put both pipes on tonight. The Gnarly well abused fits easly. The Fatty is tight but will go on with some work. The 2 have many differences but the main thing I think is the rear mounting point. I think the fatty mounting point will have to be moved this will give it plenty of room the pic does not show it but You can gain a half inch by moving the mounting point. first pic is the fatty second is the gnarly. she loves the smell of 927.

[/img]

[/img]


[/img]
Posted: December 3rd, 2010, 1:15 pm
by dubious01
she smells the baked beans in the 927!

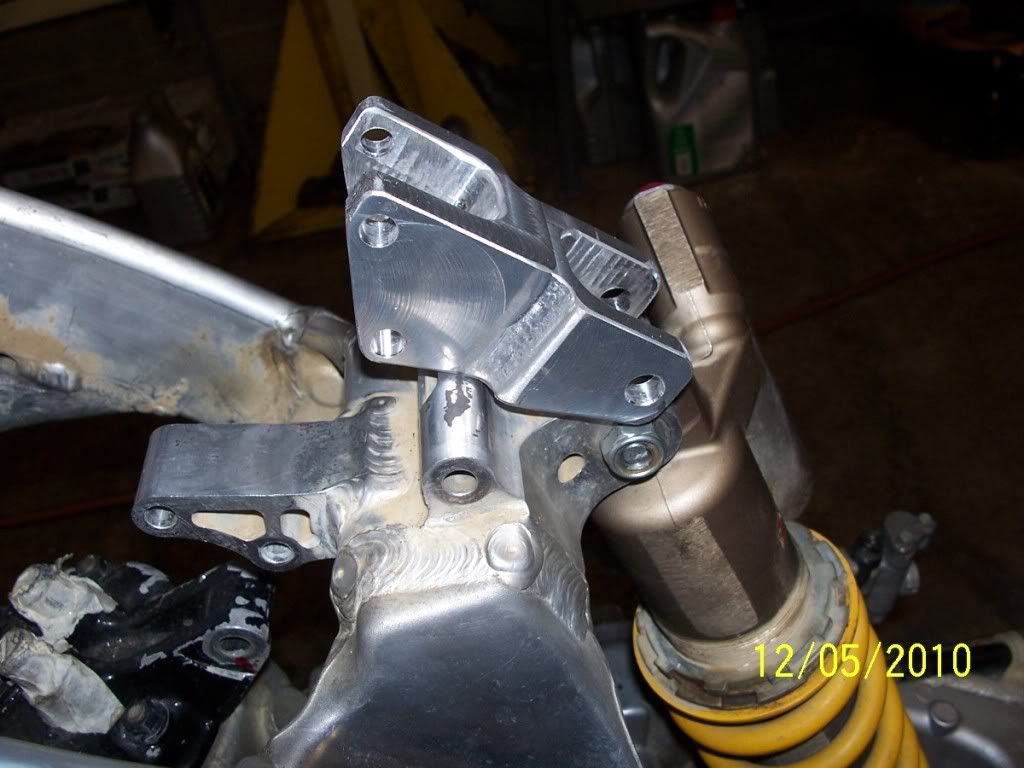
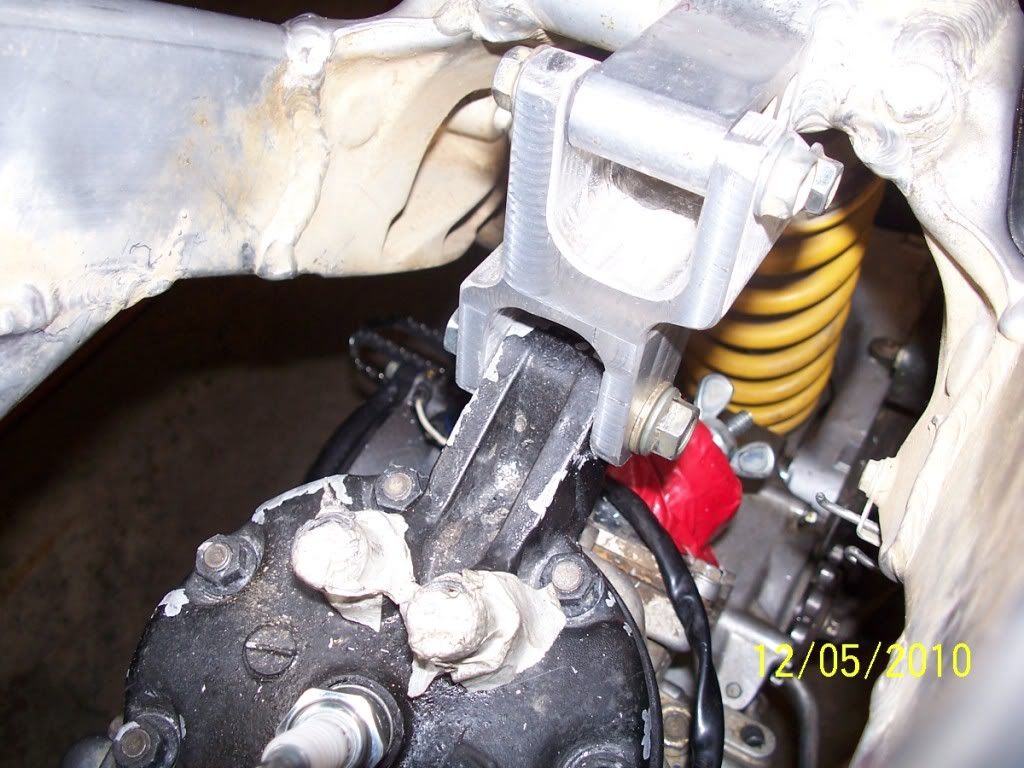
Head stay
Posted: December 5th, 2010, 7:16 pm
by riverman
Posted: December 5th, 2010, 8:43 pm
by AlisoBob
Nice work Hoon....
Posted: December 26th, 2010, 7:24 pm
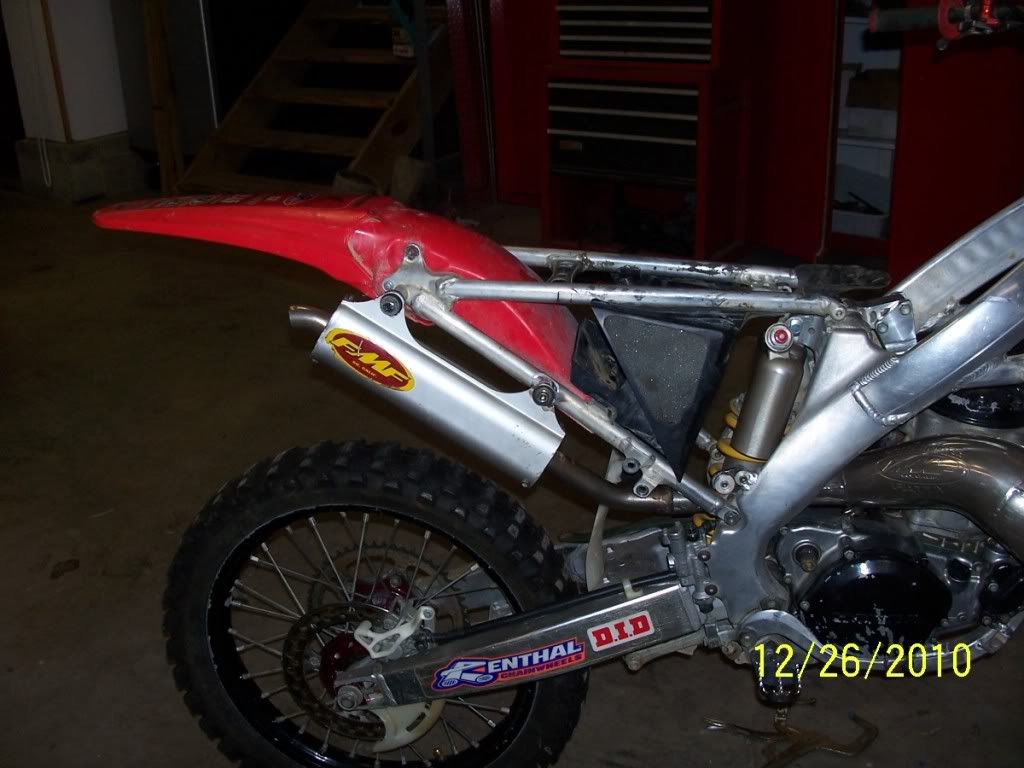
by riverman
Finally got some time off of work and got to work in the garage today. Raidiator Exhuast & started the air box what a pain in the ass. Used a 99 cr250 boot fits great but trying to make the plate to fit the crf box and using the 99 filter and bracket just does not work good. Do you guys change the left side radiator fitting on top or just stretch the hose over it when using the crf rads.

[/img]

[/img]
Posted: December 27th, 2010, 12:31 am
by dubious01
Nice work!
I'm right behind ya, start on my airbox mods, and rads tomorrow, and pipe fittment Tuesday when I can pick up my exhaust manifolds from the courier depot.
If your rebuilding your swingarm bearings, get the set for a late model CR125, the bushings are the same width as we need, everything else is the same. Mine should show up this week.
Posted: January 24th, 2011, 8:59 am
by Mikie1
You will need a bigger piece of aluminum plate for the airbox... I covered almost the entire front of the airbox with mine... the boot "sandwiches" the plate, and then pretty much the whole front of the airbox gets cut to make room for the metal filter base. It left only about 1/4" to seal the aluminum plate to the front of the airbox in 3 different places. I'm getting my aluminum sheet powder coated before I rivet it to the airbox.
I found a RotoZip with 1/4" spiral cutting blades and the router base attached works excellent for free-form cuts. A shaper would be ideal, but I just sit in a chair and put the RotoZip upside down (bit up) squeezed between my knees.
Posted: January 24th, 2011, 9:55 am
by hoofarted

but I just sit in a chair and put the RotoZip upside down (bit up) squeezed between my knees.
That's a potential nasty accident waiting to happen...
Posted: January 24th, 2011, 10:15 am
by Mikie1
Yeah, I know... I set the depth only enough for the bit to barely clear the aluminum sheet though, and I feed the sheet really slowly into the blade. Like I said, a shaper would be ideal. Actually a MILL would be ideal, but I don't have one of those...
Posted: January 24th, 2011, 4:12 pm
by riverman
I got a the bigger piece i was trying to make a template before I used the bigger one. Now if I could get some time away from work. This seven days a week is good for the bank account but is getting old.
Posted: July 9th, 2011, 10:52 am
by riverman
Do to work and other distractions the bike has taken a while. The last post I was working on the air box. It is done the engine rebuilt new bearings seals fresh bore new vertex piston.

[/img]
I had trouble forming the fuel tank but managed to make it work. After some agravation with the ignition the bike is running. I have a 2 coolant leaks both very small one is a radiator the other is the head gasket. Once i get it tunned right I will find a radiator to change out and replace the head gasket and figure out why it is leaking. Had to repalce the kicker also.

[/img]
I'll take some pics of the complete bike this weekend.
Thanks
for all of the help along the way


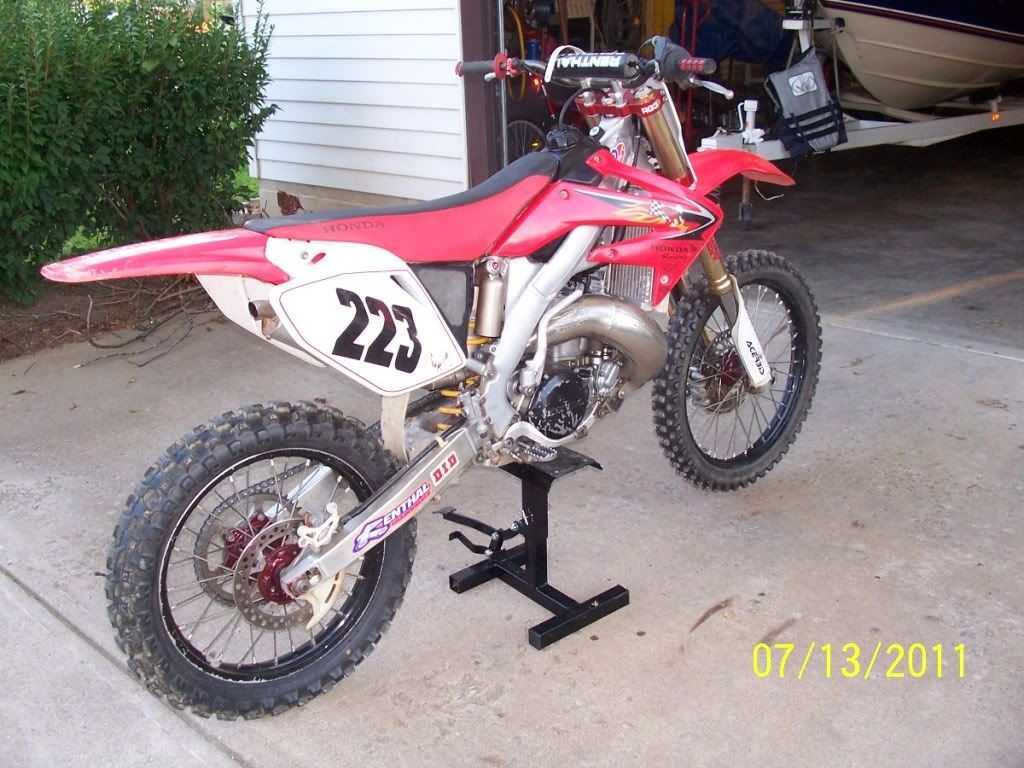
Posted: July 13th, 2011, 6:16 pm
by riverman
Bike is done. Bling to come later.

[/img]

[/img]
Posted: August 14th, 2011, 6:12 pm
by riverman
Went riding today. It finally cooled off only about 80 today. The bike starts easy now and ran good all day(about 7hrs). After getting home noticed the trailer had a spot on it under the bike. Put it in the shop went back out later and sure enough the F###ing tank is leaking. Has anyone modified a stock tank without it leaking?
Posted: August 20th, 2011, 6:44 am
by riverman
Bought a HF plastic welder ( Usally don't buy from HF but it was quick and Cheap) Cut some strips from the orginal tank that I screwed up and melted them into the area that was leaking. Put water in it for a day no leaks. Cleaned the tank put it on the bike added gas it has been holding for 3 days one short ride to put the heat to it. Only time will tell.
If you try this really thin strip work the best. I built up several layers.
Posted: September 3rd, 2011, 6:57 am
by riverman
Fucking tanks leaking again. This sucks!!!!!!!!!!!!!!!!!!!!!
Posted: September 3rd, 2011, 7:36 am
by AlisoBob
Posted: September 3rd, 2011, 8:35 am
by Tharrell
Man, you're a decent fabricator.
Make an aluminum tank, then sell'em to the rest of us.