Post by :Spanky
Your air filter is one of the most important components of your bike. A properly maintained filter will ensure that the engine only receives a diet of clean air. A poorly oiled or improperly installed air filter will allow abrasive dirt particles to enter your engine, causing rapid wear and premature failure, followed by expensive repairs.
To clean your filter correctly, you need the following items:
1. A mild solvent, such as Simple Green, mineral spirits, or kerosene, to remove the filter oil. Those of you that use No-Toil or K&N filters will need to use the specified cleaners for your application. I prefer kerosene for cleaning standard filter oil, but any good degreaser works fine.
2. 2 containers large enough to easily hold the filter, and to be able to clean it without spilling the contents. I use two 5-gallon buckets for this.
3. Mild soap and water.
4. The filter oil of your choice. Make sure that you use genuine filter oil. Other types of oils don’t become thick and tacky the way filter oil does, so they don’t trap the dirt as effectively, and gravity will pull them to the bottom of the filter and into the air boot, where the oil will clog the pilot and choke air passage intakes in the mouth of the carburetor.
5. Waterproof grease.
6. Plastic or latex gloves are a good idea whenever you are working with strong chemicals or petroleum products. These types of chemicals are murder on your skin, and they are potentially hazardous to your health, as well. I use long Playtex oven-cleaning gloves. Eye protection is also advisable. You’ll understand why if you splash some kerosene or mineral spirits in your eye, it’s not fun.
Cleaning your filter is an easy task, and should be done on a regular basis, to ensure the proper protection for your engine.
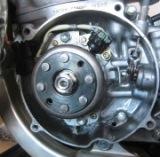
1. Remove the seat to access the filter. You KTM guys have it easy here, just pull the side cover off.
2. Remove the filter, being careful not to drop any dirt into the carburetor mouth.
3. Check to see if any dirt is present in the air boot. Clean the air boot thoroughly with a clean, solvent-soaked rag. Be sure not to dislodge any dirt from the air box that may fall into the carb. Stuff a rag into the air boot to keep any dirt out. Clean the air box completely. If you don’t, any dirt that is clinging to the sides will fall into the carb when you re-install the filter.
Now, we are ready to clean the filter.
4. Submerge the filter in the bucket of solvent, and gently squeeze and release the filter several times to ensure that all of the old oil is loosened and removed by the solvent. Never twist or wring a filter, as that will break the tiny walls that separate the individual pores of the filter, greatly reducing the surface area available to trap dirt.
5. Now wash the filter in the bucket of mild soapy water. Again, gently squeeze and release the filter, to force the soapy water in and out through the pores of the filter material. Rinse the filter in the same manner. Repeat until you see clean water when rinsing the filter. Hold the filter in front of a bright light, and look through it. You can see if there is any remaining dirt trapped in the filter. Clean again if necessary.
6. Now it’s time to oil the filter. I find it to be much easier and cleaner to do this inside a large freezer bag. Pour a small stream of oil onto the filter surface, all the way around the filter’s circumference, covering about 1/3 of the surface. Squeeze the filter inside the bag, working the oil into the filter, and spreading it evenly across the surface of the filter. Continue until the filter is uniformly covered. Add more oil as necessary to completely cover the entire filter. Now hold the bag upside down, with it open, over a container to catch the excess oil. Give the entire filter a strong, firm squeeze, to remove any excess oil. Too much oil will make your bike run poorly, and will migrate into the tiny air passages in the intake mouth of the carb, clogging them.
7. Run a thin bead of waterproof grease all the way around the sealing edge of the filter, covering the lip from edge to edge. This is to ensure a good seal against the surface of the air box, to prevent any dirt from leaking around the filter. If your filter or air box is equipped with a neoprene gasket at the sealing area, you do not need to do this.
8. Remember the rag we stuffed in the air boot? Don’t forget to remove it at this time! Don’t laugh, it isn’t as hard as you think to forget this little detail, and it will ruin your riding day when you can’t understand why your bike won’t start.
9. Install the filter onto its frame, and install the assembly into the air box. With your finger, put a small dab of grease over the hole that the filter retainer bolt goes through, to prevent dirt from being sucked through here. Install and tighten the filter retainer. Check all the way around the filter to ensure that it is in place and seated properly.
10. With a clean rag, remove any grease that you may have gotten on the inside of the air box, to prevent dirt build-up.
11. Now, re-install the seat or air box cover. The filter should be allowed at least one hour to dry before riding, so that the solvents in the oil can evaporate, changing the filter oil into a very sticky residue that will do an excellent job of trapping dirt. Riding on a freshly oiled filter usually makes your bike run raspy and rough, because the engine is burning the solvent vapors that are evaporating from the filter oil.
Even if your filter doesn’t get dirty, or you don’t go riding for some reason, filter oil begins to lose its ability to trap dirt effectively after about a week. If it has been longer than a week since you oiled the filter, it needs to be re-oiled, even if it doesn’t need cleaning.
Go ride, and enjoy the knowledge that your engine is breathing the cleanest air that you can give it!
Air Filter Servicing
So what are you're guys's thoughts on filters? Twin Air...UNI...or the dozens of other replica brands? Oh I forgot, and the OE filter.
I swap between a UNI and Twin Air from ride to ride. Honestly I think the TA needs a little richer jetting then the UNI. It seems to pass a sliver more air. But it's hard to beat a UNI's filtration I think.
I swap between a UNI and Twin Air from ride to ride. Honestly I think the TA needs a little richer jetting then the UNI. It seems to pass a sliver more air. But it's hard to beat a UNI's filtration I think.
'03 CR500 powered by...umm...a new motor?
-
AlisoBob

- "Hoon-father"
- Posts: 15405
- Joined: May 31st, 2007, 6:39 pm
- Last active:
- Location: Aliso Viejo Ca
I have used UNI's about all my life. Used a couple of twin Airs... not impressed.
Tried that " No-Toil" filter oil too..... sucked big time. Ran down the subframe, and onto the floor.
From now until forever...
1. UNI Filter
2. Sticky Blue Bel-Ray Oil
Done!
Tried that " No-Toil" filter oil too..... sucked big time. Ran down the subframe, and onto the floor.
From now until forever...
1. UNI Filter
2. Sticky Blue Bel-Ray Oil
Done!
Last edited by AlisoBob on June 23rd, 2007, 6:11 pm, edited 1 time in total.

I've been a No-Toil guy since the stuff came out. The "drippy down the frame stuff" happens when its not completely shaken up before it goes into the filter.I dump a new bottle into a large Tupperware container then submerge the filter into the container. Ring it out and put the cover back on the container and put it back on the shelf untill next week.
The No - Toil has ended the argument between me and the wife because of the gas smell in the laundry room when I'd bring them in to finish cleaning them with soap.Now she doesnt even know I do the whole cleaning process in the laundry tub with HER soap!
I have not purchased a No-Toil specific bottle since Honda started carrying it under their name. Its the same easy stuff to clean and I dont have to order it anymore.
-
Ported&Polished
- Posts: 1898
- Joined: June 23rd, 2007, 12:47 pm
- Last active:
- Location: Prescott
I like this spray on red tacky stuff I got. It is super tacky and never drips, and all you do is spray the filter inside and out, then squeeze the filter a bunch until the whole thing is red. There is zero waste, and you don't need a bowl or a bag. I also want to suggest that when I ride in the sand, my filter gets so much stuck in it, that I do the dish soap and rinse step for about a half hour in the kitchen sink. About 6 or 7 complete soap ups and rinse outs. In the sink, you can see the tiny sand particles after you hose out the basin. I just keep cleaning until there is zero sand in the sink.
Don't Clyde it, ride it!
-
90cr500guy
- Posts: 494
- Joined: July 3rd, 2007, 6:58 pm
- Last active: