85 Refresh

Recount your rebuilds here!
Post Reply
User avatar
jbsleddin
PVT. 1st Class
Posts: 251
Joined: June 12th, 2011, 10:48 am
Location: Wheatley, Ontario, Canada

85 Refresh

Post by jbsleddin »

Well since winter is upon us , I decided it was long overdue and I should give the old girl some attention. #1 was the waterpump. I didn't take many pictures along the way, but do have a few here and there. I was planning on stopping there, but the top end was really bothering me, owning the bike for nearly 2 years and not knowing what was in there. So I decided an inspection at minimum would be necessary. Piston was a Wiseco 90.5mm, I was really hoping for a standard bore, since the 85 I sold was on an 89mm, but whatever. I still love this bike more for many reasons. The piston was in good shape, had a couple light seize marks from someone not letting it warm up long enough...? But nothing you could feel with your fingernail and clearance checked out good. I decided it was getting rings anyways, and that's the reason I an just finishing up what I started back around Christmas time. The rings were apparently backordered, and 2 weeks turned into nearly 2 months...
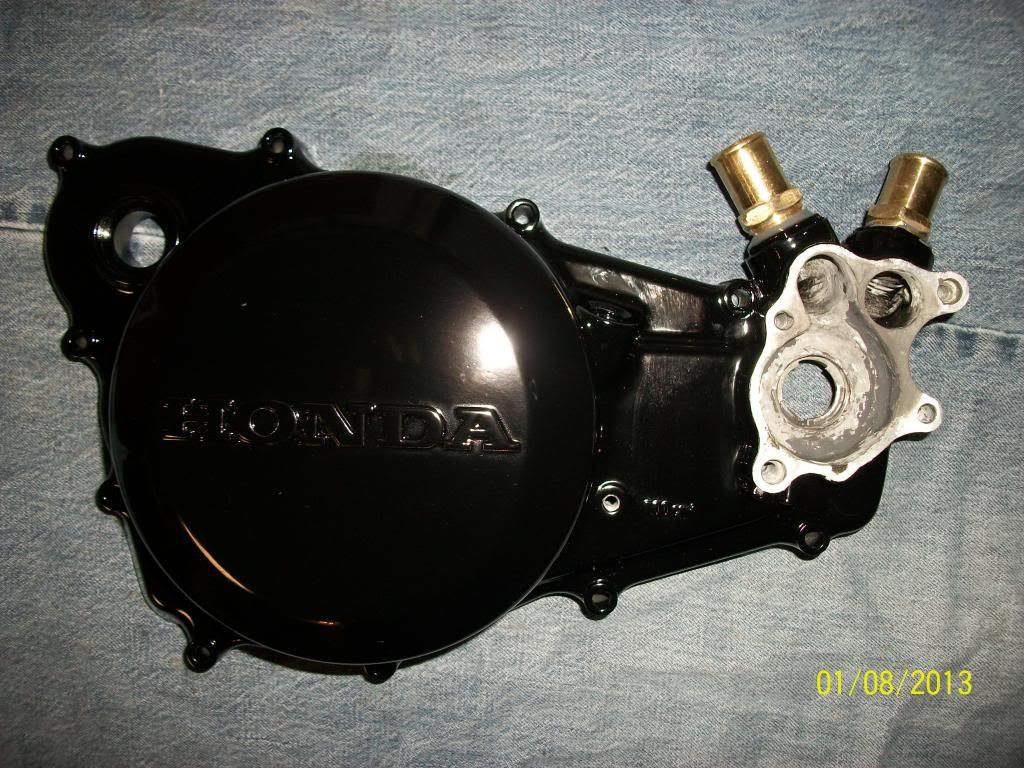
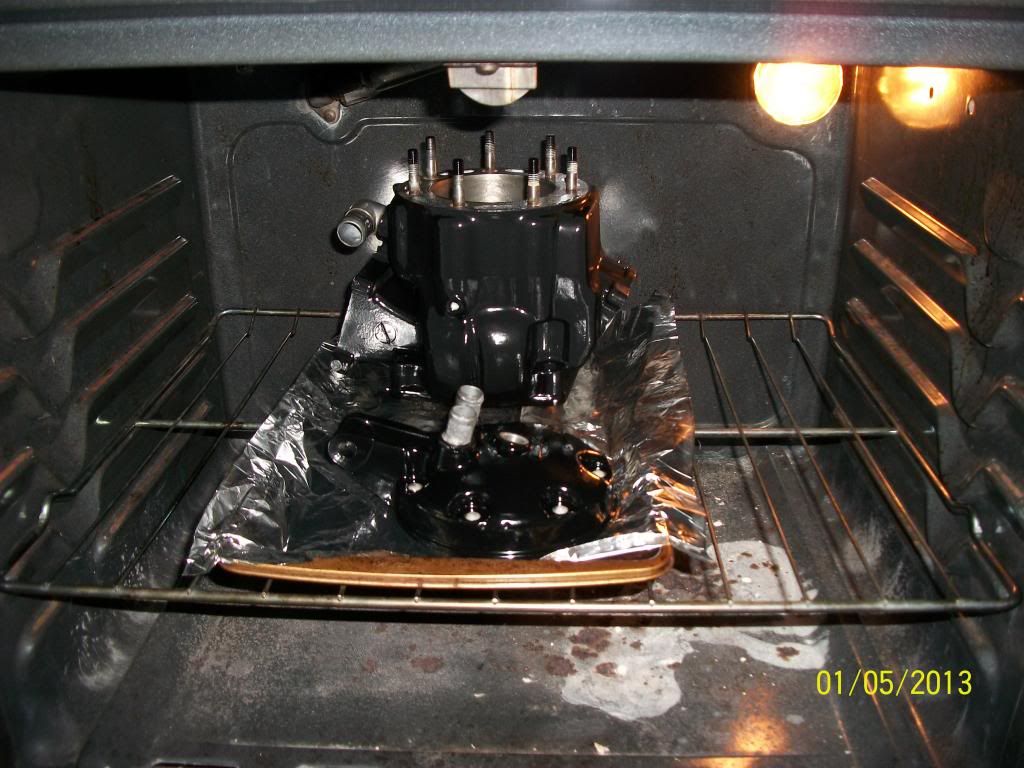
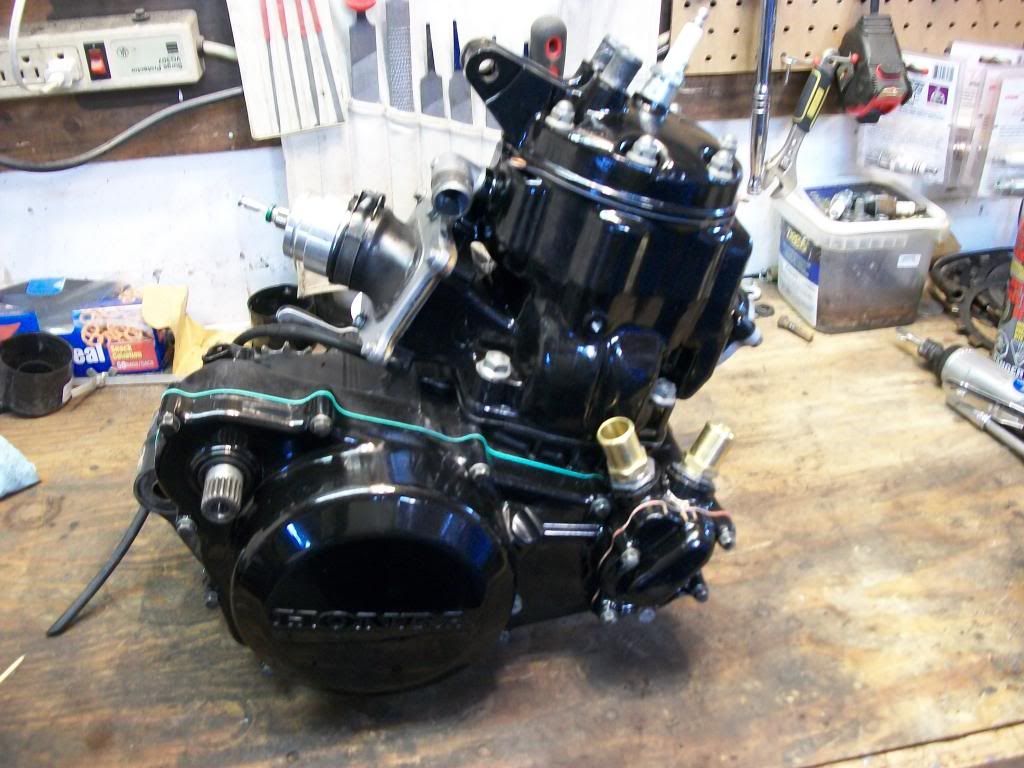
Water pump got the JB treatment as did the last 85, decided to paint the jug to look original, wasn't digging the bare finish. So I used VHT Brake caliper paint for the cylinder and clutch cover, and then baked them when the wife wasn't home.

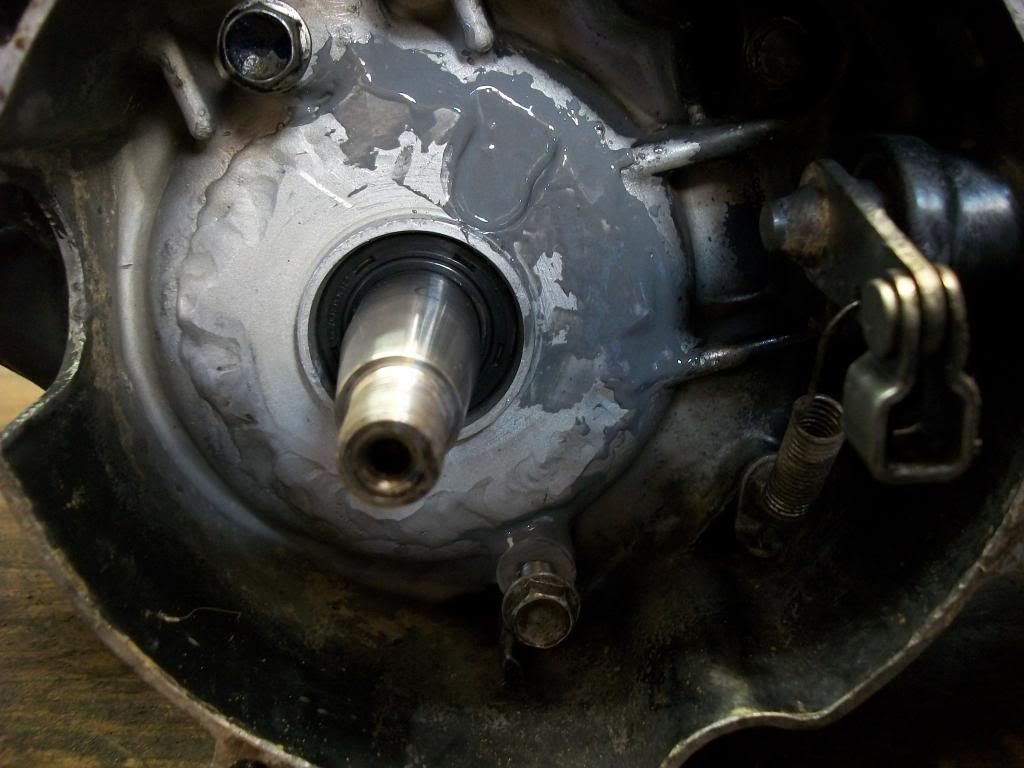
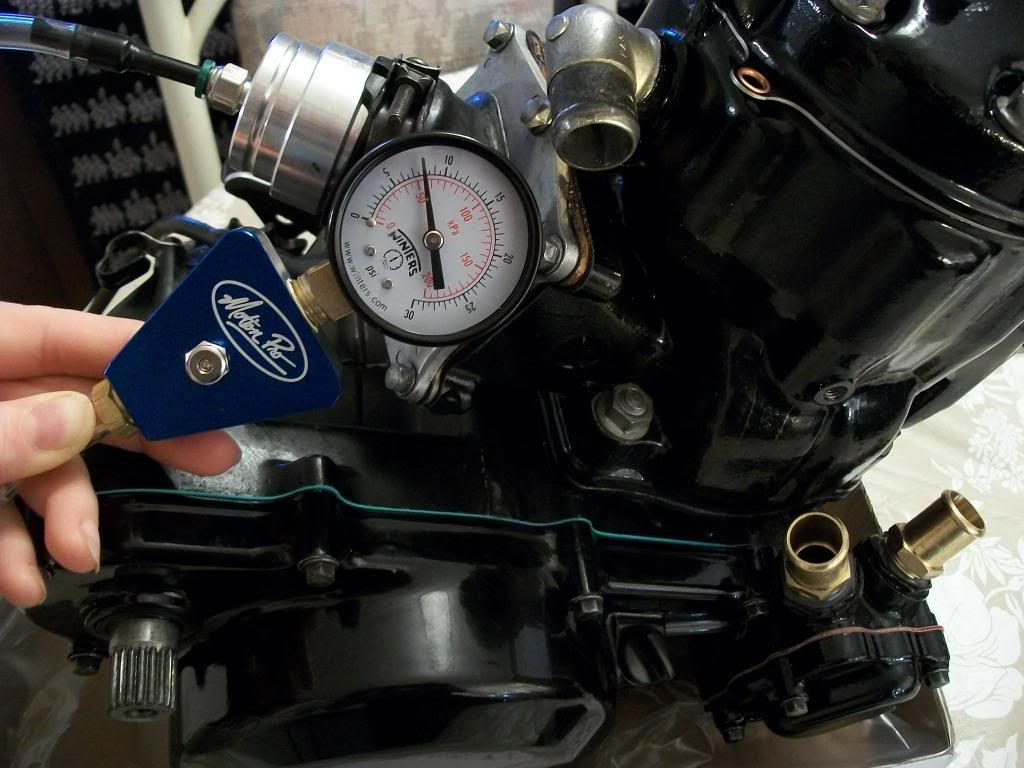
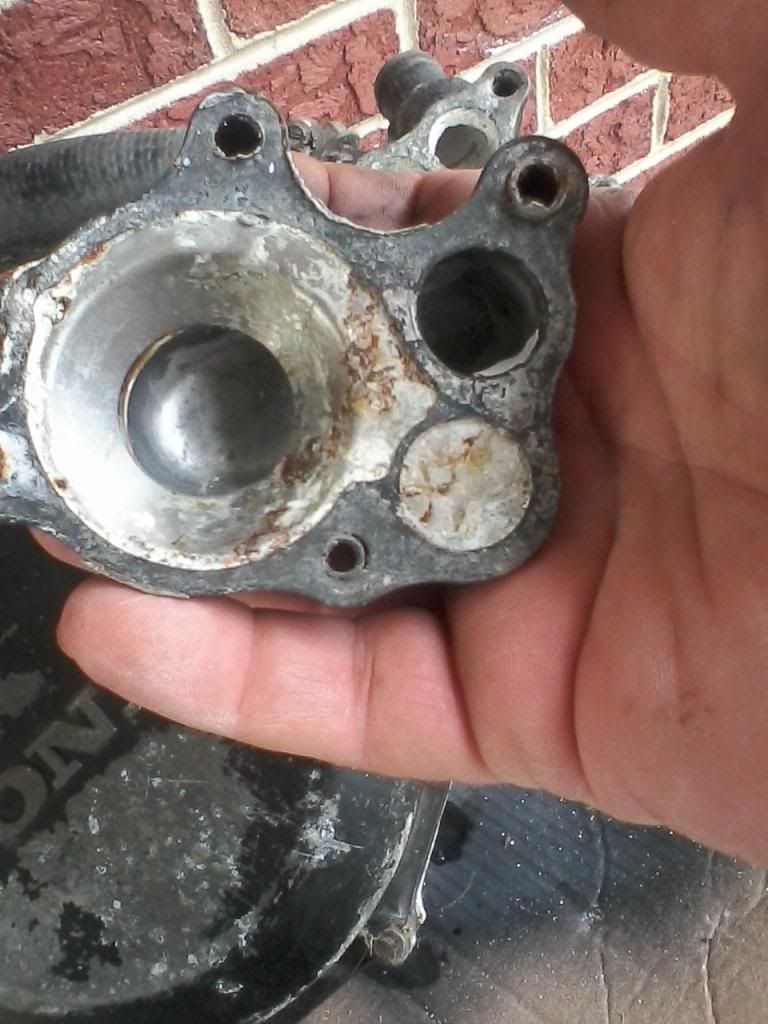
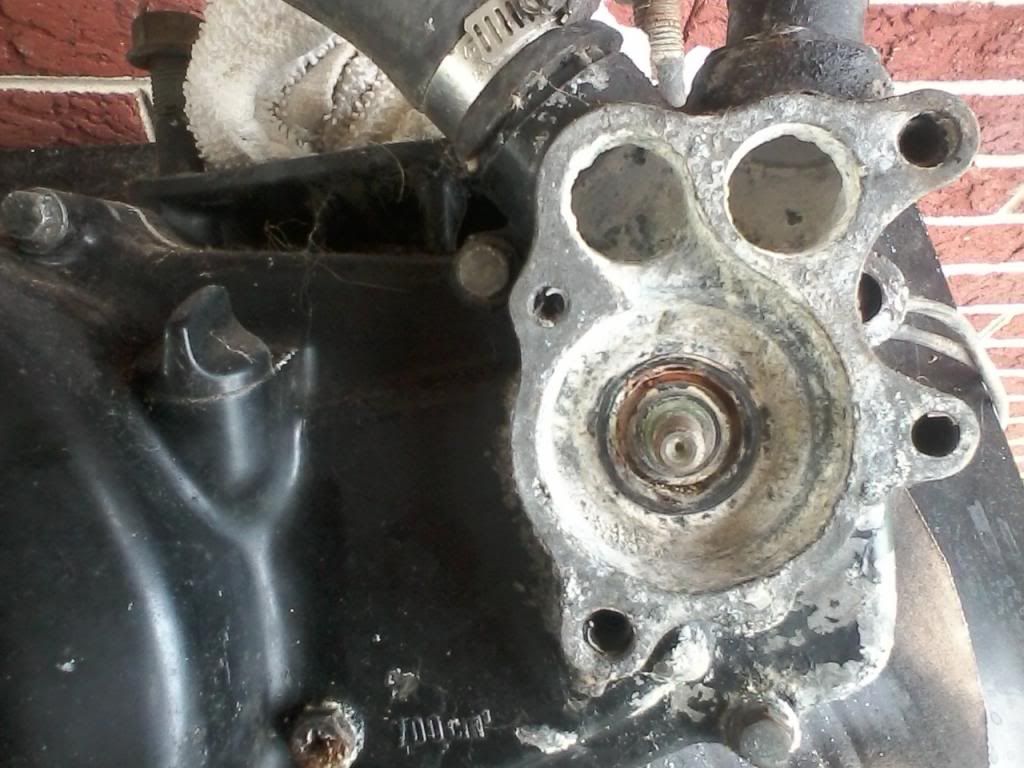
Failed the leakdown test 2 times, first time was reed gaskets, RTV'd them and tried again the next day. Leaking behind the flywheel, so I assumed seals. When I pulled the ignition off, found the case had been repaired at some point, and the welds were the cause of the leak. Small pinholes in the welds, they ended up getting the JB treatment also. Problem solved though, seals were good, holds 8lbs. all day long, ready to install.
Got it all back together and was just about ready to fire her up. Poured in the $30 per 1/2 gallon Engine Ice, and the water pump gaskets began to leak. So I did my best to reclaim the coolant, and apart she comes again, pipe has to come off, which was sealed nicely, I must say. So, RTV the water pump gaskets and slap it all back together, another coat of RTV on my pipe flange which held up quite well to the disassembly. Let it sit for the night, gonna try to fire her up today. Be patient, I'll have to go digging for the pics. :?
Last edited by jbsleddin on January 2nd, 2016, 4:43 pm, edited 4 times in total.
Make a joke and I will sigh, and you will laugh, and I will cry.
User avatar
jbsleddin
PVT. 1st Class
Posts: 251
Joined: June 12th, 2011, 10:48 am
Location: Wheatley, Ontario, Canada

Post by jbsleddin »

The before pics, this is the day I brought it home, nearly 2 years ago....

Image
Image

The water pump with its final coat of JB Weld, ready for the final grind.
Image

Baked jug
Image

Crankcase repair
Image

Final product
Image
Image
Image
Image

I decided to paint the subframe while I had it apart, and gave the frame some lazy touch ups where needed. It's not perfect, but it will have to do. I plan on putting some good seat time in this year, not just drinking beer and looking at it in the garage.
Make a joke and I will sigh, and you will laugh, and I will cry.
User avatar
AlisoBob
"Hoon-father"
Posts: 15404
Joined: May 31st, 2007, 6:39 pm
Location: Aliso Viejo Ca

Post by AlisoBob »

Nice!!!! Keep that old iron runnin'!!!
User avatar
jbsleddin
PVT. 1st Class
Posts: 251
Joined: June 12th, 2011, 10:48 am
Location: Wheatley, Ontario, Canada

Post by jbsleddin »

Make a joke and I will sigh, and you will laugh, and I will cry.
User avatar
Tharrell
Posts: 1670
Joined: January 27th, 2010, 11:03 am
Location: Mount Airy, NC

Post by Tharrell »

That's awesome, gotta get mine done.
Can you detail the waterpump stuff, and how long-what temp did you bake the paint?
User avatar
beekums
Posts: 77
Joined: December 1st, 2009, 3:21 pm

Post by beekums »

Nice
85 CR500 put a little excitement between your legs
User avatar
jbsleddin
PVT. 1st Class
Posts: 251
Joined: June 12th, 2011, 10:48 am
Location: Wheatley, Ontario, Canada

Post by jbsleddin »

Tharell, unfortunately didn't take any pics of the water pump this time around, but is pretty straight forward, same as the last one I did. You need a die grinder or Dremel, with a decent (small) carbide burr. Get rid of anything that resembles corrosion without digging too deep, and then a quick sandblasting to get inside the pitted areas. JB Weld applied in several stages, always attempting to maintain the original shape. Build it up with JB, let cure over night, bake at 250 for an hour (helps cure extra hard) and then work away with the die grinder to get it back to shape. Takes a lot of patience, and usually about 5 or more layers to get satisfactory results. On the final layer, I put the impeller in with the old bearing to test fit and find where any interference might be, and then whittle it away a bit at a time, not taking too much. The original hose barbs I ended up breaking to get out, had no choice, in order to not damage the entire cover. I cracked them then broke them off piece by piece, die grind the holes smooth, drilled to 1/2", tapped with a 1/2" NPT tap, and then installed brass "beaded" hose barbs with a bit of JB on the threads. Not gonna be a happy camper if I ever have to take them out again, but I know damn well they wont leak, and should prevent any issues (if they even exist???) with combining dissimilar metals. Oh yeah, I forgot about the paint, I did that right before the installing of the fittings, baked for 1 hour at 250F...... Then baked again after installing the fittings to cure the JB. The paint I used was VHT Brake Caliper paint which is supposed to be chemical resistant once cured. I've had pretty good results with it in the past, as long as you use good practice, everything has to be super clean. I'm sure someone will now tell me that the aluminum clutch covers are still plentiful and that I'm a JB nut.... :P
Make a joke and I will sigh, and you will laugh, and I will cry.
User avatar
beekums
Posts: 77
Joined: December 1st, 2009, 3:21 pm

Post by beekums »

As far as I know the covers r rare and if anyone know of any I am going to need one soon or I will be doing the JB thing
85 CR500 put a little excitement between your legs
User avatar
jbsleddin
PVT. 1st Class
Posts: 251
Joined: June 12th, 2011, 10:48 am
Location: Wheatley, Ontario, Canada

Post by jbsleddin »

The mag covers are pretty scarce, but most people will consider you a dumbass for wanting one. :lol: I'm just trying to keep it original. I have brand new Chinese rads in the box, but spent hours cleaning out plugged tubes and making repairs to the shroud mounting tabs for the same reason.
Make a joke and I will sigh, and you will laugh, and I will cry.
86500
Posts: 11
Joined: April 29th, 2013, 6:01 am

Post by 86500 »

can you detail your leakdown setup? looked like an aluminum manifold clamped into the reed boot or somethign what was all that ill take one
User avatar
jbsleddin
PVT. 1st Class
Posts: 251
Joined: June 12th, 2011, 10:48 am
Location: Wheatley, Ontario, Canada

Post by jbsleddin »

86500 wrote:can you detail your leakdown setup? looked like an aluminum manifold clamped into the reed boot or somethign what was all that ill take one
It's sold as a kit, by Motion Pro. Pretty nice setup, a lot of guys put them together over time, but I didn't have the patience for that shit. Wanted it NOW, so I bought it. A must have for all 2 strokes, don't know how I got by all these years without one. :shock:
Make a joke and I will sigh, and you will laugh, and I will cry.
User avatar
mr500
Posts: 99
Joined: July 30th, 2010, 3:02 am
Location: Sydney Australia

Post by mr500 »

That's so hot.
Great work with the cover too.
Are those fork boots genuine or after market and where did you get them from?
I need to get a set for my '87.
If my bike looks anything close to yours when I'm finished, I'll be very happy :lol:
Keep it real, Keep it steel.
User avatar
jbsleddin
PVT. 1st Class
Posts: 251
Joined: June 12th, 2011, 10:48 am
Location: Wheatley, Ontario, Canada

Post by jbsleddin »

Thanks. :cool: Unfortunately, the boots are aftermarket. I only came across one pair on E Bay when I was searching for them (OEM) and wasn't willing to sacrifice my first born for them. $20 was reasonable for these, although I can't remember who I got them from. :?
Make a joke and I will sigh, and you will laugh, and I will cry.
User avatar
Tharrell
Posts: 1670
Joined: January 27th, 2010, 11:03 am
Location: Mount Airy, NC

Post by Tharrell »

You got me off my ass to get mine done.
I had really grand plans before the fire earlier this year, now I just wanna get it rollin and runnin.
Rattle canned it with some chevy engine orange.
Looks like I need to do some work to my water pump.
The cover actually looks great on the outside and only minor corrosion on the inside.

Image
Image
Image
User avatar
jbsleddin
PVT. 1st Class
Posts: 251
Joined: June 12th, 2011, 10:48 am
Location: Wheatley, Ontario, Canada

Post by jbsleddin »

Glad I could be an inspiration to someone. :lol: The water pump can be depressing to look at initially, but it's really not all that difficult once you get it rolling. Yours doesn't look nearly as bad as the last one I just coached the neighbor kid through. Keep us posted on the progress! :cool:
Make a joke and I will sigh, and you will laugh, and I will cry.
Post Reply